Handmade Products
Colorful art jewelry and creative tools made by Lisa Clarke.-
 Bangle Bracelets$20.00 – $42.00
 -
Barrettes$30.00
-
Dangly Earrings$30.00
-
Inlay Rings$24.00 – $32.00
-
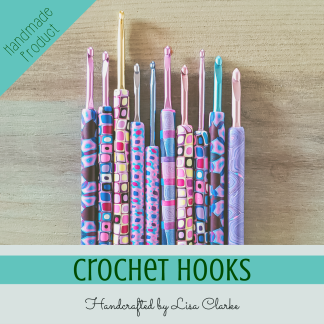
Crochet Hooks$24.00
-
Stick Pens$16.00
-
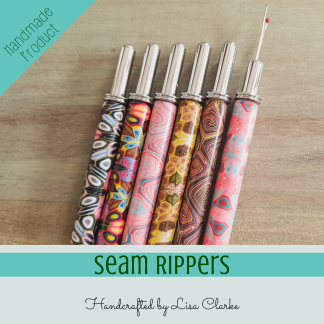
Seam Rippers$28.00
-
Stud Earrings$16.00 – $20.00
-
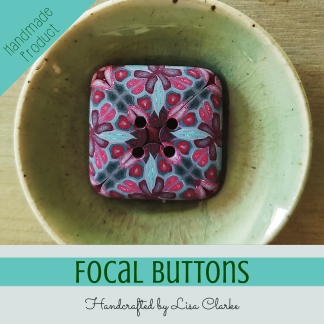 Focal Buttons$8.00 – $10.00
 -
 Shawl Pins$30.00
 -
Pendant Necklaces$36.00 – $46.00
-
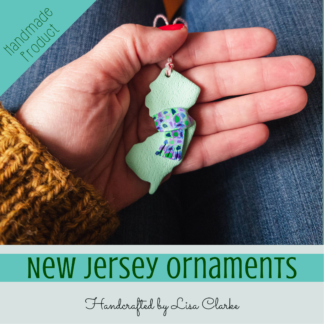
New Jersey Ornaments$24.00
-
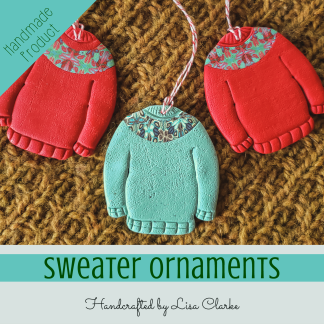 Sweater Ornaments$28.00
 -
Badge Reels$20.00


Downloadable Patterns, Tutorials, and More
Patterns and tutorials in yarn, fabric, and polymer clay, all designed and written by Lisa.Polymer Clay Tutorials
-
%27%20fill-opacity%3D%27.5%27%3E%3Cellipse%20fill%3D%22%231a1637%22%20fill-opacity%3D%22.5%22%20rx%3D%221%22%20ry%3D%221%22%20transform%3D%22matrix(33.18315%2030.30038%20-57.70079%2063.19043%2028.4%2018.8)%22%2F%3E%3Cellipse%20fill%3D%22%23807721%22%20fill-opacity%3D%22.5%22%20rx%3D%221%22%20ry%3D%221%22%20transform%3D%22rotate(121.4%2042.6%20115.4)%20scale(165.12364%2060.27442)%22%2F%3E%3Cellipse%20fill%3D%22%23204d4b%22%20fill-opacity%3D%22.5%22%20rx%3D%221%22%20ry%3D%221%22%20transform%3D%22matrix(10.06496%20-33.89234%2057.68017%2017.1292%20192.4%20216.2)%22%2F%3E%3Cellipse%20fill%3D%22%238b87a6%22%20fill-opacity%3D%22.5%22%20rx%3D%221%22%20ry%3D%221%22%20transform%3D%22matrix(-320.32647%2017.36725%20-5.70316%20-105.1907%20130%20375.3)%22%2F%3E%3C%2Fg%3E%3C%2Fsvg%3E) The Jubilee Cane Polymer Clay Tutorial$4.99
The Jubilee Cane Polymer Clay Tutorial$4.99 -
%27%20fill-opacity%3D%27.5%27%3E%3Cellipse%20fill%3D%22%23c2bfc6%22%20fill-opacity%3D%22.5%22%20rx%3D%221%22%20ry%3D%221%22%20transform%3D%22matrix(-219.97337%2022.25692%20-7.98125%20-78.88168%20129%20419.2)%22%2F%3E%3Cellipse%20fill-opacity%3D%22.5%22%20rx%3D%221%22%20ry%3D%221%22%20transform%3D%22rotate(-146%20168.8%2026.6)%20scale(83.72039%20100.27845)%22%2F%3E%3Cellipse%20fill%3D%22%239daf31%22%20fill-opacity%3D%22.5%22%20rx%3D%221%22%20ry%3D%221%22%20transform%3D%22matrix(40.74373%2021.75513%20-34.7063%2064.99913%20158.3%20134.4)%22%2F%3E%3Cellipse%20fill%3D%22%23272f32%22%20fill-opacity%3D%22.5%22%20rx%3D%221%22%20ry%3D%221%22%20transform%3D%22rotate(-171.5%2025.6%2019.5)%20scale(59.50123%20244.03907)%22%2F%3E%3C%2Fg%3E%3C%2Fsvg%3E) Yarny Buttons Polymer Clay Tutorial$8.99
Yarny Buttons Polymer Clay Tutorial$8.99 -
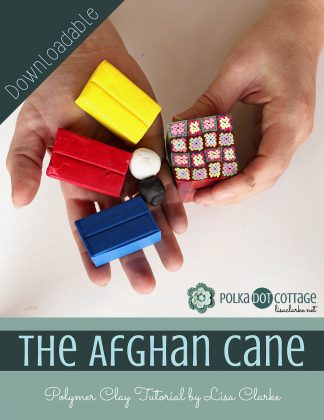
%27%20fill-opacity%3D%27.5%27%3E%3Cellipse%20fill%3D%22%23f3ffff%22%20fill-opacity%3D%22.5%22%20rx%3D%221%22%20ry%3D%221%22%20transform%3D%22matrix(-145.31174%2072.13337%20-30.78007%20-62.00606%20298.4%20227)%22%2F%3E%3Cellipse%20fill%3D%22%2392471f%22%20fill-opacity%3D%22.5%22%20rx%3D%221%22%20ry%3D%221%22%20transform%3D%22matrix(116.88797%20-123.38103%20106.33105%20100.73527%20152%2044.7)%22%2F%3E%3Cellipse%20fill%3D%22%23e4f2fe%22%20fill-opacity%3D%22.5%22%20rx%3D%221%22%20ry%3D%221%22%20transform%3D%22matrix(-101.71651%20-75.79982%2031.58169%20-42.37977%20.8%20233.5)%22%2F%3E%3Cellipse%20fill%3D%22%230d4148%22%20fill-opacity%3D%22.5%22%20rx%3D%221%22%20ry%3D%221%22%20transform%3D%22matrix(33.17287%2037.62724%20-80.5271%2070.99419%2036%2029.8)%22%2F%3E%3C%2Fg%3E%3C%2Fsvg%3E) The Afghan Cane Polymer Clay Tutorial$9.99
The Afghan Cane Polymer Clay Tutorial$9.99 -
%22%20transform%3D%22translate(.8%20.8)%20scale(1.64063)%22%20fill-opacity%3D%22.5%22%3E%3Cellipse%20fill%3D%22%232d2d2d%22%20cx%3D%2232%22%20cy%3D%2210%22%20rx%3D%22114%22%20ry%3D%2237%22%2F%3E%3Cpath%20fill%3D%22%23bcbcbc%22%20d%3D%22M212%20111l-7-127L78%20163z%22%2F%3E%3Cellipse%20fill%3D%22%23bebebe%22%20rx%3D%221%22%20ry%3D%221%22%20transform%3D%22matrix(138.95684%20-.49033%20.08726%2024.72766%2090.7%20253.2)%22%2F%3E%3Cellipse%20fill%3D%22%234f4f4f%22%20rx%3D%221%22%20ry%3D%221%22%20transform%3D%22matrix(122.04456%20-21.16225%204.02253%2023.19828%20142.9%20174)%22%2F%3E%3C%2Fg%3E%3C%2Fsvg%3E) Beginner Button Class Polymer Clay Tutorial$7.99
Beginner Button Class Polymer Clay Tutorial$7.99 -
%22%20transform%3D%22translate(.8%20.8)%20scale(1.64063)%22%20fill-opacity%3D%22.5%22%3E%3Cellipse%20fill%3D%22%237a9eac%22%20cx%3D%22112%22%20cy%3D%22255%22%20rx%3D%2285%22%20ry%3D%2285%22%2F%3E%3Cellipse%20fill%3D%22%23113328%22%20rx%3D%221%22%20ry%3D%221%22%20transform%3D%22matrix(-25.08006%20-24.49629%2040.0053%20-40.95867%2021%2019.6)%22%2F%3E%3Cellipse%20fill%3D%22%23b0b4c1%22%20cx%3D%2279%22%20cy%3D%22255%22%20rx%3D%22130%22%20ry%3D%2222%22%2F%3E%3Cellipse%20fill%3D%22%23ba7134%22%20rx%3D%221%22%20ry%3D%221%22%20transform%3D%22rotate(160.5%2057.6%2056.2)%20scale(146.33396%2093.24674)%22%2F%3E%3C%2Fg%3E%3C%2Fsvg%3E) Plaid Shawl Pin Polymer Clay Tutorial$3.99
Plaid Shawl Pin Polymer Clay Tutorial$3.99 -
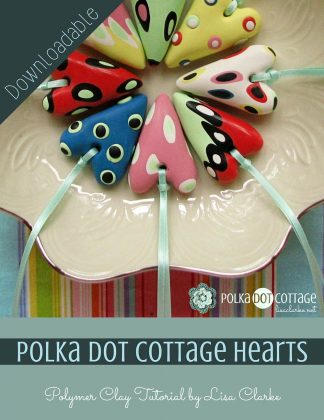
%27%20fill-opacity%3D%27.5%27%3E%3Cpath%20fill%3D%22%232f281c%22%20fill-opacity%3D%22.5%22%20d%3D%22M121%20155.3l-160.2-68%2057.7-136%20160.1%2068z%22%2F%3E%3Cellipse%20fill%3D%22%23d2d0dd%22%20fill-opacity%3D%22.5%22%20rx%3D%221%22%20ry%3D%221%22%20transform%3D%22matrix(-.99624%20-43.90036%20321.47974%20-7.2954%20200.2%20206.7)%22%2F%3E%3Cellipse%20fill%3D%22%23a7b243%22%20fill-opacity%3D%22.5%22%20rx%3D%221%22%20ry%3D%221%22%20transform%3D%22matrix(24.23221%20-71.18165%20153.75087%2052.34107%20272.9%2059.5)%22%2F%3E%3Cellipse%20fill%3D%22%238c646e%22%20fill-opacity%3D%22.5%22%20rx%3D%221%22%20ry%3D%221%22%20transform%3D%22matrix(-92.19025%2030.31061%20-18.26688%20-55.55904%20170.8%20133.6)%22%2F%3E%3C%2Fg%3E%3C%2Fsvg%3E) Polka Dot Cottage Hearts Polymer Clay Tutorial$3.99
Polka Dot Cottage Hearts Polymer Clay Tutorial$3.99 -
%22%20transform%3D%22translate(.8%20.8)%20scale(1.64063)%22%20fill-opacity%3D%22.5%22%3E%3Cellipse%20fill%3D%22%23444f12%22%20cx%3D%2221%22%20cy%3D%2216%22%20rx%3D%22196%22%20ry%3D%2247%22%2F%3E%3Cellipse%20fill%3D%22%23c7d292%22%20rx%3D%221%22%20ry%3D%221%22%20transform%3D%22matrix(-7.86651%20-53.12388%20130.88678%20-19.38153%20101.7%20139.3)%22%2F%3E%3Cellipse%20fill%3D%22%2388859b%22%20cx%3D%2297%22%20cy%3D%22255%22%20rx%3D%2299%22%20ry%3D%2299%22%2F%3E%3Cellipse%20fill%3D%22%23362d5e%22%20rx%3D%221%22%20ry%3D%221%22%20transform%3D%22matrix(48.0777%20-46.66878%2024.2268%2024.9582%2020.3%208.7)%22%2F%3E%3C%2Fg%3E%3C%2Fsvg%3E) Family Tree Magnets Polymer Clay Tutorial$4.99
Family Tree Magnets Polymer Clay Tutorial$4.99


Knitting and Loom Knitting Patterns
-
%22%20transform%3D%22translate(.8%20.8)%20scale(1.63672)%22%20fill-opacity%3D%22.5%22%3E%3Cellipse%20fill%3D%22%23221716%22%20cx%3D%2264%22%20cy%3D%22155%22%20rx%3D%22196%22%20ry%3D%2231%22%2F%3E%3Cellipse%20fill%3D%22%23f69548%22%20rx%3D%221%22%20ry%3D%221%22%20transform%3D%22rotate(-19.7%20286.6%20-123)%20scale(35.83389%2054.01848)%22%2F%3E%3Cellipse%20fill%3D%22%23a8b5bc%22%20rx%3D%221%22%20ry%3D%221%22%20transform%3D%22rotate(.3%20-57941.6%2020830.4)%20scale(196%2044.83848)%22%2F%3E%3Cellipse%20fill%3D%22%23979497%22%20rx%3D%221%22%20ry%3D%221%22%20transform%3D%22rotate(131.3%2050%2053.2)%20scale(71.61089%2043.4248)%22%2F%3E%3C%2Fg%3E%3C%2Fsvg%3E) Fireside Cardigan Knitting Pattern$5.99
Fireside Cardigan Knitting Pattern$5.99 -
%27%20fill-opacity%3D%27.5%27%3E%3Cellipse%20fill%3D%22%23c4b1cc%22%20fill-opacity%3D%22.5%22%20rx%3D%221%22%20ry%3D%221%22%20transform%3D%22matrix(229.83142%2033.84876%20-12.6801%2086.09726%20196.1%20411.5)%22%2F%3E%3Cellipse%20fill%3D%22%2300260a%22%20fill-opacity%3D%22.5%22%20rx%3D%221%22%20ry%3D%221%22%20transform%3D%22rotate(-156.3%20115.3%2063.1)%20scale(212.83604%2086.16144)%22%2F%3E%3Cellipse%20fill%3D%22%236f7407%22%20fill-opacity%3D%22.5%22%20rx%3D%221%22%20ry%3D%221%22%20transform%3D%22matrix(-38.34073%2060.77062%20-93.86238%20-59.21861%20261.8%2053.6)%22%2F%3E%3Cellipse%20fill%3D%22%23003d29%22%20fill-opacity%3D%22.5%22%20rx%3D%221%22%20ry%3D%221%22%20transform%3D%22matrix(-72.4589%2010.31243%20-20.85754%20-146.5527%20136%20129.2)%22%2F%3E%3C%2Fg%3E%3C%2Fsvg%3E) The Taryn Shawl Knitting Pattern$7.99
The Taryn Shawl Knitting Pattern$7.99 -
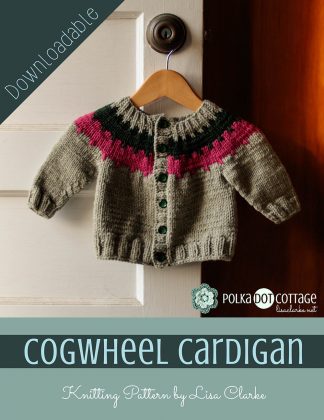
%22%20transform%3D%22translate(.8%20.8)%20scale(1.64063)%22%20fill-opacity%3D%22.5%22%3E%3Cellipse%20fill%3D%22%230c0000%22%20cx%3D%22179%22%20cy%3D%2269%22%20rx%3D%2274%22%20ry%3D%22122%22%2F%3E%3Cellipse%20fill%3D%22%23c5cccc%22%20rx%3D%221%22%20ry%3D%221%22%20transform%3D%22matrix(-109.6018%20-162.49136%2051.64908%20-34.83775%2029.5%20189)%22%2F%3E%3Cpath%20fill%3D%22%23bbbfbf%22%20d%3D%22M114-16L-7%2059l6%20111z%22%2F%3E%3Cellipse%20fill%3D%22%23454849%22%20rx%3D%221%22%20ry%3D%221%22%20transform%3D%22rotate(-93.2%2095.1%2010.5)%20scale(43.76272%2059.23577)%22%2F%3E%3C%2Fg%3E%3C%2Fsvg%3E) Cogwheel Cardigan Knitting Pattern$5.99
Cogwheel Cardigan Knitting Pattern$5.99 -
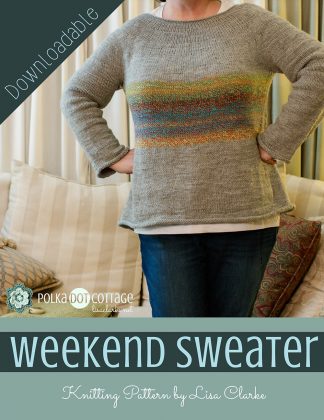
%22%20transform%3D%22translate(.8%20.8)%20scale(1.64063)%22%20fill-opacity%3D%22.5%22%3E%3Cellipse%20fill%3D%22%23d6d5db%22%20rx%3D%221%22%20ry%3D%221%22%20transform%3D%22matrix(-45.23423%203.16309%20-4.82495%20-69%2035%20121)%22%2F%3E%3Cellipse%20fill%3D%22%231c1f10%22%20rx%3D%221%22%20ry%3D%221%22%20transform%3D%22matrix(54.244%20-4.2691%203.98971%2050.6941%20149.9%20159)%22%2F%3E%3Cellipse%20fill%3D%22%23667a03%22%20cx%3D%22180%22%20cy%3D%2271%22%20rx%3D%2265%22%20ry%3D%2265%22%2F%3E%3Cellipse%20fill%3D%22%23252331%22%20rx%3D%221%22%20ry%3D%221%22%20transform%3D%22matrix(38.5869%20-41.5298%2029.73583%2027.62868%207.4%200)%22%2F%3E%3C%2Fg%3E%3C%2Fsvg%3E) Weekend Sweater Knitting Pattern$5.99
Weekend Sweater Knitting Pattern$5.99 -
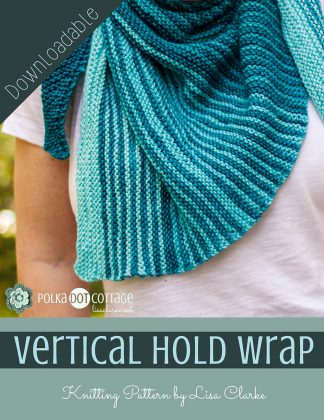
%22%20transform%3D%22translate(.8%20.8)%20scale(1.64063)%22%20fill-opacity%3D%22.5%22%3E%3Cellipse%20fill%3D%22%23004e74%22%20cx%3D%2292%22%20cy%3D%2224%22%20rx%3D%2287%22%20ry%3D%2287%22%2F%3E%3Cpath%20fill%3D%22%23f4dfd6%22%20d%3D%22M212%2059l-12%20139-98-1z%22%2F%3E%3Cellipse%20fill%3D%22%23c18b4e%22%20rx%3D%221%22%20ry%3D%221%22%20transform%3D%22matrix(5.64243%2080.69053%20-33.85194%202.36716%2013.5%20125.6)%22%2F%3E%3Cellipse%20fill%3D%22%23aa9992%22%20cx%3D%2295%22%20cy%3D%22255%22%20rx%3D%22102%22%20ry%3D%22102%22%2F%3E%3C%2Fg%3E%3C%2Fsvg%3E) Vertical Hold Wrap Knitting Pattern$4.99
Vertical Hold Wrap Knitting Pattern$4.99 -
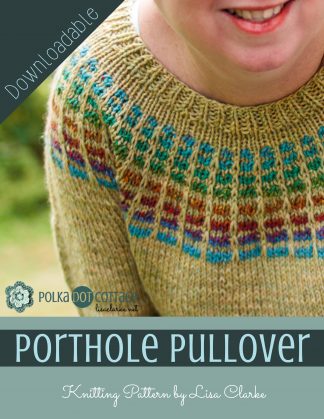
%22%20transform%3D%22translate(.8%20.8)%20scale(1.63672)%22%20fill-opacity%3D%22.5%22%3E%3Cellipse%20fill%3D%22%23485900%22%20cx%3D%22141%22%20cy%3D%22103%22%20rx%3D%2290%22%20ry%3D%2250%22%2F%3E%3Cellipse%20fill%3D%22%239394bc%22%20rx%3D%221%22%20ry%3D%221%22%20transform%3D%22matrix(-5.02765%2047.04493%20-194.89022%20-20.82776%2098.9%20231.7)%22%2F%3E%3Cellipse%20fill%3D%22%23cbdf8e%22%20rx%3D%221%22%20ry%3D%221%22%20transform%3D%22matrix(19.00182%2031.7497%20-26.7534%2016.0116%2020.9%20155.9)%22%2F%3E%3Cellipse%20fill%3D%22%23de7140%22%20cx%3D%22143%22%20cy%3D%223%22%20rx%3D%2261%22%20ry%3D%2261%22%2F%3E%3C%2Fg%3E%3C%2Fsvg%3E) Porthole Pullover Knitting Pattern$5.99
Porthole Pullover Knitting Pattern$5.99 -
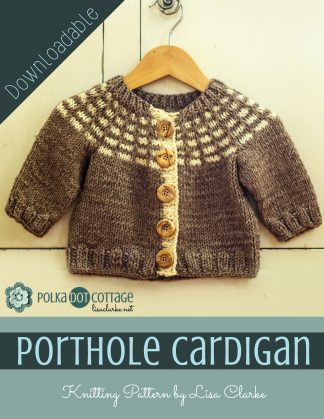
%27%20fill-opacity%3D%27.5%27%3E%3Cellipse%20fill%3D%22%23fff%22%20fill-opacity%3D%22.5%22%20rx%3D%221%22%20ry%3D%221%22%20transform%3D%22matrix(-27.95273%2064.13872%20-250.76179%20-109.2862%20321.6%2064.9)%22%2F%3E%3Cellipse%20fill%3D%22%2347510f%22%20fill-opacity%3D%22.5%22%20rx%3D%221%22%20ry%3D%221%22%20transform%3D%22matrix(-144.62732%20-22.2537%2012.5436%20-81.52116%20140.2%20195.6)%22%2F%3E%3Cellipse%20fill%3D%22%2315102f%22%20fill-opacity%3D%22.5%22%20rx%3D%221%22%20ry%3D%221%22%20transform%3D%22matrix(56.25111%20-59.06949%2027.40586%2026.09825%2019.7%2027.6)%22%2F%3E%3Cellipse%20fill%3D%22%23fff%22%20fill-opacity%3D%22.5%22%20rx%3D%221%22%20ry%3D%221%22%20transform%3D%22matrix(41.97212%20-53.72186%2073.19454%2057.18584%20283.5%2015)%22%2F%3E%3C%2Fg%3E%3C%2Fsvg%3E) Porthole Cardigan Knitting Pattern$5.99
Porthole Cardigan Knitting Pattern$5.99 -
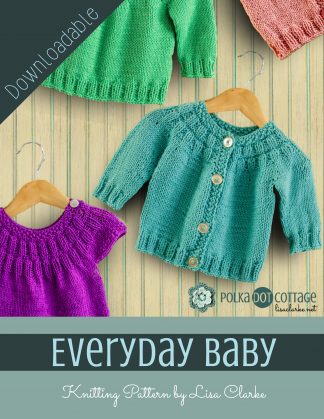
%27%20fill-opacity%3D%27.5%27%3E%3Cellipse%20fill%3D%22%2380007e%22%20fill-opacity%3D%22.5%22%20rx%3D%221%22%20ry%3D%221%22%20transform%3D%22matrix(49.19622%2032.07061%20-46.00934%2070.57819%2039.1%20276)%22%2F%3E%3Cellipse%20fill%3D%22%23003325%22%20fill-opacity%3D%22.5%22%20rx%3D%221%22%20ry%3D%221%22%20transform%3D%22matrix(-15.0697%20-48.83955%20119.77897%20-36.95842%201.4%2037.8)%22%2F%3E%3Cellipse%20fill%3D%22%23eccc71%22%20fill-opacity%3D%22.5%22%20rx%3D%221%22%20ry%3D%221%22%20transform%3D%22matrix(99.32937%205.0775%20-3.74497%2073.26153%20308%2071.5)%22%2F%3E%3Cellipse%20fill%3D%22%23e5c690%22%20fill-opacity%3D%22.5%22%20rx%3D%221%22%20ry%3D%221%22%20transform%3D%22matrix(-34.0737%20-40.24945%2057.36349%20-48.5618%2041%20158.4)%22%2F%3E%3C%2Fg%3E%3C%2Fsvg%3E) Everyday Baby Knitting Pattern$6.99
Everyday Baby Knitting Pattern$6.99 -
%27%20fill-opacity%3D%27.5%27%3E%3Cpath%20fill%3D%22%23554047%22%20fill-opacity%3D%22.5%22%20d%3D%22M121.9-28.4l52.8%20299.8L-15.5%20305-68.3%205.2z%22%2F%3E%3Cellipse%20fill%3D%22%23c4ccc9%22%20fill-opacity%3D%22.5%22%20rx%3D%221%22%20ry%3D%221%22%20transform%3D%22matrix(180.38629%20-1.01352%20.17514%2031.17076%20154.8%20415.3)%22%2F%3E%3Cellipse%20fill%3D%22%23be4e74%22%20fill-opacity%3D%22.5%22%20rx%3D%221%22%20ry%3D%221%22%20transform%3D%22matrix(88.5664%2021.0995%20-11.64076%2048.86278%20147.7%20157.8)%22%2F%3E%3Cellipse%20fill%3D%22%231d2b27%22%20fill-opacity%3D%22.5%22%20rx%3D%221%22%20ry%3D%221%22%20transform%3D%22matrix(63.53465%20-71.53732%2029.59932%2026.28813%2019%2035.3)%22%2F%3E%3C%2Fg%3E%3C%2Fsvg%3E) Chevron Cowl Loom Knitting Pattern$3.99 – $5.99
Chevron Cowl Loom Knitting Pattern$3.99 – $5.99 -
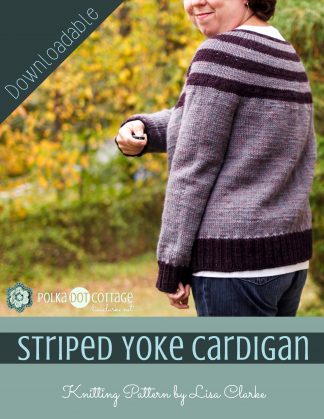
%27%20fill-opacity%3D%27.5%27%3E%3Cellipse%20fill%3D%22%23e4961f%22%20fill-opacity%3D%22.5%22%20rx%3D%221%22%20ry%3D%221%22%20transform%3D%22matrix(-136.50096%20132.74139%20-32.05998%20-32.968%20107%2085.2)%22%2F%3E%3Cellipse%20fill%3D%22%23323750%22%20fill-opacity%3D%22.5%22%20rx%3D%221%22%20ry%3D%221%22%20transform%3D%22matrix(85.16344%2022.34221%20-35.65002%20135.8898%20268%20205.4)%22%2F%3E%3Cellipse%20fill%3D%22%23a1a7ba%22%20fill-opacity%3D%22.5%22%20rx%3D%221%22%20ry%3D%221%22%20transform%3D%22matrix(221.9486%2075.96599%20-32.83068%2095.92087%20165.6%20418.2)%22%2F%3E%3Cellipse%20fill%3D%22%232c3923%22%20fill-opacity%3D%22.5%22%20rx%3D%221%22%20ry%3D%221%22%20transform%3D%22matrix(-35.84561%20-27.23189%2068.34895%20-89.96843%2038.5%2020)%22%2F%3E%3C%2Fg%3E%3C%2Fsvg%3E) Striped Yoke Cardigan Knitting Pattern$4.99
Striped Yoke Cardigan Knitting Pattern$4.99 -
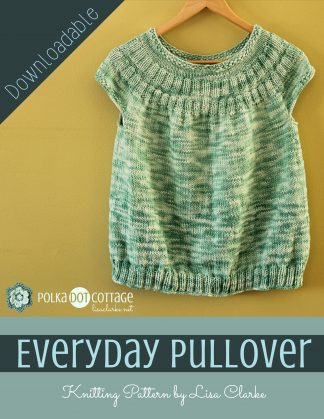
%22%20transform%3D%22translate(.8%20.8)%20scale(1.63672)%22%20fill-opacity%3D%22.5%22%3E%3Cellipse%20fill%3D%22%2313162b%22%20rx%3D%221%22%20ry%3D%221%22%20transform%3D%22matrix(-17.45098%20-16.64597%2042.26698%20-44.31105%2017.7%2015.5)%22%2F%3E%3Cellipse%20fill%3D%22%23c9b266%22%20rx%3D%221%22%20ry%3D%221%22%20transform%3D%22matrix(-145.64303%20131.16443%20-28.33842%20-31.46656%2086.7%2062.6)%22%2F%3E%3Cellipse%20fill%3D%22%238080a6%22%20rx%3D%221%22%20ry%3D%221%22%20transform%3D%22matrix(-185.70357%208.59157%20-2.4758%20-53.5135%2074.9%20242.5)%22%2F%3E%3Cellipse%20fill%3D%22%23788c35%22%20cx%3D%22176%22%20cy%3D%22123%22%20rx%3D%2228%22%20ry%3D%2281%22%2F%3E%3C%2Fg%3E%3C%2Fsvg%3E) Everyday Pullover Knitting Pattern$4.99
Everyday Pullover Knitting Pattern$4.99 -
%22%20transform%3D%22translate(.8%20.8)%20scale(1.63672)%22%20fill-opacity%3D%22.5%22%3E%3Cellipse%20fill%3D%22%2331332a%22%20rx%3D%221%22%20ry%3D%221%22%20transform%3D%22matrix(50.88309%2020.16357%20-13.97841%2035.27474%20114.2%20172.3)%22%2F%3E%3Cellipse%20fill%3D%22%231d173d%22%20rx%3D%221%22%20ry%3D%221%22%20transform%3D%22rotate(-41.6%2028%20-13.3)%20scale(40.14633%2029.17687)%22%2F%3E%3Cellipse%20fill%3D%22%23b7c466%22%20rx%3D%221%22%20ry%3D%221%22%20transform%3D%22rotate(143.6%2056.8%2031.4)%20scale(196%2037.9845)%22%2F%3E%3Cellipse%20fill%3D%22%23b9b3d9%22%20cx%3D%22100%22%20cy%3D%22255%22%20rx%3D%22140%22%20ry%3D%2222%22%2F%3E%3C%2Fg%3E%3C%2Fsvg%3E) Everyday Cardigan Knitting Pattern$4.99 – $9.99
Everyday Cardigan Knitting Pattern$4.99 – $9.99 -
%22%20transform%3D%22translate(.8%20.8)%20scale(1.63672)%22%20fill-opacity%3D%22.5%22%3E%3Cellipse%20rx%3D%221%22%20ry%3D%221%22%20transform%3D%22matrix(172.56985%20-27.02372%207.10166%2045.35024%2087.6%2025)%22%2F%3E%3Cellipse%20fill%3D%22%23ccab91%22%20rx%3D%221%22%20ry%3D%221%22%20transform%3D%22rotate(-127.6%20111.6%2061.1)%20scale(92.9868%20153.45428)%22%2F%3E%3Cellipse%20fill%3D%22%23c95c21%22%20rx%3D%221%22%20ry%3D%221%22%20transform%3D%22matrix(-79.80628%2012.64007%20-9.40384%20-59.37351%2070.9%20122.8)%22%2F%3E%3Cellipse%20cx%3D%22149%22%20cy%3D%2217%22%20rx%3D%22111%22%20ry%3D%2233%22%2F%3E%3C%2Fg%3E%3C%2Fsvg%3E) Striped Wristwarmers Knitting Pattern$4.99
Striped Wristwarmers Knitting Pattern$4.99 -
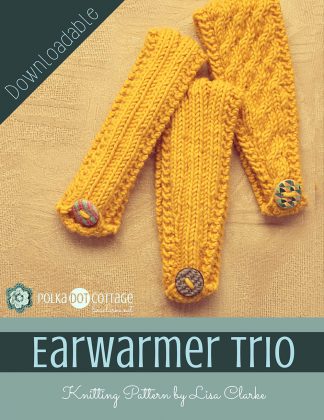
%22%20transform%3D%22translate(.8%20.8)%20scale(1.64063)%22%20fill-opacity%3D%22.5%22%3E%3Cellipse%20fill%3D%22%23092a48%22%20rx%3D%221%22%20ry%3D%221%22%20transform%3D%22matrix(-21.35318%20-23.63203%2050.93519%20-46.02347%2010.5%2018.7)%22%2F%3E%3Cellipse%20fill%3D%22%235d7cac%22%20cx%3D%2278%22%20cy%3D%22225%22%20rx%3D%22196%22%20ry%3D%2241%22%2F%3E%3Cellipse%20fill%3D%22%23f7b522%22%20rx%3D%221%22%20ry%3D%221%22%20transform%3D%22matrix(-50.87761%20-44.69708%2058.8556%20-66.99393%20121.1%2069.7)%22%2F%3E%3Cellipse%20fill%3D%22%23ffc98a%22%20rx%3D%221%22%20ry%3D%221%22%20transform%3D%22rotate(39%20-148.8%2077.7)%20scale(22.91035%20190.58816)%22%2F%3E%3C%2Fg%3E%3C%2Fsvg%3E) Earwarmer Trio Knitting Pattern$5.99
Earwarmer Trio Knitting Pattern$5.99 -
%27%20fill-opacity%3D%27.5%27%3E%3Cellipse%20fill%3D%22%23a50000%22%20fill-opacity%3D%22.5%22%20rx%3D%221%22%20ry%3D%221%22%20transform%3D%22matrix(5.031%2096.98267%20-174.39965%209.04702%20167.1%20209.2)%22%2F%3E%3Cellipse%20fill%3D%22%2378b7c9%22%20fill-opacity%3D%22.5%22%20rx%3D%221%22%20ry%3D%221%22%20transform%3D%22rotate(-177.2%2056.9%20198.1)%20scale(321.5625%2084.32878)%22%2F%3E%3Cpath%20fill%3D%22%23fac782%22%20fill-opacity%3D%22.5%22%20d%3D%22M370.1%2035.2L336.5%20133%20100.7%2051.7%20134.4-46z%22%2F%3E%3Cellipse%20fill%3D%22%230a4c5d%22%20fill-opacity%3D%22.5%22%20rx%3D%221%22%20ry%3D%221%22%20transform%3D%22matrix(27.30619%2028.86106%20-63.96967%2060.52334%2028.7%2030.3)%22%2F%3E%3C%2Fg%3E%3C%2Fsvg%3E) Luxurious Neckwarmer Loom Knitting Pattern$1.99 – $6.99
Luxurious Neckwarmer Loom Knitting Pattern$1.99 – $6.99 -
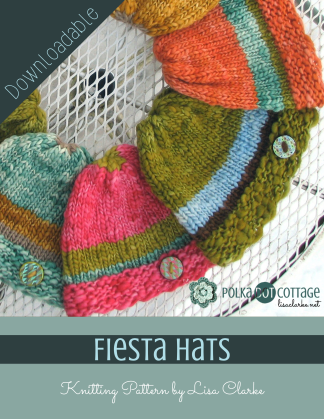
%27%20fill-opacity%3D%27.5%27%3E%3Cellipse%20fill%3D%22%23e9f9ff%22%20fill-opacity%3D%22.5%22%20rx%3D%221%22%20ry%3D%221%22%20transform%3D%22matrix(-72.70486%2087.0613%20-45.30652%20-37.83545%20306.1%20235.3)%22%2F%3E%3Cpath%20fill%3D%22%2395560b%22%20fill-opacity%3D%22.5%22%20d%3D%22M347.8%2061.4L48.3%20305.2l144-330.6z%22%2F%3E%3Cellipse%20fill%3D%22%23162631%22%20fill-opacity%3D%22.5%22%20rx%3D%221%22%20ry%3D%221%22%20transform%3D%22matrix(168.30825%20-206.30895%2037.75578%2030.80142%20.8%2049.2)%22%2F%3E%3Cellipse%20fill%3D%22%239093a2%22%20fill-opacity%3D%22.5%22%20rx%3D%221%22%20ry%3D%221%22%20transform%3D%22matrix(19.97441%20-136.91961%20262.52423%2038.29814%20154.5%20405)%22%2F%3E%3C%2Fg%3E%3C%2Fsvg%3E) Fiesta Hats$2.99
Fiesta Hats$2.99 -
%27%20fill-opacity%3D%27.5%27%3E%3Cellipse%20fill%3D%22%23bcbcbc%22%20fill-opacity%3D%22.5%22%20rx%3D%221%22%20ry%3D%221%22%20transform%3D%22rotate(-87.8%20287.7%20108.9)%20scale(56.72869%20239.469)%22%2F%3E%3Cellipse%20fill%3D%22%231b1b1b%22%20fill-opacity%3D%22.5%22%20rx%3D%221%22%20ry%3D%221%22%20transform%3D%22matrix(134.20077%20-51.56574%2022.11589%2057.557%20298.8%20232.6)%22%2F%3E%3Cellipse%20fill%3D%22%23141414%22%20fill-opacity%3D%22.5%22%20rx%3D%221%22%20ry%3D%221%22%20transform%3D%22matrix(35.67845%20-92.08844%2068.8645%2026.68064%20.8%20217.1)%22%2F%3E%3Cellipse%20fill%3D%22%23292929%22%20fill-opacity%3D%22.5%22%20rx%3D%221%22%20ry%3D%221%22%20transform%3D%22matrix(10.12288%2035.3027%20-113.27827%2032.48202%2038.4%209.5)%22%2F%3E%3C%2Fg%3E%3C%2Fsvg%3E) Striped Sock Puppets$2.99
Striped Sock Puppets$2.99


Crochet Patterns
-
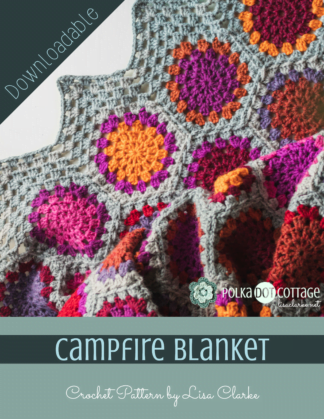
%27%20fill-opacity%3D%27.5%27%3E%3Cellipse%20fill%3D%22%23b9cfc8%22%20fill-opacity%3D%22.5%22%20rx%3D%221%22%20ry%3D%221%22%20transform%3D%22rotate(40.3%20-111.3%20141)%20scale(45.23207%20140.77649)%22%2F%3E%3Cellipse%20fill%3D%22%233f212c%22%20fill-opacity%3D%22.5%22%20rx%3D%221%22%20ry%3D%221%22%20transform%3D%22matrix(-145.22888%2026.65449%20-13.40438%20-73.03474%20282.9%20247.3)%22%2F%3E%3Cellipse%20fill%3D%22%23b5d1c8%22%20fill-opacity%3D%22.5%22%20rx%3D%221%22%20ry%3D%221%22%20transform%3D%22matrix(181.92092%20-2.08652%20.49565%2043.2155%20155%20418.2)%22%2F%3E%3Cellipse%20fill%3D%22%2319352c%22%20fill-opacity%3D%22.5%22%20rx%3D%221%22%20ry%3D%221%22%20transform%3D%22matrix(-69.24574%2054.49102%20-27.1858%20-34.547%205.3%2028.1)%22%2F%3E%3C%2Fg%3E%3C%2Fsvg%3E) Campfire Blanket Crochet Pattern$6.99 – $9.99
Campfire Blanket Crochet Pattern$6.99 – $9.99 -
%22%20transform%3D%22translate(.8%20.8)%20scale(1.63672)%22%20fill-opacity%3D%22.5%22%3E%3Cellipse%20fill%3D%22%230c1033%22%20rx%3D%221%22%20ry%3D%221%22%20transform%3D%22matrix(-21.24876%20-19.19973%2047.72414%20-52.81736%207%2029.3)%22%2F%3E%3Cellipse%20fill%3D%22%23e7e290%22%20rx%3D%221%22%20ry%3D%221%22%20transform%3D%22matrix(-18.77992%20-80.44246%20151.08936%20-35.27299%20176.7%2087.6)%22%2F%3E%3Cellipse%20fill%3D%22%23575b7e%22%20cx%3D%2287%22%20cy%3D%22214%22%20rx%3D%22196%22%20ry%3D%2221%22%2F%3E%3Cellipse%20fill%3D%22%23ffa071%22%20rx%3D%221%22%20ry%3D%221%22%20transform%3D%22matrix(-6.067%2031.07395%20-52.12714%20-10.17751%2023.2%20139.9)%22%2F%3E%3C%2Fg%3E%3C%2Fsvg%3E) Mod Floral Mandala Crochet Pattern$5.99 – $9.99
Mod Floral Mandala Crochet Pattern$5.99 – $9.99 -
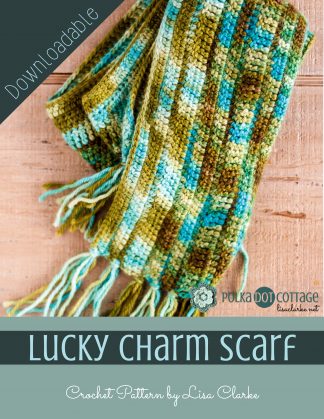
%27%20fill-opacity%3D%27.5%27%3E%3Cellipse%20fill%3D%22%23252d20%22%20fill-opacity%3D%22.5%22%20rx%3D%221%22%20ry%3D%221%22%20transform%3D%22matrix(-93.97554%2050.61452%20-34.74476%20-64.51029%2079.6%2015.1)%22%2F%3E%3Cellipse%20fill%3D%22%23ffd5ae%22%20fill-opacity%3D%22.5%22%20rx%3D%221%22%20ry%3D%221%22%20transform%3D%22rotate(-72.4%20285.5%20-124.1)%20scale(133.50977%2050.47359)%22%2F%3E%3Cellipse%20fill%3D%22%23ffcbaa%22%20fill-opacity%3D%22.5%22%20rx%3D%221%22%20ry%3D%221%22%20transform%3D%22rotate(81.6%20-120%20115.7)%20scale(108.07379%2043.04483)%22%2F%3E%3Cellipse%20fill%3D%22%23768a2b%22%20fill-opacity%3D%22.5%22%20rx%3D%221%22%20ry%3D%221%22%20transform%3D%22matrix(94.4412%203.79315%20-6.57683%20163.74886%20158.5%20124.5)%22%2F%3E%3C%2Fg%3E%3C%2Fsvg%3E) Lucky Charm Scarf Crochet Pattern$3.99
Lucky Charm Scarf Crochet Pattern$3.99 -
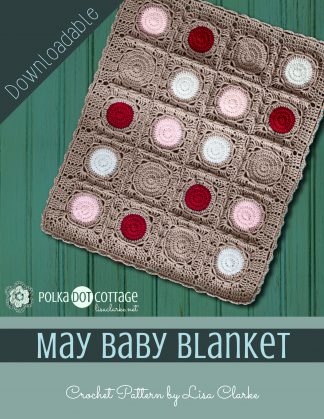
%27%20fill-opacity%3D%27.5%27%3E%3Cellipse%20fill%3D%22%230f4c37%22%20fill-opacity%3D%22.5%22%20rx%3D%221%22%20ry%3D%221%22%20transform%3D%22rotate(-78.7%2078.1%2044.8)%20scale(320.79692%2043.06311)%22%2F%3E%3Cellipse%20fill%3D%22%23cbc2c5%22%20fill-opacity%3D%22.5%22%20rx%3D%221%22%20ry%3D%221%22%20transform%3D%22rotate(89.8%20-133%20286.4)%20scale(43.49762%20198.19865)%22%2F%3E%3Cellipse%20fill%3D%22%23958b8e%22%20fill-opacity%3D%22.5%22%20rx%3D%221%22%20ry%3D%221%22%20transform%3D%22matrix(24.7379%20123.9033%20-90.1321%2017.99532%20184%20158.2)%22%2F%3E%3Cpath%20fill%3D%22%232d5849%22%20fill-opacity%3D%22.5%22%20d%3D%22M287%20161.8l81%2020.2-41.2%20165.2-81-20.2z%22%2F%3E%3C%2Fg%3E%3C%2Fsvg%3E) May Baby Blanket Crochet Pattern$4.99 – $9.99
May Baby Blanket Crochet Pattern$4.99 – $9.99 -
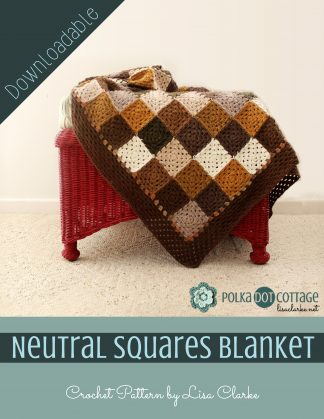
%27%20fill-opacity%3D%27.5%27%3E%3Cellipse%20fill%3D%22%236c0c00%22%20fill-opacity%3D%22.5%22%20rx%3D%221%22%20ry%3D%221%22%20transform%3D%22matrix(-14.52345%2079.11216%20-103.49304%20-18.9993%20169%20176)%22%2F%3E%3Cellipse%20fill%3D%22%23fff%22%20fill-opacity%3D%22.5%22%20rx%3D%221%22%20ry%3D%221%22%20transform%3D%22rotate(-58.9%20118%20-195.2)%20scale(79.39274%20233.78497)%22%2F%3E%3Cellipse%20fill%3D%22%23fff6ff%22%20fill-opacity%3D%22.5%22%20rx%3D%221%22%20ry%3D%221%22%20transform%3D%22matrix(31.53461%20112.18796%20-50.71613%2014.25566%207.5%20202.3)%22%2F%3E%3Cellipse%20fill%3D%22%23000e14%22%20fill-opacity%3D%22.5%22%20rx%3D%221%22%20ry%3D%221%22%20transform%3D%22matrix(-46.16266%20-44.2684%2083.51723%20-87.09097%203.7%20.9)%22%2F%3E%3C%2Fg%3E%3C%2Fsvg%3E) Neutral Squares Blanket Crochet Pattern$4.99 – $7.99
Neutral Squares Blanket Crochet Pattern$4.99 – $7.99 -
%22%20transform%3D%22translate(.8%20.8)%20scale(1.63672)%22%20fill-opacity%3D%22.5%22%3E%3Cellipse%20fill%3D%22%23dad0cf%22%20cx%3D%22129%22%20cy%3D%2241%22%20rx%3D%2277%22%20ry%3D%2277%22%2F%3E%3Cpath%20fill%3D%22%233a3c3c%22%20d%3D%22M196.7%20208.3l-196%203.4-1.4-80%20196-3.4z%22%2F%3E%3Cellipse%20fill%3D%22%231e2020%22%20rx%3D%221%22%20ry%3D%221%22%20transform%3D%22matrix(51.69213%20-72.24435%2028.8139%2020.61686%200%2020.2)%22%2F%3E%3Cellipse%20fill%3D%22%23292929%22%20rx%3D%221%22%20ry%3D%221%22%20transform%3D%22rotate(65.4%20-110.8%2071.2)%20scale(62.25104%2028.33162)%22%2F%3E%3C%2Fg%3E%3C%2Fsvg%3E) Mod Floral Blanket Crochet Pattern$2.99 – $9.99
Mod Floral Blanket Crochet Pattern$2.99 – $9.99 -
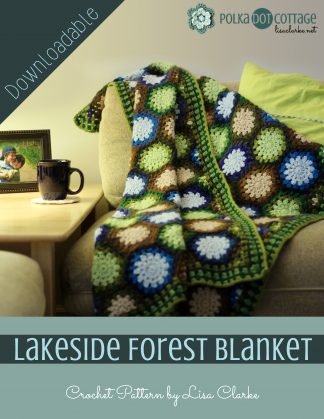
%27%20fill-opacity%3D%27.5%27%3E%3Cellipse%20fill%3D%22%232a2930%22%20fill-opacity%3D%22.5%22%20rx%3D%221%22%20ry%3D%221%22%20transform%3D%22matrix(225.9917%20-51.69293%2016.7183%2073.08922%20249.8%20247.6)%22%2F%3E%3Cellipse%20fill%3D%22%23c1c4b4%22%20fill-opacity%3D%22.5%22%20rx%3D%221%22%20ry%3D%221%22%20transform%3D%22matrix(-183.6986%2044.50994%20-12.50481%20-51.60907%20230.3%2025.6)%22%2F%3E%3Cellipse%20fill%3D%22%23c5c2d5%22%20fill-opacity%3D%22.5%22%20rx%3D%221%22%20ry%3D%221%22%20transform%3D%22matrix(-.4154%20-29.74894%20211.47437%20-2.95293%20145%20404.6)%22%2F%3E%3Cpath%20fill%3D%22%23a2b444%22%20fill-opacity%3D%22.5%22%20d%3D%22M177.4%20209.7l-180%2055L-48.1%20116l180-55z%22%2F%3E%3C%2Fg%3E%3C%2Fsvg%3E) Lakeside Forest Blanket Crochet Pattern$4.99 – $9.99
Lakeside Forest Blanket Crochet Pattern$4.99 – $9.99 -
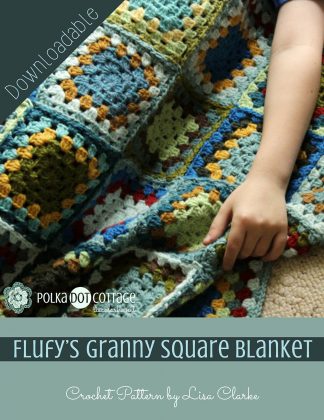
%27%20fill-opacity%3D%27.5%27%3E%3Cellipse%20fill%3D%22%23101012%22%20fill-opacity%3D%22.5%22%20rx%3D%221%22%20ry%3D%221%22%20transform%3D%22matrix(-38.77268%20-41.00096%20176.74237%20-167.13695%2037.5%20231.5)%22%2F%3E%3Cellipse%20fill%3D%22%23b5b5b7%22%20fill-opacity%3D%22.5%22%20rx%3D%221%22%20ry%3D%221%22%20transform%3D%22rotate(-88.5%20288.9%20105.2)%20scale(63.79604%20321.56248)%22%2F%3E%3Cellipse%20fill%3D%22%23b3b6a6%22%20fill-opacity%3D%22.5%22%20rx%3D%221%22%20ry%3D%221%22%20transform%3D%22matrix(-69.52684%20144.90367%20-56.23816%20-26.98387%20319%2066.5)%22%2F%3E%3Cellipse%20fill%3D%22%231f1f1f%22%20fill-opacity%3D%22.5%22%20rx%3D%221%22%20ry%3D%221%22%20transform%3D%22matrix(.77318%20-50.47461%2073.35394%201.12365%2077.6%20237.9)%22%2F%3E%3C%2Fg%3E%3C%2Fsvg%3E) Flufy’s Granny Square Blanket Crochet Pattern$1.99 – $5.99
Flufy’s Granny Square Blanket Crochet Pattern$1.99 – $5.99


Sewing Patterns
-
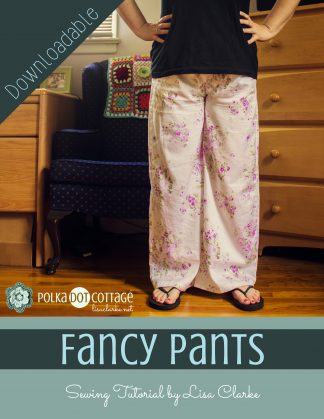
%22%20transform%3D%22translate(.8%20.8)%20scale(1.63672)%22%20fill-opacity%3D%22.5%22%3E%3Cellipse%20fill%3D%22%231e0a00%22%20cx%3D%2233%22%20cy%3D%22112%22%20rx%3D%2260%22%20ry%3D%2260%22%2F%3E%3Cellipse%20fill%3D%22%23ecb6c4%22%20rx%3D%221%22%20ry%3D%221%22%20transform%3D%22matrix(-30.29842%20-.15864%20.32479%20-62.02925%20127.3%20110.3)%22%2F%3E%3Cellipse%20fill%3D%22%23a2b4c2%22%20rx%3D%221%22%20ry%3D%221%22%20transform%3D%22matrix(102.6336%208.97928%20-5.02962%2057.4888%20100%20256.1)%22%2F%3E%3Cellipse%20fill%3D%22%239e4000%22%20cx%3D%22183%22%20cy%3D%2275%22%20rx%3D%2237%22%20ry%3D%22116%22%2F%3E%3C%2Fg%3E%3C%2Fsvg%3E) Fancypants Sewing Tutorial$9.99
Fancypants Sewing Tutorial$9.99 -
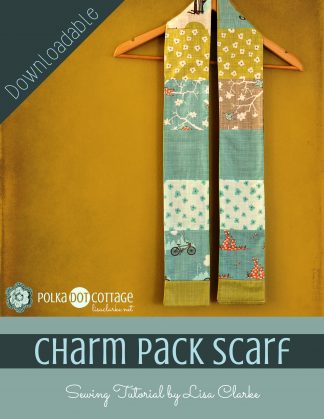
%22%20transform%3D%22translate(.8%20.8)%20scale(1.63672)%22%20fill-opacity%3D%22.5%22%3E%3Cellipse%20fill%3D%22%237a91cb%22%20cx%3D%2278%22%20cy%3D%22233%22%20rx%3D%22196%22%20ry%3D%2239%22%2F%3E%3Cellipse%20fill%3D%22%239b6400%22%20cx%3D%2241%22%20cy%3D%2264%22%20rx%3D%2252%22%20ry%3D%22118%22%2F%3E%3Cellipse%20fill%3D%22%2305314c%22%20rx%3D%221%22%20ry%3D%221%22%20transform%3D%22matrix(-20.96565%20-15.43782%2037.74795%20-51.26436%2022.4%2013.6)%22%2F%3E%3Cellipse%20fill%3D%22%23beb881%22%20rx%3D%221%22%20ry%3D%221%22%20transform%3D%22matrix(-1.25425%2070.03375%20-36.12155%20-.64691%20121%2080.2)%22%2F%3E%3C%2Fg%3E%3C%2Fsvg%3E) Charm Pack Scarf Sewing Pattern$4.99
Charm Pack Scarf Sewing Pattern$4.99 -
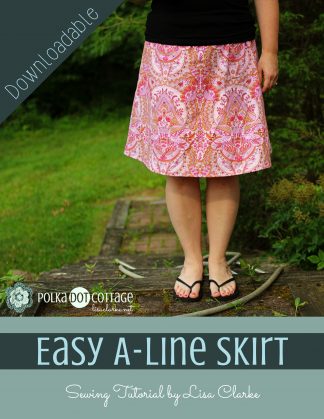
%27%20fill-opacity%3D%27.5%27%3E%3Cellipse%20fill%3D%22%23b3baca%22%20fill-opacity%3D%22.5%22%20rx%3D%221%22%20ry%3D%221%22%20transform%3D%22matrix(-195.83778%20-3.41836%20.92145%20-52.7897%20156%20389.2)%22%2F%3E%3Cellipse%20fill%3D%22%23ff8bb6%22%20fill-opacity%3D%22.5%22%20rx%3D%221%22%20ry%3D%221%22%20transform%3D%22rotate(-97.3%20148.6%20-25.4)%20scale(62.54703%2061.20011)%22%2F%3E%3Cellipse%20fill%3D%22%23000a00%22%20fill-opacity%3D%22.5%22%20rx%3D%221%22%20ry%3D%221%22%20transform%3D%22matrix(59.6819%206.04332%20-18.03265%20178.08457%20321.6%20135)%22%2F%3E%3Cellipse%20fill%3D%22%230c1211%22%20fill-opacity%3D%22.5%22%20rx%3D%221%22%20ry%3D%221%22%20transform%3D%22matrix(-35.61172%20-52.20483%20261.75138%20-178.55468%2090%2036.3)%22%2F%3E%3C%2Fg%3E%3C%2Fsvg%3E) Easy A-Line Skirt Sewing Pattern$4.99
Easy A-Line Skirt Sewing Pattern$4.99 -
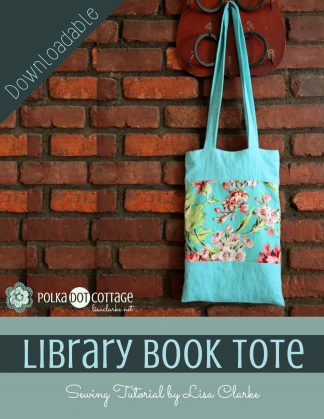
%22%20transform%3D%22translate(.8%20.8)%20scale(1.63672)%22%20fill-opacity%3D%22.5%22%3E%3Cellipse%20fill%3D%22%23510%22%20cx%3D%2240%22%20cy%3D%2278%22%20rx%3D%2266%22%20ry%3D%22100%22%2F%3E%3Cellipse%20fill%3D%22%238a9d9f%22%20rx%3D%221%22%20ry%3D%221%22%20transform%3D%22matrix(-53.83653%20-58.76716%20144.52307%20-132.39744%20128.9%20210.5)%22%2F%3E%3Cellipse%20fill%3D%22%2346132d%22%20cx%3D%22143%22%20cy%3D%226%22%20rx%3D%2258%22%20ry%3D%2258%22%2F%3E%3Cellipse%20fill%3D%22%234c3040%22%20rx%3D%221%22%20ry%3D%221%22%20transform%3D%22matrix(10.80366%20-33.88085%2047.68794%2015.20636%2073.2%20169.6)%22%2F%3E%3C%2Fg%3E%3C%2Fsvg%3E) Library Book Tote Sewing Pattern$5.99
Library Book Tote Sewing Pattern$5.99 -
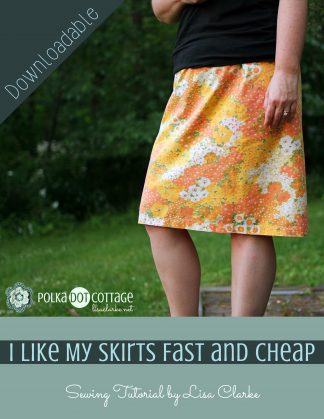
%27%20fill-opacity%3D%27.5%27%3E%3Cellipse%20fill%3D%22%23000004%22%20fill-opacity%3D%22.5%22%20rx%3D%221%22%20ry%3D%221%22%20transform%3D%22matrix(-196.176%20253.82207%20-70.81864%20-54.73487%2065.6%2097.8)%22%2F%3E%3Cellipse%20fill%3D%22%23aeb3c6%22%20fill-opacity%3D%22.5%22%20rx%3D%221%22%20ry%3D%221%22%20transform%3D%22matrix(238.28642%20-7.07218%202.58365%2087.05238%20129%20375.2)%22%2F%3E%3Cellipse%20fill%3D%22%23f1aa58%22%20fill-opacity%3D%22.5%22%20rx%3D%221%22%20ry%3D%221%22%20transform%3D%22rotate(-106%20166%20-1.2)%20scale(96.01096%2067.43489)%22%2F%3E%3Cpath%20fill%3D%22%23161928%22%20fill-opacity%3D%22.5%22%20d%3D%22M97.4%204l224.2-29.4%209.8%20116.2z%22%2F%3E%3C%2Fg%3E%3C%2Fsvg%3E) I Like My Skirts Fast and Cheap$4.99
I Like My Skirts Fast and Cheap$4.99 -
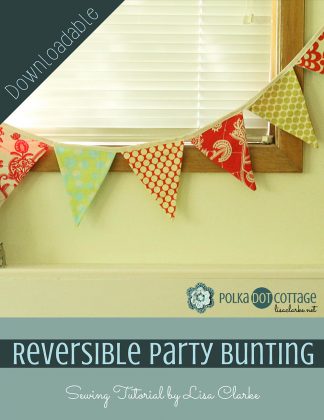
%22%20transform%3D%22translate(.8%20.8)%20scale(1.64063)%22%20fill-opacity%3D%22.5%22%3E%3Cellipse%20fill%3D%22%23ffffe2%22%20cx%3D%2299%22%20cy%3D%2233%22%20rx%3D%2251%22%20ry%3D%2251%22%2F%3E%3Cellipse%20fill%3D%22%230f1134%22%20rx%3D%221%22%20ry%3D%221%22%20transform%3D%22matrix(-22.33803%20-24.6787%2092.17714%20-83.43457%2013.8%204.4)%22%2F%3E%3Cellipse%20fill%3D%22%2354567a%22%20cx%3D%22121%22%20cy%3D%22217%22%20rx%3D%22196%22%20ry%3D%2218%22%2F%3E%3Cellipse%20fill%3D%22%23cecb72%22%20rx%3D%221%22%20ry%3D%221%22%20transform%3D%22matrix(-8.12717%20-62.57576%20186.77631%20-24.258%20117.9%20118.5)%22%2F%3E%3C%2Fg%3E%3C%2Fsvg%3E) Reversible Party Bunting Sewing Pattern$4.99
Reversible Party Bunting Sewing Pattern$4.99 -
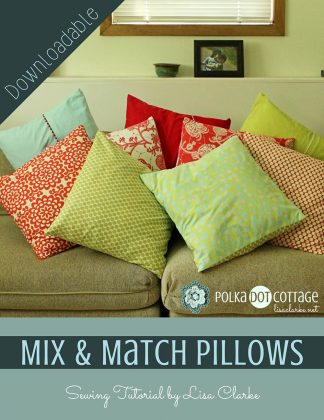
%27%20fill-opacity%3D%27.5%27%3E%3Cellipse%20fill%3D%22%2315173e%22%20fill-opacity%3D%22.5%22%20rx%3D%221%22%20ry%3D%221%22%20transform%3D%22rotate(136.6%203.2%2014.8)%20scale(129.98952%2044.97277)%22%2F%3E%3Cellipse%20fill%3D%22%23637527%22%20fill-opacity%3D%22.5%22%20rx%3D%221%22%20ry%3D%221%22%20transform%3D%22matrix(4.70885%2037.2744%20-319.02688%2040.30247%20109.4%20276.5)%22%2F%3E%3Cellipse%20fill%3D%22%238182aa%22%20fill-opacity%3D%22.5%22%20rx%3D%221%22%20ry%3D%221%22%20transform%3D%22rotate(86.6%20-107.7%20285.1)%20scale(80.19539%20226.78387)%22%2F%3E%3Cellipse%20fill%3D%22%23b8b05f%22%20fill-opacity%3D%22.5%22%20rx%3D%221%22%20ry%3D%221%22%20transform%3D%22rotate(59.8%207.7%20209.8)%20scale(102.14672%20208.22639)%22%2F%3E%3C%2Fg%3E%3C%2Fsvg%3E) Mix and Match Pillows Sewing Pattern$4.99
Mix and Match Pillows Sewing Pattern$4.99 -
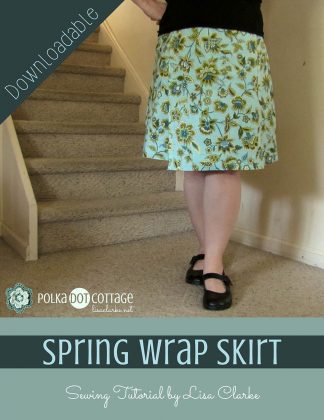
%22%20transform%3D%22translate(.8%20.8)%20scale(1.64063)%22%20fill-opacity%3D%22.5%22%3E%3Cellipse%20fill%3D%22%233c4317%22%20rx%3D%221%22%20ry%3D%221%22%20transform%3D%22rotate(169.4%20-2.7%2029.1)%20scale(76.48973%20114.6121)%22%2F%3E%3Cellipse%20fill%3D%22%23c5c3d2%22%20rx%3D%221%22%20ry%3D%221%22%20transform%3D%22matrix(-127.93264%20-5.02867%20.83565%20-21.2595%20114.4%20255)%22%2F%3E%3Cellipse%20fill%3D%22%2392909d%22%20rx%3D%221%22%20ry%3D%221%22%20transform%3D%22matrix(40.3549%20-.1996%20.30768%2062.20538%20121.8%2090.1)%22%2F%3E%3Cellipse%20fill%3D%22%23839622%22%20cx%3D%22185%22%20cy%3D%2233%22%20rx%3D%2231%22%20ry%3D%2289%22%2F%3E%3C%2Fg%3E%3C%2Fsvg%3E) Spring Wrap Skirt Sewing Pattern$3.99
Spring Wrap Skirt Sewing Pattern$3.99
Other Downloadables
-
%27%20fill-opacity%3D%27.5%27%3E%3Cellipse%20fill%3D%22%230f0e16%22%20fill-opacity%3D%22.5%22%20rx%3D%221%22%20ry%3D%221%22%20transform%3D%22rotate(32.4%20-39.1%2059.8)%20scale(52.26143%2070.84258)%22%2F%3E%3Cellipse%20fill%3D%22%23e1e0e8%22%20fill-opacity%3D%22.5%22%20rx%3D%221%22%20ry%3D%221%22%20transform%3D%22matrix(-3.4531%20-30.80511%20132.7656%20-14.88237%20253.6%20.8)%22%2F%3E%3Cellipse%20fill%3D%22%236f7165%22%20fill-opacity%3D%22.5%22%20rx%3D%221%22%20ry%3D%221%22%20transform%3D%22rotate(79.7%20-83.9%20294)%20scale(45.76198%20232.80249)%22%2F%3E%3Cellipse%20fill%3D%22%23b3b7a2%22%20fill-opacity%3D%22.5%22%20rx%3D%221%22%20ry%3D%221%22%20transform%3D%22matrix(-175.82567%2077.1776%20-35.32772%20-80.48345%20174.8%20199)%22%2F%3E%3C%2Fg%3E%3C%2Fsvg%3E) Creative Photo Edits #1 Presets / Actions$4.99
Creative Photo Edits #1 Presets / Actions$4.99 -
%22%20transform%3D%22translate(.8%20.8)%20scale(1.64063)%22%20fill-opacity%3D%22.5%22%3E%3Cellipse%20fill%3D%22%23f7f6f6%22%20cx%3D%2291%22%20cy%3D%22118%22%20rx%3D%22121%22%20ry%3D%2231%22%2F%3E%3Cpath%20fill%3D%22%23151414%22%20d%3D%22M103.2-25.8l-94%2094-42.4-42.4%2094-94z%22%2F%3E%3Cellipse%20fill%3D%22%23676b69%22%20rx%3D%221%22%20ry%3D%221%22%20transform%3D%22matrix(-195.99983%20-.25924%20.0501%20-37.8806%2092.7%20201.9)%22%2F%3E%3Cellipse%20fill%3D%22%23dedddd%22%20rx%3D%221%22%20ry%3D%221%22%20transform%3D%22rotate(175.9%2083.3%2022.3)%20scale(36.21304%2015.38912)%22%2F%3E%3C%2Fg%3E%3C%2Fsvg%3E) Basic Photo Edits Presets / Actions$4.99
Basic Photo Edits Presets / Actions$4.99 -
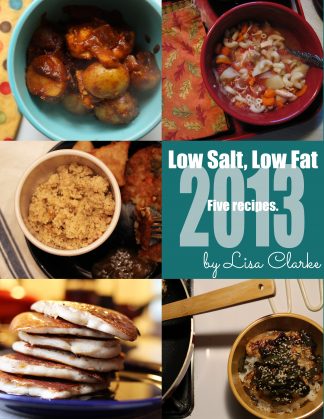
%27%20fill-opacity%3D%27.5%27%3E%3Cellipse%20fill%3D%22%234eb8b0%22%20fill-opacity%3D%22.5%22%20rx%3D%221%22%20ry%3D%221%22%20transform%3D%22matrix(-28.4025%2081.05935%20-103.61163%20-36.30463%20273%20227.1)%22%2F%3E%3Cellipse%20fill%3D%22%23e6995b%22%20fill-opacity%3D%22.5%22%20rx%3D%221%22%20ry%3D%221%22%20transform%3D%22matrix(-73.69286%205.22705%20-9.7263%20-137.12484%2025.8%20234.5)%22%2F%3E%3Cellipse%20fill%3D%22%236b1209%22%20fill-opacity%3D%22.5%22%20rx%3D%221%22%20ry%3D%221%22%20transform%3D%22matrix(5.08441%20-74.0803%20170.82449%2011.72433%20202.6%2039.7)%22%2F%3E%3Cellipse%20fill%3D%22%235c2c00%22%20fill-opacity%3D%22.5%22%20rx%3D%221%22%20ry%3D%221%22%20transform%3D%22matrix(-33.60771%2044.92435%20-58.34142%20-43.64496%20294.7%20391.2)%22%2F%3E%3C%2Fg%3E%3C%2Fsvg%3E) Low Salt Low Fat 2013 Recipe Collection$0.00 – $4.99
Low Salt Low Fat 2013 Recipe Collection$0.00 – $4.99 -
%22%20transform%3D%22translate(.8%20.8)%20scale(1.64063)%22%20fill-opacity%3D%22.5%22%3E%3Cellipse%20fill%3D%22%23fff%22%20rx%3D%221%22%20ry%3D%221%22%20transform%3D%22matrix(-4.61512%2096.4967%20-49.34306%20-2.35992%20118%2083.7)%22%2F%3E%3Cellipse%20fill%3D%22%23290000%22%20cx%3D%2212%22%20cy%3D%2273%22%20rx%3D%2247%22%20ry%3D%22135%22%2F%3E%3Cpath%20fill%3D%22%23fdffff%22%20d%3D%22M62.3%2061.2l63.6-27%2041.8%2098.6-63.6%2027z%22%2F%3E%3Cellipse%20fill%3D%22%23540f27%22%20rx%3D%221%22%20ry%3D%221%22%20transform%3D%22rotate(21%20-344.2%20602.7)%20scale(25.32557%2048.57365)%22%2F%3E%3C%2Fg%3E%3C%2Fsvg%3E) License Plate Game Printable$0.00 – $4.99
License Plate Game Printable$0.00 – $4.99 -
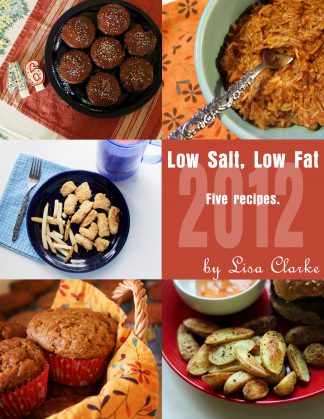
%22%20transform%3D%22translate(.8%20.8)%20scale(1.63672)%22%20fill-opacity%3D%22.5%22%3E%3Cellipse%20fill%3D%22%2398a9c9%22%20rx%3D%221%22%20ry%3D%221%22%20transform%3D%22matrix(85.42791%2018.74611%20-11.81114%2053.82455%2024.2%20114.8)%22%2F%3E%3Cellipse%20fill%3D%22%23602a00%22%20cx%3D%22180%22%20cy%3D%22218%22%20rx%3D%2255%22%20ry%3D%2268%22%2F%3E%3Cellipse%20fill%3D%22%234b0121%22%20rx%3D%221%22%20ry%3D%221%22%20transform%3D%22matrix(-27.78292%20-2.0957%204.23512%20-56.1452%2062.3%2027.5)%22%2F%3E%3Cellipse%20fill%3D%22%23652700%22%20rx%3D%221%22%20ry%3D%221%22%20transform%3D%22matrix(60.04441%20-1.54113%201.23013%2047.92754%203.3%20237.1)%22%2F%3E%3C%2Fg%3E%3C%2Fsvg%3E) Low Salt Low Fat 2012 Recipe Collection$0.00 – $4.99
Low Salt Low Fat 2012 Recipe Collection$0.00 – $4.99 -
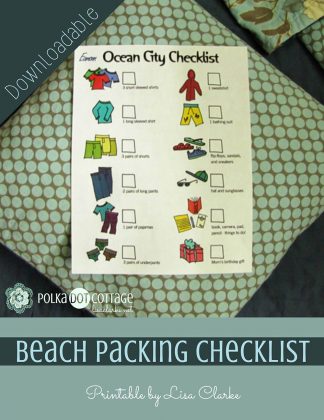
%27%20fill-opacity%3D%27.5%27%3E%3Cellipse%20fill%3D%22%23eef0e6%22%20fill-opacity%3D%22.5%22%20rx%3D%221%22%20ry%3D%221%22%20transform%3D%22matrix(90.83344%20-19.7011%2023.88632%20110.12977%20150.4%20165.3)%22%2F%3E%3Cellipse%20fill%3D%22%23151516%22%20fill-opacity%3D%22.5%22%20rx%3D%221%22%20ry%3D%221%22%20transform%3D%22matrix(39.90617%2030.24752%20-94.61004%20124.82095%2017.4%2033.7)%22%2F%3E%3Cellipse%20fill%3D%22%23202021%22%20fill-opacity%3D%22.5%22%20rx%3D%221%22%20ry%3D%221%22%20transform%3D%22matrix(34.97991%20-64.694%2048.3372%2026.13583%20313.9%20274.2)%22%2F%3E%3Cellipse%20fill%3D%22%232b2c29%22%20fill-opacity%3D%22.5%22%20rx%3D%221%22%20ry%3D%221%22%20transform%3D%22matrix(-95.43039%20-112.92662%2036.22904%20-30.61591%20293.3%2027.3)%22%2F%3E%3C%2Fg%3E%3C%2Fsvg%3E) Beach Packing Checklist Printable$0.00 – $4.99
Beach Packing Checklist Printable$0.00 – $4.99 -
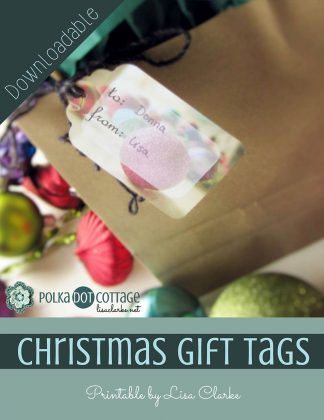
%22%20transform%3D%22translate(.8%20.8)%20scale(1.64063)%22%20fill-opacity%3D%22.5%22%3E%3Cellipse%20fill%3D%22%23e0e1ea%22%20rx%3D%221%22%20ry%3D%221%22%20transform%3D%22matrix(52.75764%206.84242%20-4.72907%2036.4629%2082.4%2087.6)%22%2F%3E%3Cellipse%20fill%3D%22%231e180b%22%20cx%3D%2286%22%20cy%3D%2214%22%20rx%3D%22196%22%20ry%3D%2226%22%2F%3E%3Cellipse%20fill%3D%22%237d5601%22%20rx%3D%221%22%20ry%3D%221%22%20transform%3D%22matrix(35.23319%20-99.21137%2035.03695%2012.44276%20172.8%2083)%22%2F%3E%3Cellipse%20fill%3D%22%239aa0ae%22%20rx%3D%221%22%20ry%3D%221%22%20transform%3D%22matrix(-132.7122%20-49.88324%2022.35082%20-59.4634%2074.3%20228.5)%22%2F%3E%3C%2Fg%3E%3C%2Fsvg%3E) Christmas Gift Tags Printable$0.00 – $4.99
Christmas Gift Tags Printable$0.00 – $4.99