


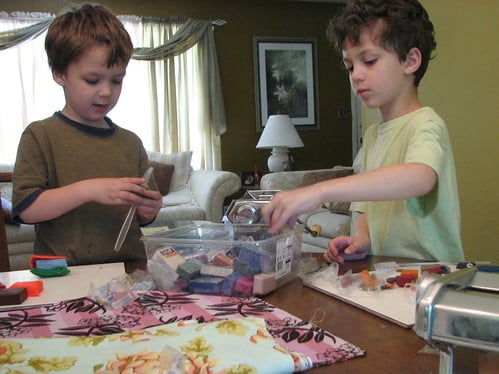
Once upon a time, before I learned to sew, and before I started knitting, this was a polymer clay blog. Ok, it still is to some extent, but there have been enough detours into other crafty territory, that I’ve picked up plenty of followers who know very little about the clay. And on those days where I do have a polymer clay show and tell, I am likely to be asked one of two questions:
- How can I get started in polymer clay and make things like yours?
- How can my child get started in polymer clay and make things like yours?
To some extent, I think the answer to both questions is the same. I started my illustrious career 13 years ago, after receiving a Klutz Press polymer clay book. So, you can imagine I’d be a huge proponent of getting your feet wet via books aimed at children.
In a Nutshell
Get thee to the craft store (or your junk drawer) and find these five items:
- clay
- old straight-sided drinking glass
- old kitchen knife
- toothpick
- kids’ clay book
That’s it. You’re good to go. Or you could read on for more details…
Expectations
Before I go any further, let me make it clear that you will not be making things like mine right out of the gate. I’ve had some time to hone my craft, and find my niche as it were. You need to play around a bit, try different techniques, see what you are good at, and what you enjoy. It’s one of the reasons kids’ books are perfect. There’s a little bit of everything presented, and it’s done so in a way that is easy to understand. And fun!
And even once you are comfortable and experienced with the medium, your creations are going to look like yours, not like mine. And that’s the way it should be, don’t you think?
Clay
 Sculpey III is marketed towards children, mainly because of its ease of use straight from the package. It’s a great choice for getting started, but you must remember one very important thing: it is the weakest of all of the clays once baked. Protruding parts, and thin sheets will snap right off. If your projects are not going to be round or chunky in nature, if they’re going to need some of their own strength, then you’ll want to try one of the more professional grade clays like Premo! Sculpey, Fimo, or Kato Polyclay. My own preference where strength is required is for Premo. It’s relatively soft, and I like that in a clay. Many people prefer stiffer clays. It’s a personal preference that comes with experience.
Tools
- Something for rolling out sheets – for most, the ideal tool is a good pasta machine, dedicated to craft use, however I made do for a few years with just a small plastic roller. The side of a sturdy straight-sided drinking glass would also work. Whatever you use, make sure it is no longer being used for food, and that it has no texture on it, as texture will transfer to the clay.
- Something for cutting slices – here, the ideal tool would be a tissue blade, or a blade specifically designed for working with clay. But, again, you can substitute a less sharp, less precise tool (like an old kitchen knife, an x-acto knife, or a wallpaper scraper) in the beginning.
- Something for poking holes – I started with a toothpick, but this can be anything pointy, like a knitting needle, or a dental tool.
- Your hands!
Books & DVDs
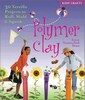
 If you want to take my advice and start with a children’s book, Kids Crafts: Polymer Clay by Irene Semanchuk Dean is a favorite. It’s also available in paperback.
The book that got me hooked on clay was The Incredible Clay Book by Sherri Haab.
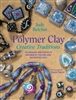
 In terms of a more grown-up approach, I’d recommend Judy Belcher’s Polymer Clay Creative Traditions book and Donna Kato’s Introduction to Polymer Clay DVD.
These and the two above give a good sampling of the techniques available for you to try.
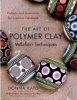
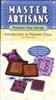
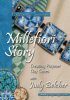 There are many, many more excellent books and videos available out there that focus on more specific skills, such as millefiori (my own area of interest). If you’re looking to try your hand at millefiori (aka caning) I highly recommend Millefiori Story DVD with Judy Belcher and The Art of Polymer Clay: Millefiori Techniques book by Donna Kato.
Online Resources
- I have several free tutorials available at Polka Dot Creations
- Sculpey.com has a large library of free projects, plus more information about the clays they manufacture
- You can buy books, videos & magazines on the subject from me at Polka Dot Creations
- You can buy clay and supplies online at Polymer Clay Express
- You can get involved in an active online community at Polymer Clay Central
This should be enough to get you started. Remember, you don’t need a lot of fancy tools – just grab some clay, raid the junk drawer, and jump right in! After you’ve played around for a while, you’ll get a feel for where you want to go, and what additional resources you may need to get there.
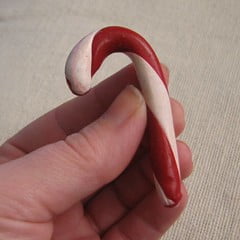
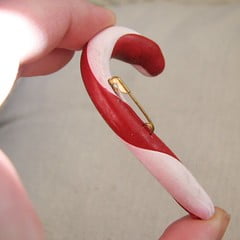
Don’t be discouraged if your first items don’t look “professional.” (This candy cane with the embedded safety pin back, fingerprints all over it, and slightly sticky lint-magnet finish was my first creation – durable enough to last all these years, but not exactly drool-worthy.)
Yes, polymer clay is often marketed towards children, and yes, polymer clay is easy to pick up and just start creating with – the instant gratification factor is way up there! But don’t underestimate the importance of honing your skills and taking the time to master a technique. I wasn’t born making buttons to perfectly match my scarves, and neither will you (or your child) be.
Have fun! 🙂


OH thanks for all the helpful hints. We had used the not so strong clay and my daughter wasn’t liking it. She is truly a natural at this so I’m so confident that with the right type of “strong” clay she will be much more happy about it.
See what Janey has been blogging about: Out Of The Haze
Glad to be of help! I still use Sculpey a lot – all of my millefiori canes are made of it – but I make sure that the piece is mostly made of Premo, if it needs to be strong.
You have no idea how much encouragement this posting gave me. I have kinda put the clay aside since I had a job “fall into my lap.” But I keep telling myself I will get up to my craft room and pick up where I left off. I just needed that “something” to motivate me. I think you just gave it to me! Thank you!!!!!!
I am so glad to hear that! Enjoy your clay time 🙂
Thanks for the great ideas! I have been wanting to try this for a long time. I have the pasta machine, cutter, clay and they have all been sitting here for so long. Did you do a tutorial for your cute little stockings you made with the curled up toes? Those were really sweet and I’m sure they are not for a beginner.
See what Viv (VivLyn) has been blogging about: More Peeks
No, I haven’t written up a tutorial for that. I will probably save it for Christmas 2009 🙂
[…] Clarke of The Polka Dot Cottage has a wonderful article up on her blog right now, titled “So you want to try polymer clay.” it’s full of great advice, tips, recommendations for books, and encouragement. If you are […]
This is a great post, Lisa! I linked to it from the Craft Gossip blog! Hope it sends some traffic your way.
See what Julie has been blogging about: Good Advice for Beginners!
I started too with that children’s book by Sherry Haab and the rest is history.
I did not even know about polymer clay before.The things you find in children’s books!
Hi -I am excited to find your site today. I have made an adorable fairy door out of polymer clay. One issue – I sealed it with faux indoor/outdoor sealer and it is now sticky. I can’t put it outside unless I don’t mind mother nature particles sticking to it. Argggg. What do you suggest.
Thanks,
Jennifer
Hi, Jennifer. Sorry to hear about your fairy door! Some sealers are just not compatible with polymer clay, as you unfortunately learned firsthand. I’m not sure if anything can be done to save the fairy door you already made, but if you try again, and you still want to coat it with something, you’ll want to choose a product that doesn’t react with the plasticizers in the clay. Future floor polish, believe it or not, is a tried and true choice. There’s more good information on the topic, and plenty of other options, at glass attic. Hope this helps!
Hi Lisa, I found your site today and am busy making buttons. I do have one question so far, where do you find the 3/4″ and 1 1/4″ round cutters? I checked all the stores in my area this morning. Hobby Lobby, WI Craft Mart, JoAnn’s, Vanilla Bean. Is there a place on line?
Thanks
It’s hard to find them in person, although you can sometimes get lucky and find them at Michael’s. Sometimes in the cake-decorating aisle. Online, try Amazon or Polymer Clay Express.
[…] So you want to try polymer clay – a list of supplies, tools, and recommended reading/viewing for those just getting started in polymer […]