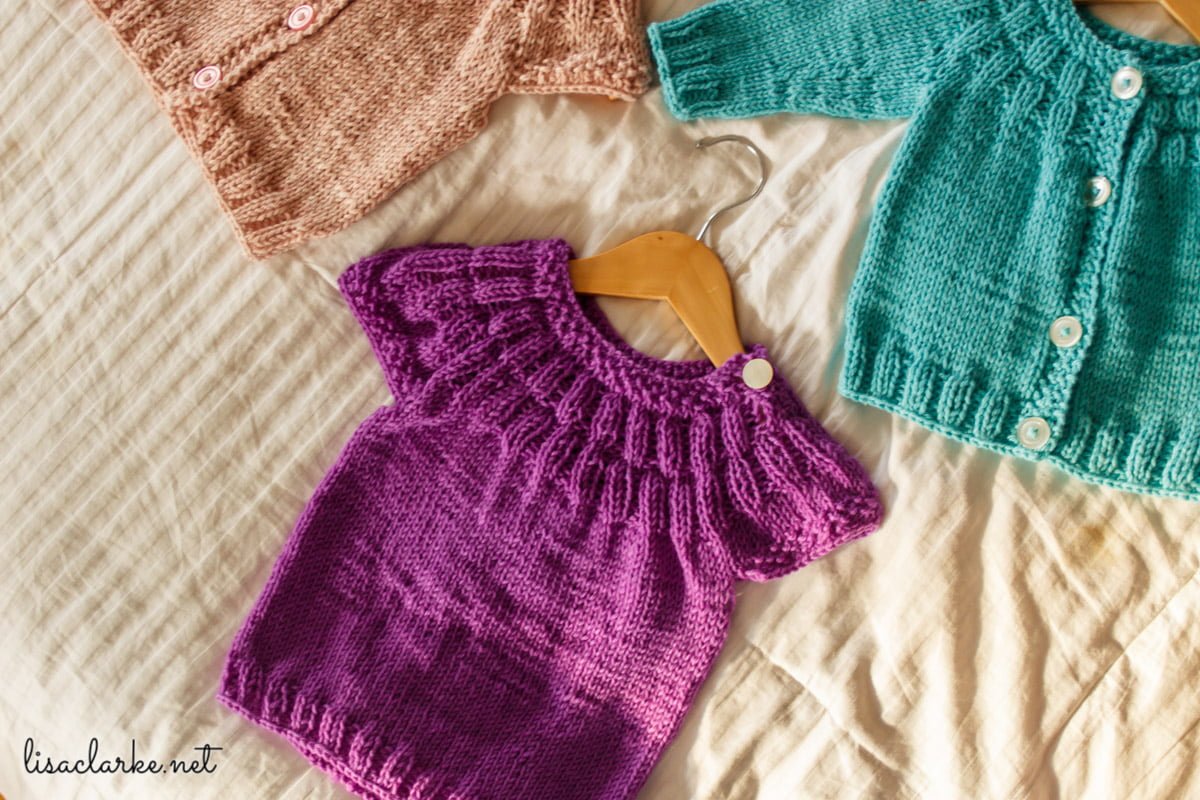
Here’s a little something I had to teach myself when I was writing Everyday Baby: how to join two button bands together to make a placket for the shoulder.
I had a surprisingly difficult time finding a good illustration of this process online. So, even though I tried to explain the process clearly in words, I thought maybe the internet would benefit from having pictures of this somewhere!
I am sharing this specifically in reference to the Everyday Baby knitting pattern views C and D, but I suspect the illustrations could help in understanding any pattern where stitches need to be overlapped.
So, we’re talking about a top-down seamless pullover pattern. This kind of pattern is often knit entirely in the round. However, in this case, I wanted to make it easier to put over a newborn’s head, so I wanted a button placket to add a few more inches to the neck circumference when the button is unfastened.
To make a button placket, you must begin the knitting the yoke flat (back and forth) for several rows before overlapping the first and last stitches of the row and converting it to an in-the-round knit.
It’s less complicated than it sounds. Have a look:
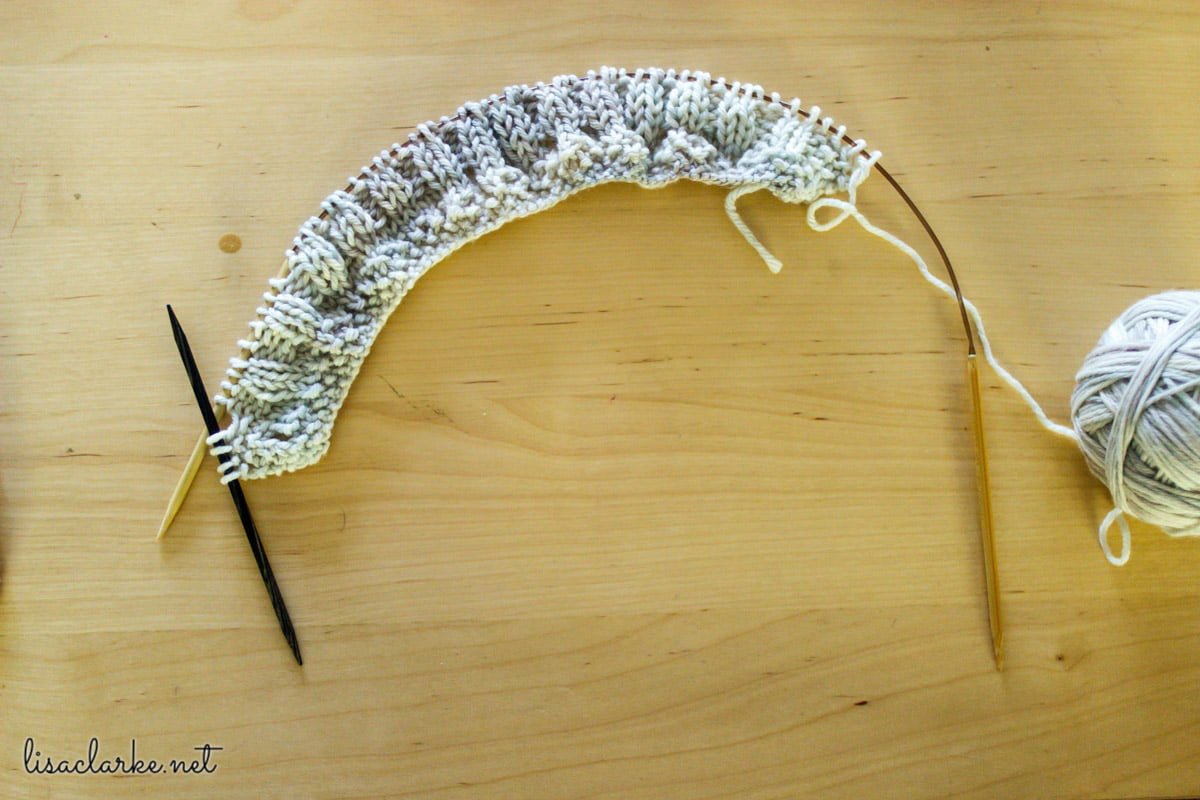
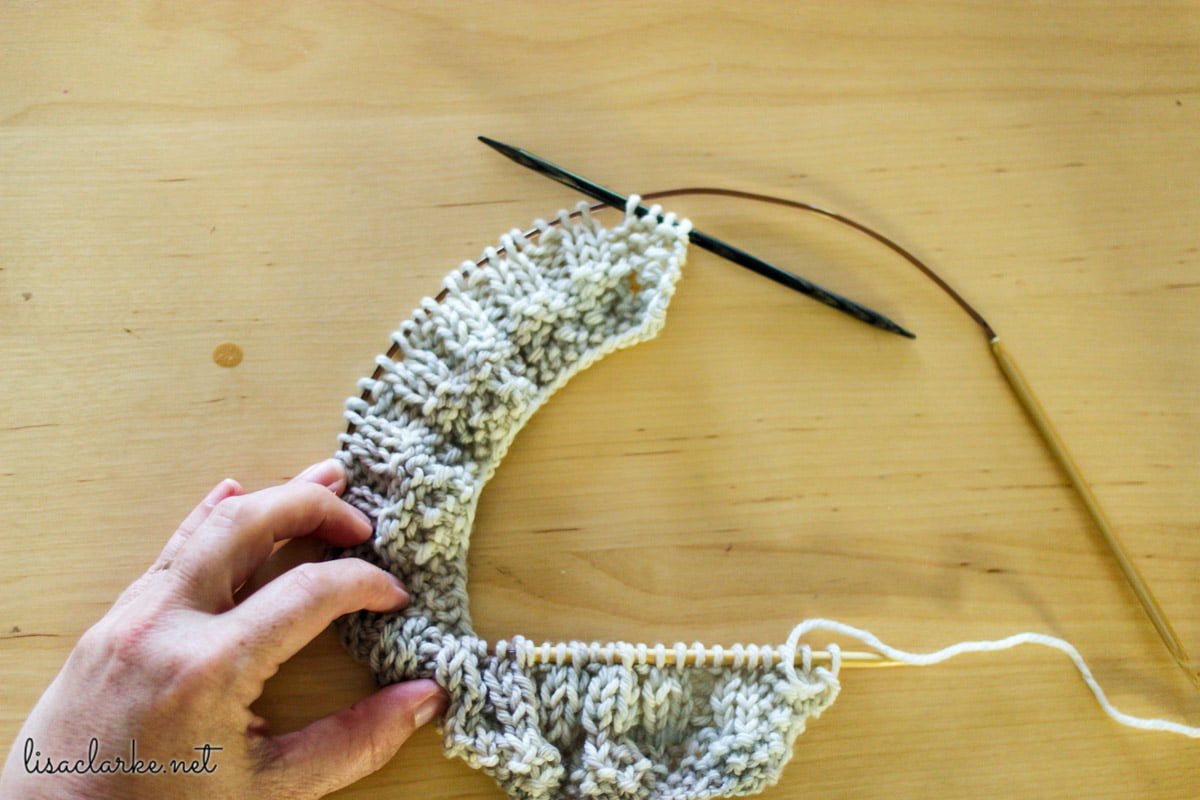
Here is our sample Everyday Baby pullover (view C or D) after 10 rows of knitting. We’ll be joining to work in the round on Row 11, which is a right-side row. Notice that we are currently looking at the right side of the work, and the working needle (where the tail is coming out) is on the right.
We slide the work to the end of the left needle, and slip the last four stitches onto a double pointed needle. (It’s four stitches for this pattern, but if you have a wider or narrower placket, you would slip as many stitches as there are in your pattern’s button band.)
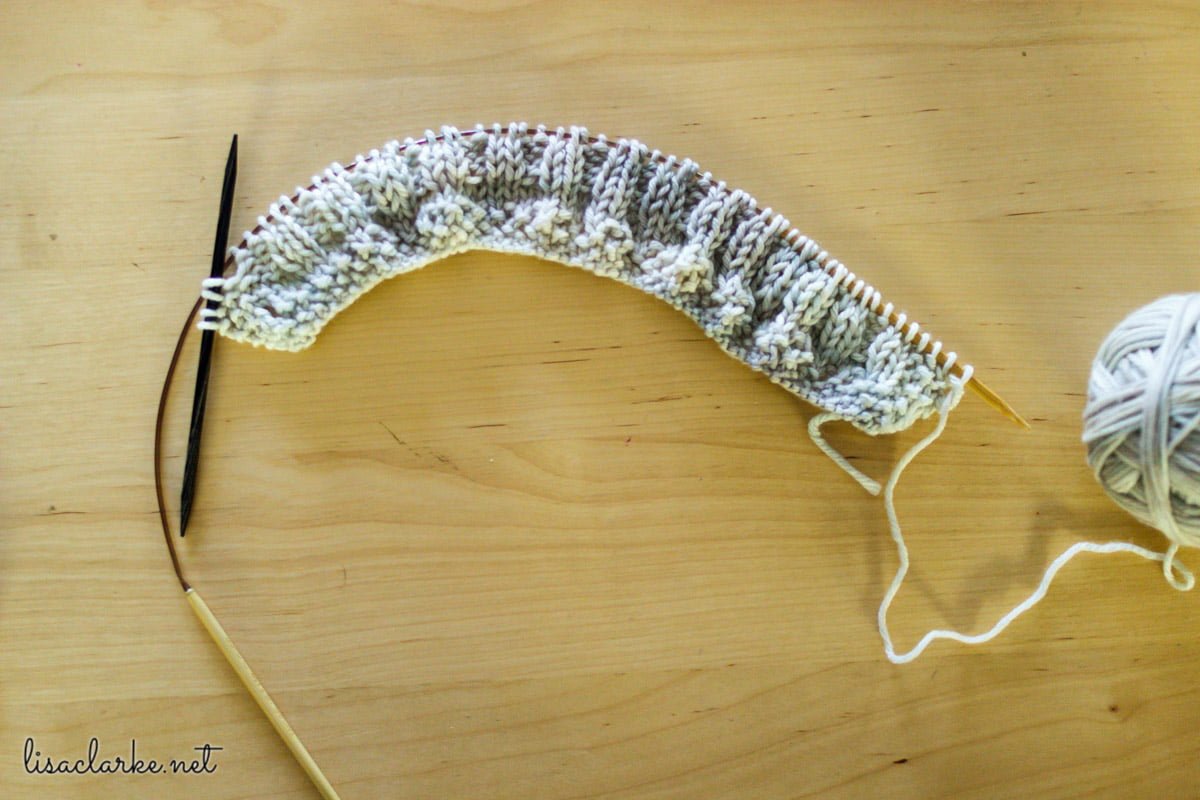
Slide the stitches back over so that the tail is at the end of the working needle on the right.
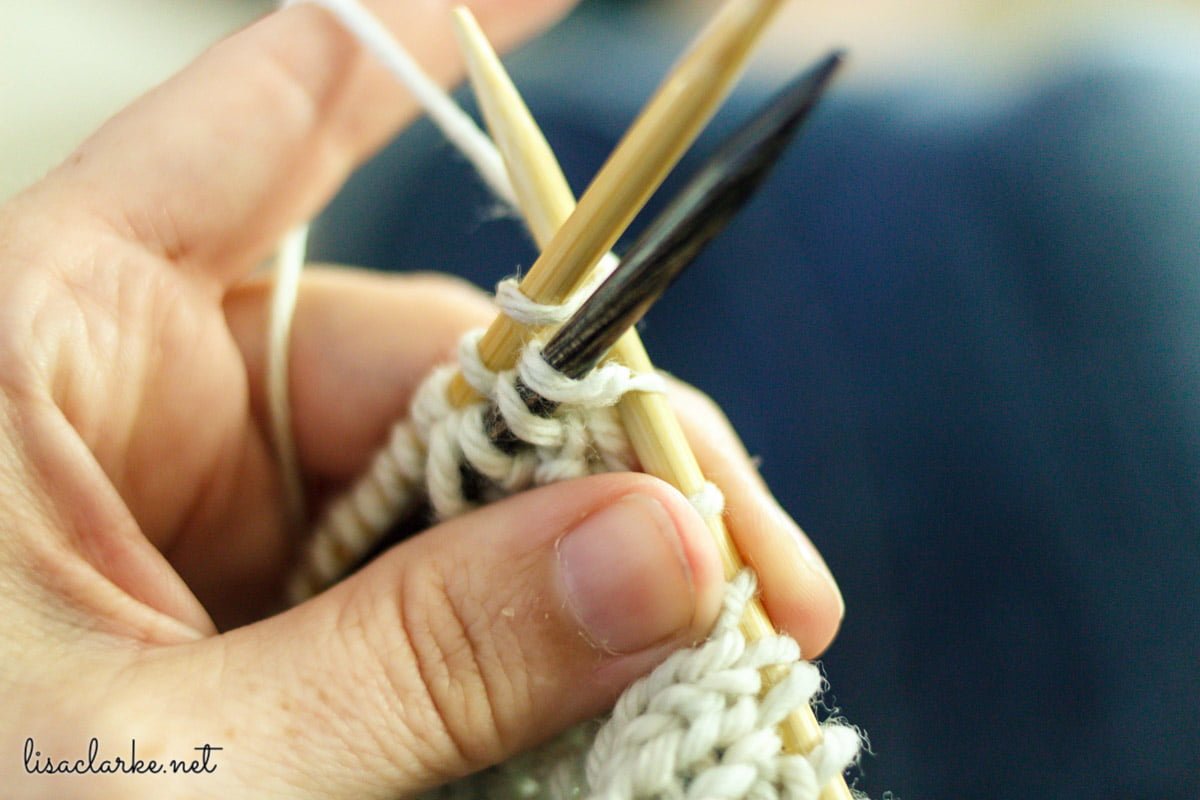
Making sure to keep the right side of the work facing you, take the double point needle and bring it around the back…
…and in front of the working needle so that the button band stitches on the double pointed needle are overlapping those on the circular needle. Remember, you are still looking at the right side of the work.
Hold the circular needle and the DPN together. We’ll be knitting with them as if they are a single needle.
For this pattern, we’re doing a k2 p2 rib. Slide your needle into the first stitch of both the DPN and the circ, and knit them together as if they were one stitch. Do the same with the second stitch of each needle. That’s our k2.
Purl the third stitches from the two needles together, and repeat for the fourth stitch. That’s our p2, and it completes one k2 p2 repetition and joins the work together at those four stitches.
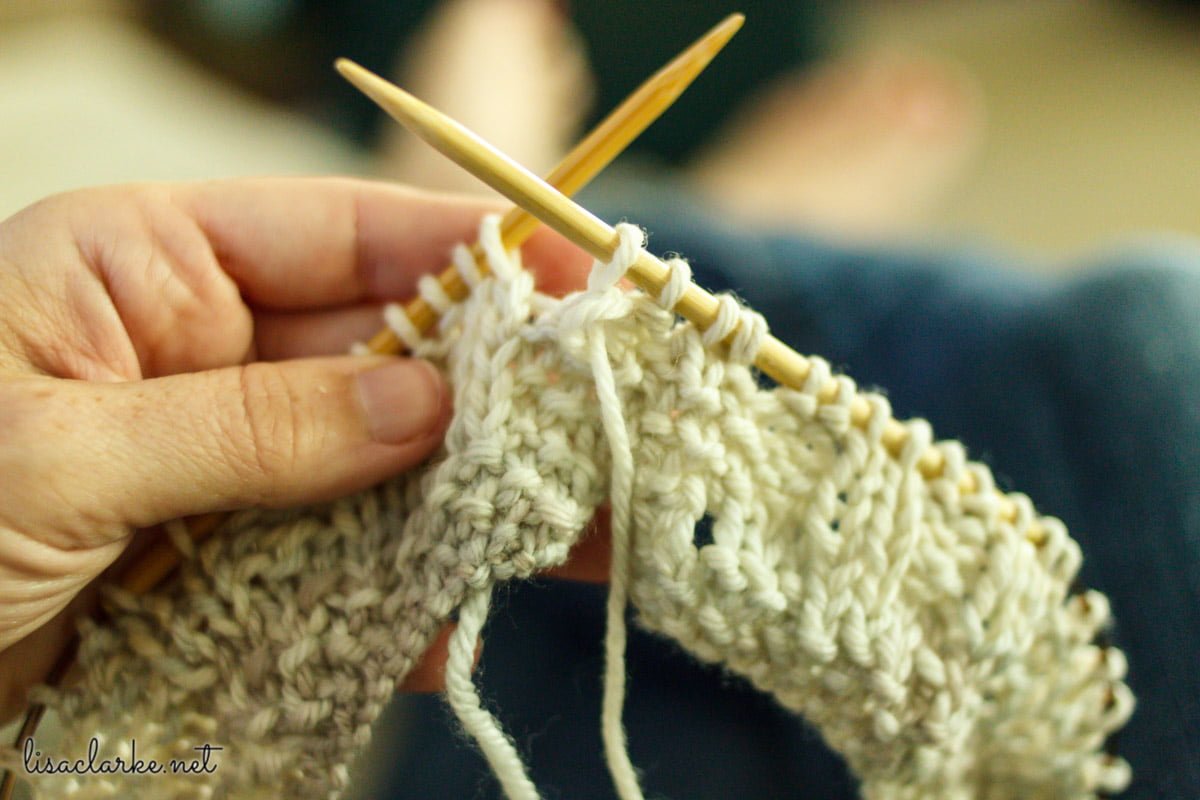
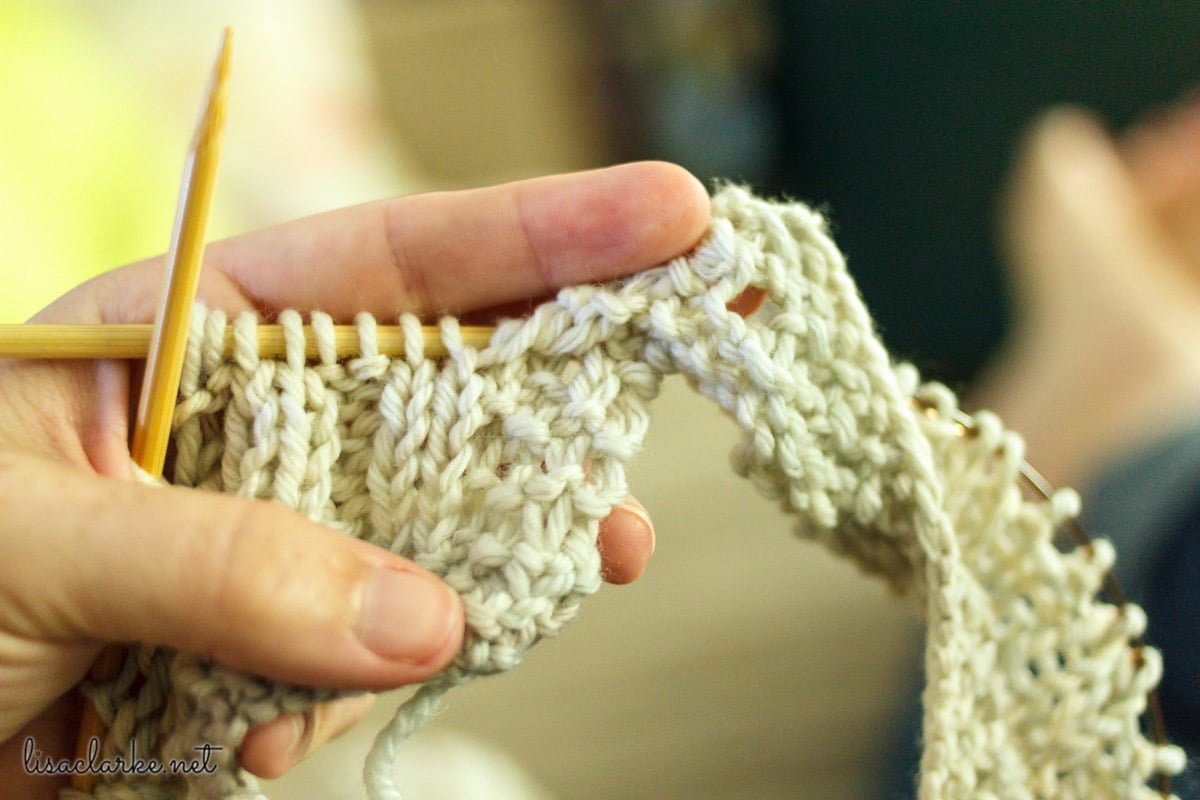
See? The work is now joined for knitting in the round. Let’s knit a few more stitches so you can see that better:
There. You can see a v-shape where the two sides overlap.
The piece is anchored together at those four stitches.
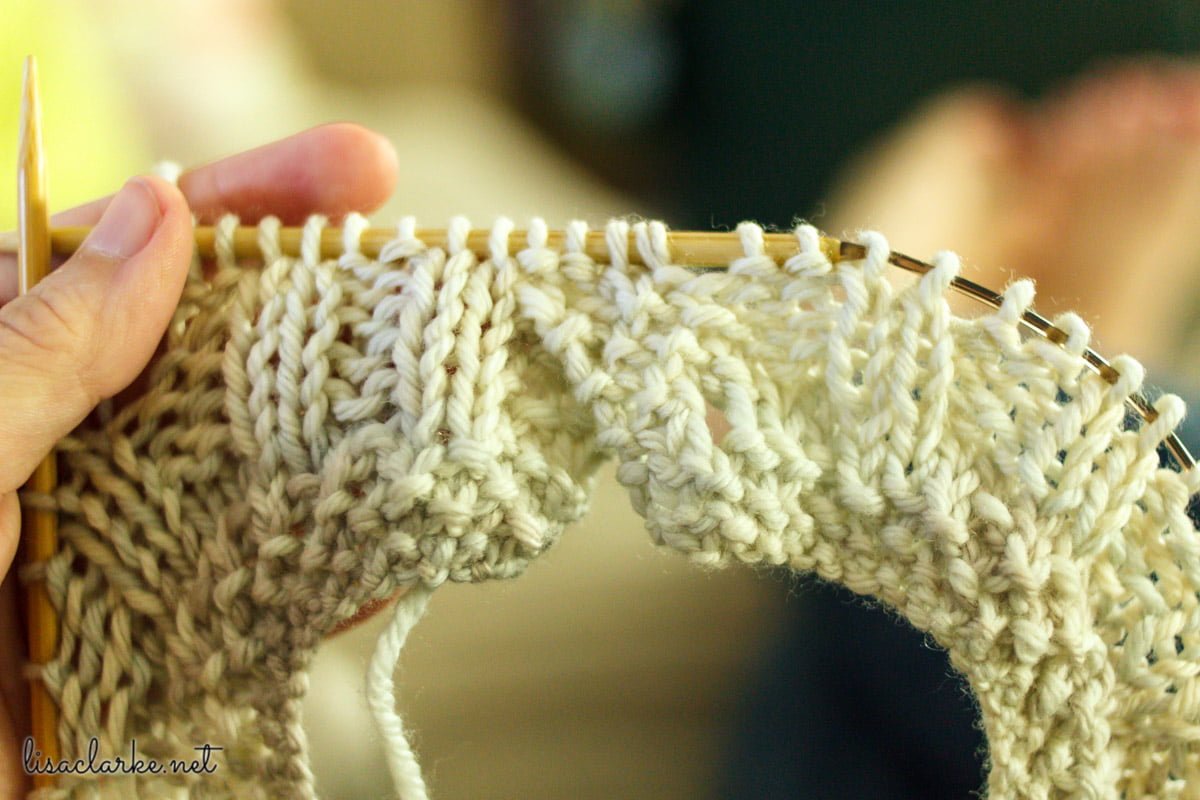
Imagine my knee is a headless toddler. (I know, weird.) This is how the sweater would look on her shoulders. My finger is where the button would go, and that is also the spot where the two button bands overlap and join at their base.
From this point on, the sweater is knit in the round.
I hope this clears it up. If you have any questions, let me know!
BTW, I really thought I was done knitting this pattern after all of the samples I’d done last week, but when I picked up the needles to shoot this photo tutorial, I found I wanted to keep going! It really is such a simple and quick knit – near instant gratifiction – if I do say so myself. And I love the way it feels in this yarn (Knitpicks Swish). I frogged this when I was done with the sample, but I think I am going to cast on again and make another. Maybe for my older niece this time 😊















Lisa this tutorial is lovely! Your instructions were very clear, I was so shocked I had done this just right!
Oh, good, I’m glad! 🙂
Thank you for your tutorial on this! I was able to easily understand what I was supposed to do!!! Helped me a lot.
Again thank you for sharing this will be bookmark for future use. Lol
I’m so glad to hear that! Happy knitting 😊
thnks for this tutorial – you’ve saved me a lot of time and frustration:(:(:(:(:(
I’m glad to hear that! Happy knitting 🙂