

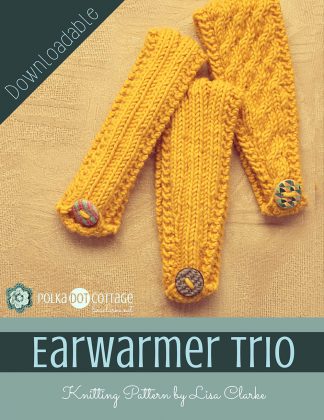
Ok, loom-knitters, as promised, I have a little something extra special for you today. Not only am I going to share the loom version of the simple ribbed earwarmer from this collection with you, but I’m going to explain to you how I convert a needle-knit pattern to a loom-knit pattern. And there will be a video, too.
See? Told ya I’d take care of you 🙂
First, I’ll share the original pattern. Then we’ll discuss things like choosing the appropriate loom for the task, and knowing how to deal with right-side and wrong-side issues. After that, we’ll translate the pattern, I’ll show you (via video) how I loom-knit it, and I’ll give you a tip for translating patterns with more complicated stitches.
P.S. You needle knitters can take the pattern below and run with it, if you like. Consider it a free excerpt from the ebook.
The original pattern as written
Materials and Tools
1 skein Valley Yarns Berkshire Bulky in Gold (100g/141yds)
1-inch button
Size 10 straight needles
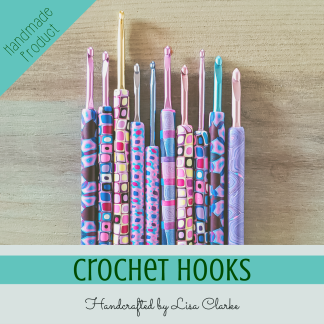
Size J crochet hook
Yarn needle
Scissors
Directions
CO 14 st.
- k2, p1, k3, p2, k3, p1, k2
- k3, p3, k2, p3, k3
Repeat 1-2 for 21″ or until desired length.
BO, leaving last st on needle.
Transfer stitch to crochet hook and ch 5.
Attach to beginning of bind-off row with sl st.
Fasten off.
Weave in ends.
Sew on button.
How to rewrite the pattern for a loom
Translating a pattern can be easy (if it’s a bulky tube, for instance) or more complicated (like, if it’s a fine-gauge lace scarf with shaping). Here are some of the things you need to consider:
Evaluate the pattern’s rewrite-ability
Determine if translating this pattern is worth your time by asking yourself a few questions:
- Do I own a knitting loom in a gauge that matches the pattern’s gauge? (more on that below)
- Is there a lot of shaping in the pattern, or other advanced techniques that may prove to be complicated (if not impossible) on the loom? For example, a circular knit with increases and decreases will pose a problem unless you have an adjustable loom. And even if you do have an adjustable loom, adding and subtracting the appropriate number of pegs for each increase and decrease may prove to be more trouble than it’s worth.
Rule of thumb: if the pattern is a bulky-yarn rectangular knit with no shaping and 48 stitches or less per row, you should have no problem translating it to use with a round Knifty Knitter.

Speaking of Knifty Knitters, if that’s what you currently own, and if you want more options, consider investing in a Martha Stewart loom. I resisted this for a long time, but I finally bought one when I was unable to get this earwarmer project to look like I wanted it to. The Martha loom is really cool. You can configure it into many different shapes and sizes, and the pegs are removable, so you can control how far apart they are from each other. The pegs also come in two different sizes, which is awesome. Essentially, what I am saying here, is this loom kit offers you additional sizes and (more importantly) additional gauges for only a few dollars more in price than a Knifty Knitter round loom set. I highly recommend it.
Select the appropriate loom
Ok, so my raving about the Martha loom aside, if you want to maintain the look and feel of the original pattern, you need to choose a loom (and a yarn) that will result in the same gauge as the pattern.
Let’s just assume that you are already using whatever yarn the pattern author suggested. That leaves you only to compare needles and looms. I used trial and error for this myself and came up with these basic guidelines:
If the pattern calls for size 13 needles, try a Knifty Knitter, or a Martha Loom with the large pegs positioned in every other hole.
If the pattern calls for size 8 needles, try a Martha Loom with the small pegs positioned in every hole.
Now, of course, there are many other needle sizes than these, and your own personal knitting style will also come into play. If the gauge of the pattern is crucial, then knit a swatch before you begin, and check your gauge once and for all. Once you’ve checked your gauge, there’s not a lot you can do to change it if you’re using a Knifty Knitter, but if you have a Martha Loom, or other loom with removable pegs, you can play around with the configuration to try and adjust your gauge to what it needs to be.
If you just can’t make it work with what you own you have three options:
- try a different yarn (you risk changing the character of the finished object, though)
- buy a new loom in a more appropriate gauge
- scrap the project and try something else
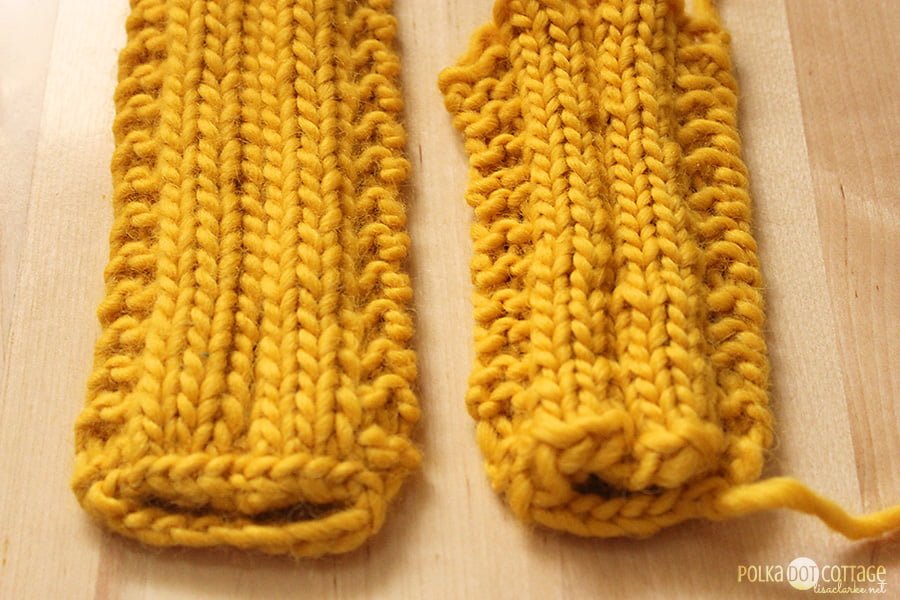
Full disclosure: my own experience knitting the headband on the Martha loom resulted in a slightly smaller gauge than the one I knit with needles. It actually also made a puffier fabric, where the ribs were more well-defined. I liked it that way, however, and decided to keep it.
Think about right sides and wrong sides
If you are translating a circular knit, then congratulations, you are already finished: in a circular pattern, the right side of the work is always facing you, whether you use needles or a loom. Therefore, the pattern is the same. (Hooray!)
If you are knitting a flat piece, there are other considerations. Think about how flat pieces are knit on a loom and on needles (assume we have a 9-stitch pattern):
- Loom: knit row one, stitches 1-9, right side (RS) facing you, then switch direction to knit row two, stitches 9-1, RS still facing.
- Needles: knit row one, stitches 1-9, RS facing you, then flip the work over to knit row two, stitches 9-1, wrong side (WS) facing.
Got that? Basically, when a needle-knit pattern tells you to do this on row 2: k3, p3, k3
it is really talking about doing those stitches on the wrong side of the work. But with a loom, we never work on the wrong side, and so we need to consider what the RS of the work looks like when we k3, p3, k3 on the WS.
Knit and Purl are the opposites of each other: when you knit on one side, you see a purl stitch on the other. When you purl on one side, you see a knit stitch on the other.
Therefore, if you are knitting row two with the RS facing, but the original pattern is for needles where the WS is facing, you need to knit the opposite of what is written. The example above would be translated as: p3, k3, p3.
The rule: RS rows are translated exactly as written. WS rows are translated as the opposite of what is written.
This is the most important concept when translating from needle-speak to loom-speak, so it’s worth reading this section again if it hasn’t quite sunken in!
Translate
Here is our simple needle-knit stitch pattern:
- k2, p1, k3, p2, k3, p1, k2
- k3, p3, k2, p3, k3
Row 1 is a RS row and therefore we don’t need to change it.
Row 2 is a WS row and therefore needs to be the opposite.
Here is our new loom-knit stitch pattern:
- k2, p1, k3, p2, k3, p1, k2
- p3, k3, p2, k3, p3
The other elements of the pattern (the cast-on and bind-off for instance) don’t need to be changed. Needle-knitters and loom-knitters have their own techniques for these things, but they don’t need to be spelled-out in the pattern. It’s just assumed that the basic versions for each craft will be used, unless otherwise specified.
The loomified pattern

Materials and Tools
1 skein Valley Yarns Berkshire Bulky in Gold (100g/141yds)
1-inch button
Martha Stewart Knitting Loom, with small pegs in every other hole
Size J crochet hook
Yarn needle
Scissors
Directions
CO 14 st.
- k2, p1, k3, p2, k3, p1, k2
- p3, k3, p2, k3, p3
Repeat 1-2 for 21″ or until desired length.
BO, leaving last st on loom.
Transfer stitch to crochet hook and ch 5.
Attach to beginning of bind-off row with sl st.
Fasten off.
Weave in ends.
Sew on button.
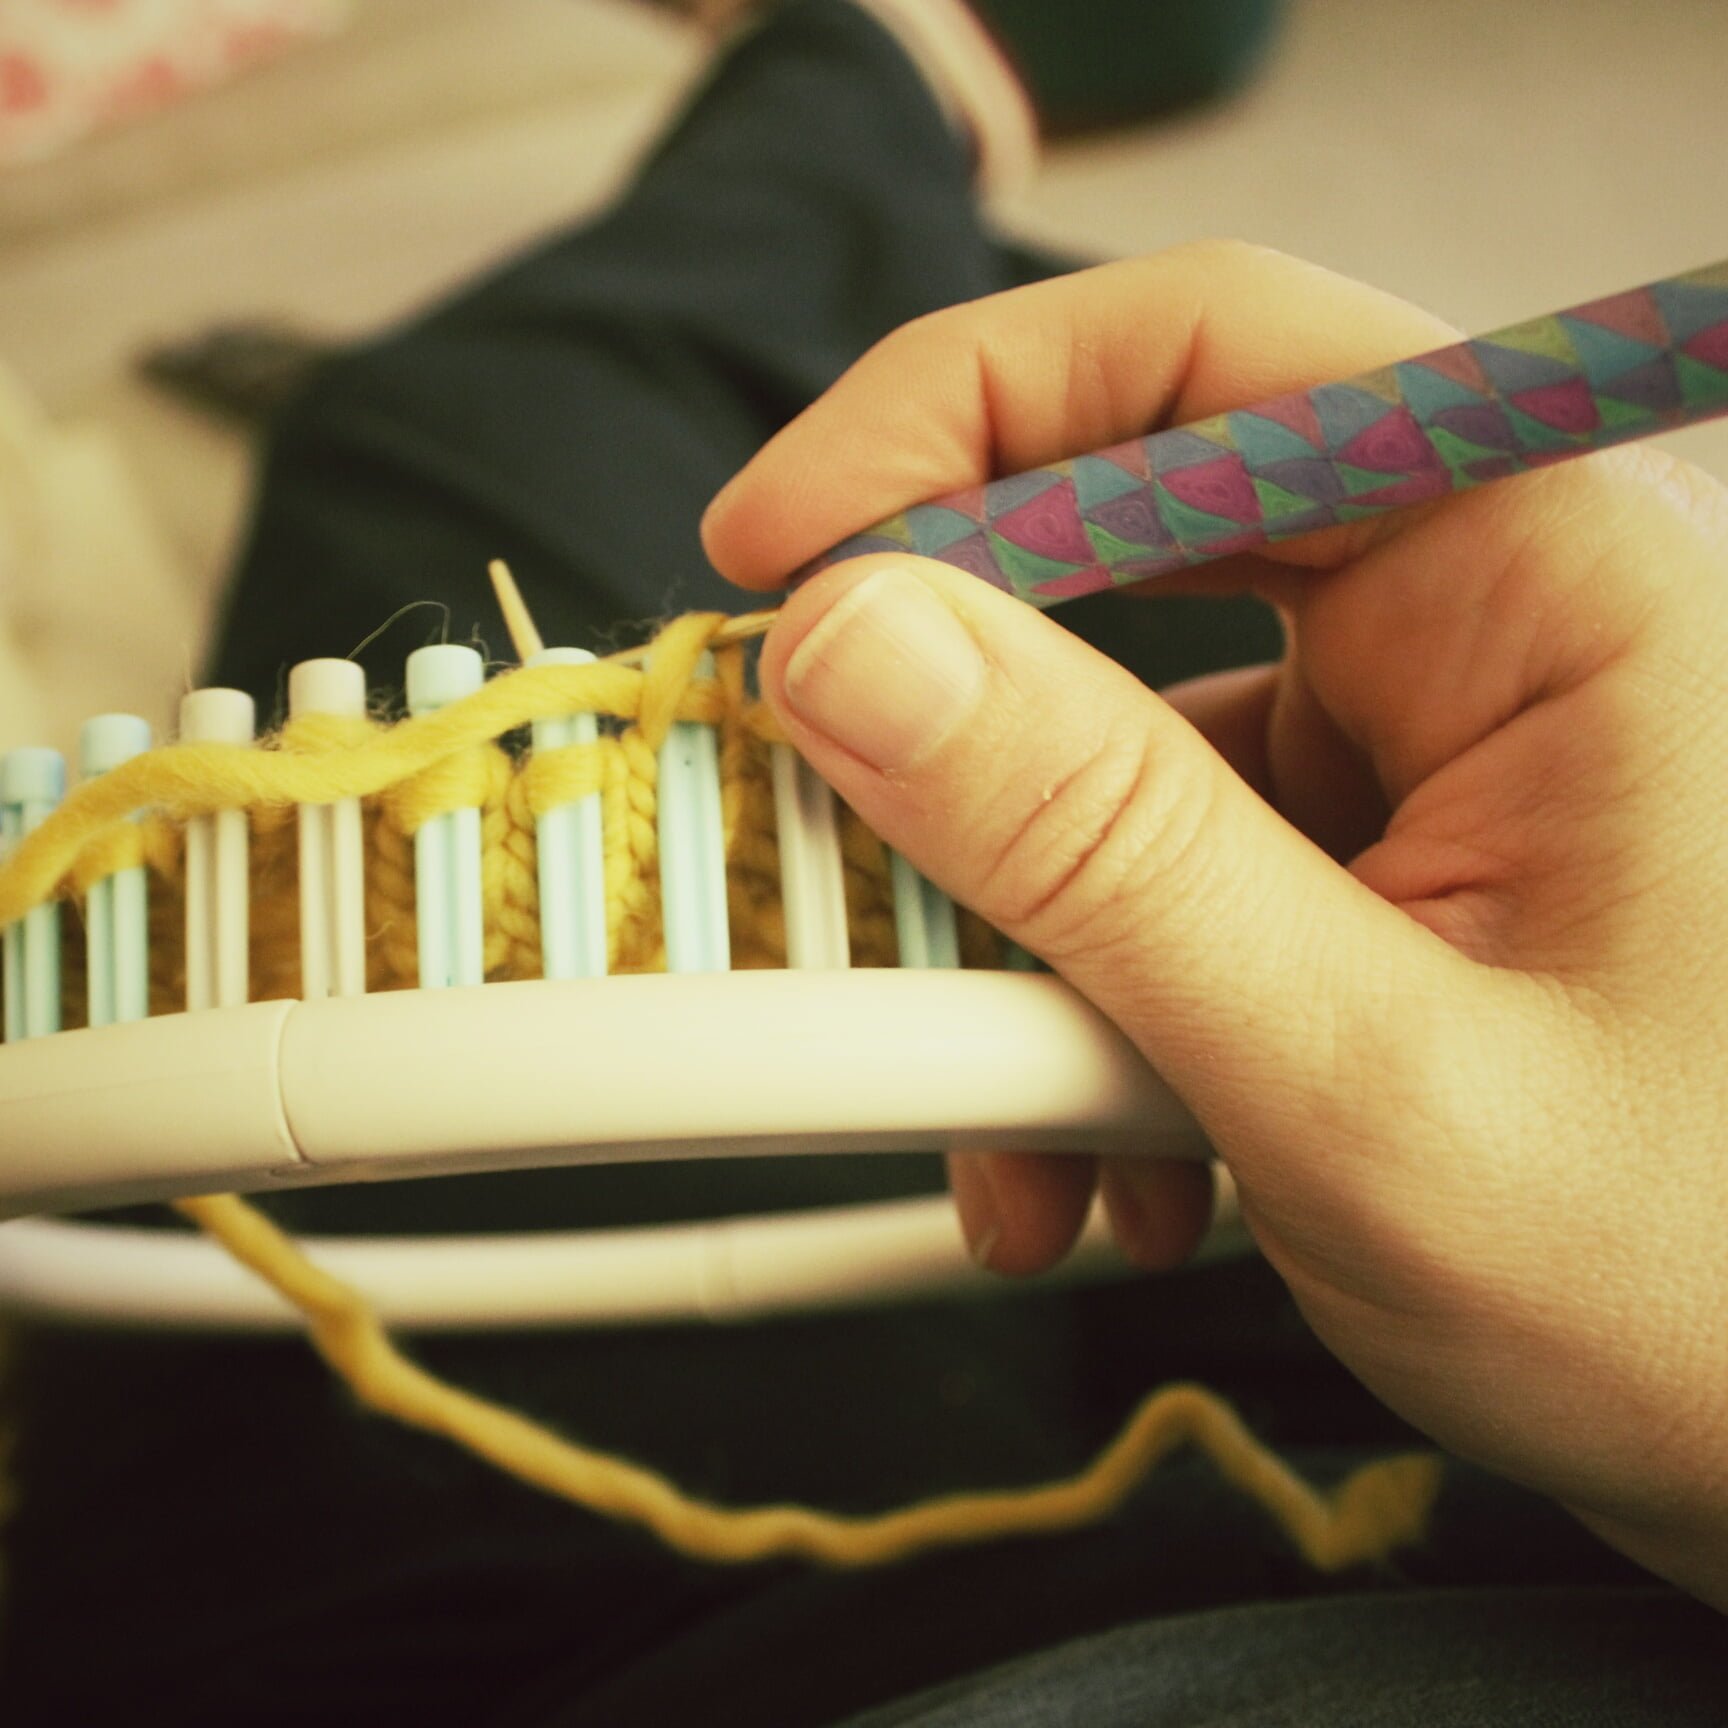
Demonstration
Now that you know how to translate a pattern, it’s time to loom knit this one! The video below takes you step-by-step through the process of loom-knitting the earwarmer. The e-wrap cast-on, knit stitch, purl stitch, and basic bind-off are all demonstrated.
Do It Yourself!
If you have an interest in trying your hand at translating the more complicated versions of this headband, go for it! It’s available for purchase below (or through this link).
Here’s a tip: during your translation, if you come across a stitch you don’t know how to do on the loom, chances are someone has demonstrated it on the internet. Search YouTube for it! For example, if you don’t know how to k2tog on a loom, enter “k2tog knitting loom” in the search box at youtube.com. You should get lots of demonstrations to choose from.


Thank you so much for the instructions and especially for the video! I’ve made a few simple hats on the loom but that has been it. Can’t wait to try this!
I’m so glad you like it! Let me know if you have any difficulty – I’d be happy to help 🙂
im slightly struggling when u say loom the ws i
do u mean.
(
CO 14 st.
row 1 k2, p1, k3, p2, k3, p1, k2
row 2 p3, k3, p2, k3, p3
)
u purl when u knit and kint when u purl
?
or do u mean
row 1 is now row 2
What I mean is this: when a needle-knit pattern has a wrong-side row, doing that particular row on a loom has to be translated as the opposite stitches.
So, if the needle pattern asks you to knit, you need to purl on the loom.
Rows 1 and 2 always remain rows 1 and 2.
Does that make sense? Or did I misunderstand your question?
thanks hun that making more sense now 😀 xx
thank u lisa. this. great been try. to figure this out since i started looming
Oh, you are very welcome – I hope it helps!
Hi there!
Now I am getting used to loom knitting, I can suggest you some improvement to that simple pattern.
1- Cast on row : should be crochet cast on.
2- Row 1 : for a better look, always knit stitches on ALL pegs on the row following crochet cast on.
I am now trying it with my MS loom and so worsted weight yarn Bergere de France Sport (supposed to be knitted with 3.5-4 mm needles). The thickness is just fine.
The headband sounds quite wide, but it is still early to have a proper idea as I only knitted a few rows…
Hugs.
Hi there,
Me again. I finished my headband using the easy pattern and have a few points to share.
First of all, I obtained very nice ribs and that made the result not as wide as I thought, so the wideness is fine.
I had a try following instructions for the closure : little chain at the end of the band and button at the other end, but got very disappointed. As soon as we give some tension to the band the end with the chain takes a bad shape which I really dislike. So I ended up undoing the chain and removing the button and sewing the two ends together.
For my next headband, I will make a proper button hole a few rows before the end of the headband.
Another thing : my crocheted cast on and cast off trend to widen a little bit the ends. Maybe I made them too loose.
I appreciate all of your feedback! I’ve never done a crochet cast-on, so it’s nice to know how it compares to the ewrap. \
I hadn’t gotten a chance to reply to your first comment, but I was going to mention exactly what you discovered – that the well-defined ribs cause the headband to be narrower than it first looks.
As far as the button hole goes, I’ve done all of mine with the crochet chain, and I like the way they look. It’s probably one of those things that is a matter of taste 🙂 I’m glad you found an alternative that pleases you!
Hi dear Lisa!
Thanks for your answer…
I still have not tried making a button hole. I will let you know if it works well, once tried.
Now, trying another headband pattern from another person before getting back to yours.
Oh, and I forgot to tell you that your handmade buttons looks brilliant.
hmm crochet cast on… i would say try it out
but i cant get that right so i always e- wrap and basic bind off at moment
id love learn more
have u heard of
momma eyelash baby blanket? cant seem find a video for that either 🙁
No, I haven’t heard of that blanket.
I don’t really loom knit much anymore, to be honest. I prefer crocheting when it comes to blankets.
I just wanted to thank you and thank you again. I’ve been looking tirelessly for layman’s instructions on converting needle to loom and yours is the first one I’ve understood.
Thanks again.
Oh, I am so happy to hear that! Thanks for taking the time to let me know 🙂
Thank you so much! I have been looking all over, and your directions on how to do this are so much more understandable!
BTW, I would love an article on converting knitting graphs too. 🙂
I’m so glad I could help!
Knitting graphs might prove to be more of a challenge for me, since I rarely use them. I’ll have to give that some thought!
I just want to thank you SO MUCH for your simple to understand instructions! Although I began knitting about six years ago on knitting looms I put them aside for the same reasons I didn’t like the patterns I found and couldn’t understand some of the instructions I’d found for translating. I then proceeded to learn to knit with needles and although I figured out the process and understand it well enough I put down knitting for several years and worked in other crafting areas. Picking up the needles to make some Christmas presents I have found I have carpel tunnel and within a few rows my left hand will be asleep and I’ll have to stop. So I tried using the loom and lo and behold I can still do that without the carpel tunnel interfering! The excitement of translating all the patterns I have saved ensues! I can’t wait to get started. Thanks again.
I am so happy to hear that! And I’m glad your hands are ok with the loom. I have heard that it’s easier on the muscles and joints.
My brother recommended I would possibly like this
web site. He was once entirely right. This put up truly made
my day. You cann’t believe simply how so much time I
had spent for this information! Thanks!
I have loom knit for years but I still don’t know how to purl. I know the knit but how do I purl? I always have to get out the needles and knit the ribbed part. Halp!? Michele
Oops, I see I never answered this! The best way to learn, I think, is to see it done. Here’s a bunch of videos that may help. Good luck!
Is there a way to translate loom patterns to needles? I’m beyond broke and can’t afford new looms right now. I love this one pattern but can’t do it cause I haven’t got a 62 pin loom. It’s the lace wrap in the learn to loom knit book. I understand basic knitting stuff, but how does one yrp, decrease, and e wrap decrease?
I am still confused about converting the number of cast on stitches. For example , a particular pattern I’m interested in is a knit Tam, with a cast on of 90 stitches as per needle instructions, with a gauge of 4 stitches per in. What should be done? Thank you so much for this instruction about conversion!! So good.
Well, ideally you would have a loom with a similar gauge and 90 pegs, but I’m guessing you don’t.
If the pattern requires 90 c/o sts at 4 sts per in, that makes 22.5 inches of knitting. You will need to knit a swatch on your loom and figure out the loom’s gauge with your chosen yarn. Let’s say it’s 3.5 sts per in. Multiply 3.5 by 22.5 and you get 78.75. Obviously, you can’t cast on a fraction of a peg, so you’d probably round that up to 79 pegs.
Keep in mind, though, that this only works if there is no special stitch pattern that requires 90 sts to work. And also, if the loom’s gauge is drastically different than the pattern’s, there will be a difference in the drape of the Tam. This is because the density of the stitches in the fabric will be different, even if the final measurements are the same.
I hope this makes it a little more clear. Let me know if you have more questions!
can you convert, a hat pattern thats crochet, in to a loom hat please email me thank u
My gut says “no.” I don’t know how to copy crochet stitches on a knitting loom, or if there is even a way. I googled it, but nothing useful came up.
I’m confused, how do you know if the original rows for needle knitting are RS or WS? Do you always needle knit the “even” rows (rows 2,4,6) on the WS?
Generally, that is true. Odd rows are RS and even rows are WS. It’s not always true though, and generally a knitting pattern will tell you which side is which. Hope this helps!
Do you know how to convert
“K1 * P3Tog keeping them on your needle, YO, P3Tog again, drop from needle, K1” to fit on a cast on of multiples of 4 plus 1?
The phrases “K1 *keeping them on your needle” and “drop from needle” are confusing!
Thanks!
Danielle
I was just about to tell you that I don’t know what those things even mean for needles, but I figured it out as I was typing 😉
Usually when you work a stitch, you work the new stitch on the right needle, and slide the old stitch off of the left needle when you’re done. In this case, you want to work the new stitch onto the right needle, leave the old stitch right where it is, and then work it again.
I’m not entirely sure how this translates into a loom pattern. I’ll be honest and tell you I avoid anything with increases and decreases (like P3Tog) because you have to move a lot of stitches around on the pegs, and I find it to be more trouble than it’s worth. If you can find a video tutorial for a loom-based p3Tog, then maybe it will become obvious after seeing it done? Essentially, you want to partially work a purl stitch on 3 pegs, and then fully work it again on the same 3 pegs. If I’m understanding correctly, this will turn 3 purl stitches into 2 in the end. But how to do that? I am at a loss. Sorry I couldn’t be more help!
Hi Lisa, I downloaded a pattern for a cowl which I thought was for loom knitting. Turns out it was for knitting. I am lucky in that the pattern calls for working it in the round (circular needles) so there is no RS or WS. It is all worked RS. My biggest problem is that she wants a cast on of 136. Obviously, my knitting looms only go up to 41, but she did say it could be made shorter or longer using 4 multiplies. So, I divided the 136 by 4and it comes out to exactly the number of rows she works in her knitting pattern, 34. So, should I cast on with 34 on my loom or am I completely wrong? Casting on with the 34, as a width, seems very short around the neck, but then again, cowls are not very wide, just long, longer if you want to double it, which I do want to do. My question is how many should I cast on? All I have is the big yellow knifty knitter loom, or 41 pegs, can’t remember right now. Once I get the cast on correct, I can follow the pattern as it is all knits and purls, super easy. Thank you for reading this! We definitely need people like you to help loom knitters! Best of the holiday season to you and your family!
Hi, Ann. Thanks for the nice comments!
It’s hard to answer your question without seeing the pattern. Since you say it is knit in the round, I feel like the cast-on number refers to the part that goes around your neck, not the part that can be varied.
It’s possible I’m picturing it all wrong… is it a free pattern? Maybe I can take a quick look at it, and see if anything jumps out at me.
I’m confused, how do you know if the original rows for needle knitting are RS or WS? Do you always needle knit the “even” rows (rows 2,4,6) on the WS?
If it’s not specified one way or another, then yes, even rows are considered WS rows. Some patterns will explicitly tell you which rows to consider WS/RS rows, but if they don’t, you can assume the even numbered rows are WS and the odd numbered rows are RS. Hope this helps!