

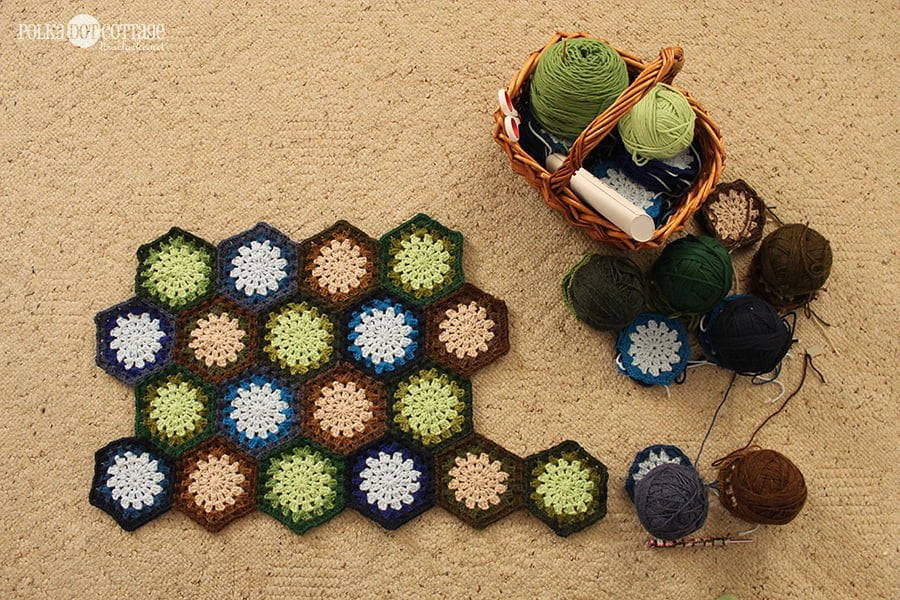
How is everybody doing with their hexagon blankets? I’ve heard from a few of you who said you started – yay! It’s fun to know that I’m not doing this by myself, and I really can’t wait to see how yours are progressing. If you blog about it, be sure to link to your post in the comments, so I (and everyone else) can have a peek!
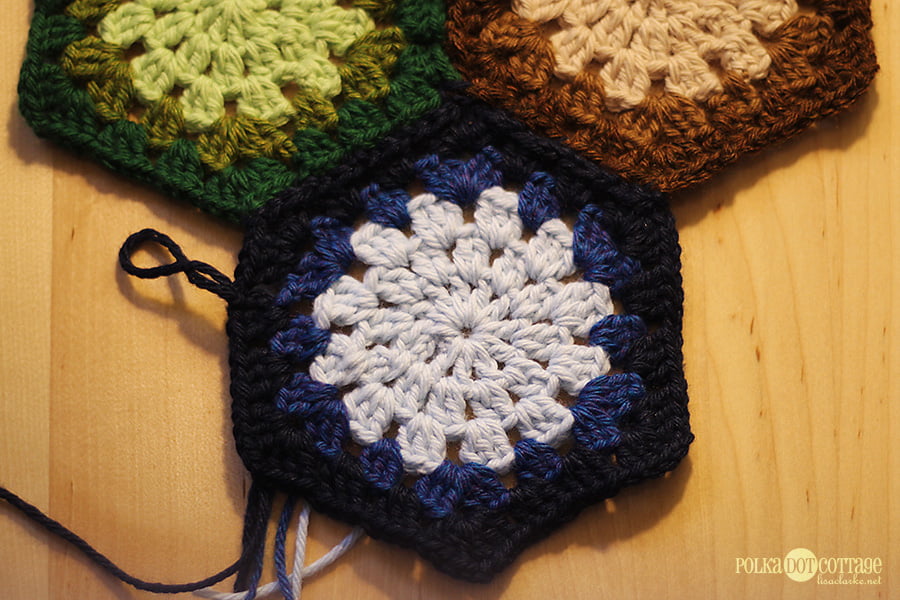
The above image shows how far along I am as of 4pm on Sunday. I suspect by the time you read this I will have at least connected the blue and brown hexes at the bottom right, and maybe connected a few more, too. I always get a bit of needlework done during my evening TV time.
Last week I showed you how to connect one hexagon to another by hooking the last row of the new motif into one side of a previous motif. It’s a versatile technique that you can use on any polygon. I showed it to you with hexagons, but the same goes for squares, triangles, or triskaidecagons, too!
Similarly, when you join a motif into a corner that is created by two previously-joined motifs, the same technique can work no matter how many sides your motifs have (assuming, of course, that they are all regular polygons and are all the same shape and size).
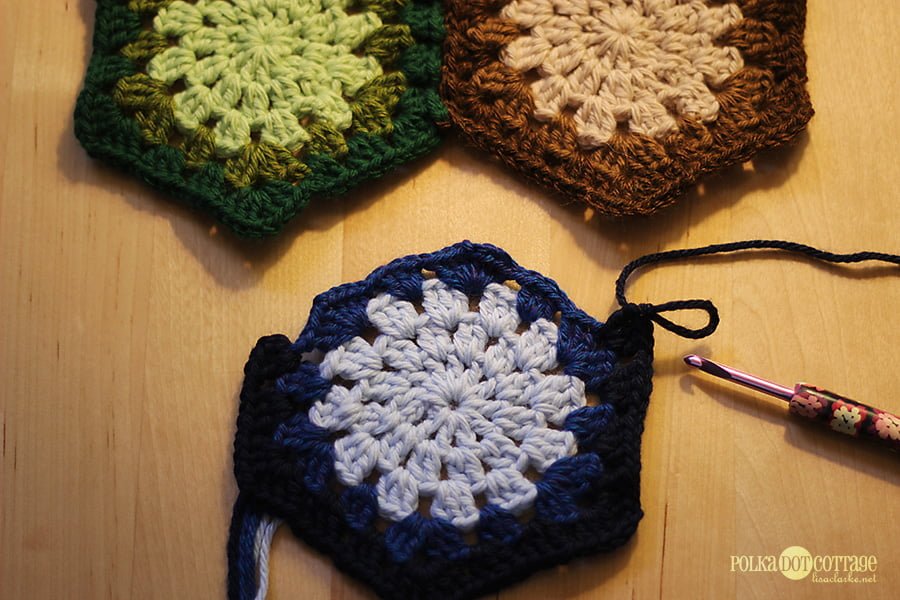
So let’s say you have nearly finished a blue hexagon, and you want to join it to a set of already-connected green and brown hexes.
Work Round 5 until you have two fully-unworked sides left, stopping after you’ve completed the first half of the corner (3dc ch1).
Note: The number of unworked sides is determined by the number of motifs to which you are attempting to join. If you were connecting the blue hexagon to three others, you would leave three full sides unworked. If you were joining it to four, you would leave four unworked. And so on.
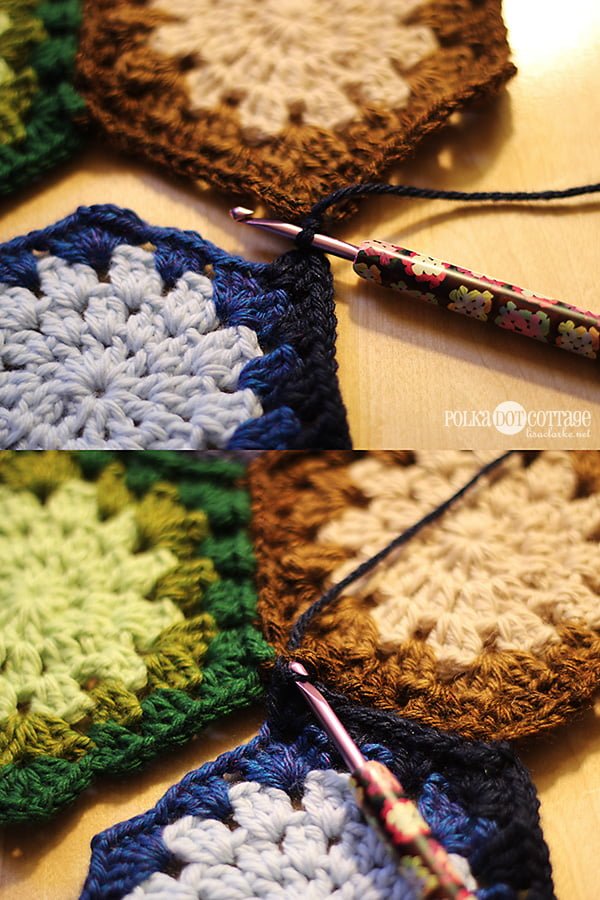
Just like you did when we joined a single hexagon to another, insert the hook into the corner space of the brown hexagon.
sl st in that corner.
Continue with Round 5, following the hexagon pattern, but replacing each ch1 st with a sl st into the corresponding space on the brown hexagon.
Do this until you reach the corner. Work half of the corner (3dc, sl st into corner of brown hexagon).
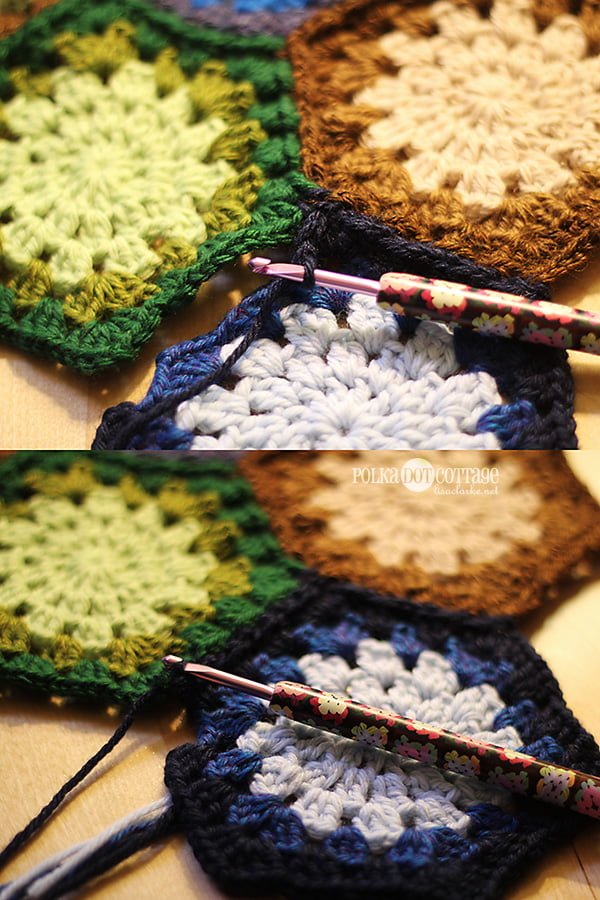
Now we’re going to use the exact same process to connect to the next side.
Insert the hook into the corner space of the green hexagon.
sl st in that corner.
Continue with Round 5, following the hexagon pattern, but replacing each ch1 st with a sl st into the corresponding space on the green hexagon.
Do this until you reach the corner. Work half of the corner (3dc, sl st into corner of green hexagon).
If you had another side to connect to, you would repeat the process yet again, always ending with half of the corner worked.
Work the rest of the corner the normal (non-joining) way: ch1 3dc.
Continue as usual until you reach the end of the round, join with a sl st at the top of the starting chain, and fasten off.
And there you have it! With this information, you should be able to complete almost the entire body of your blanket! Like so:
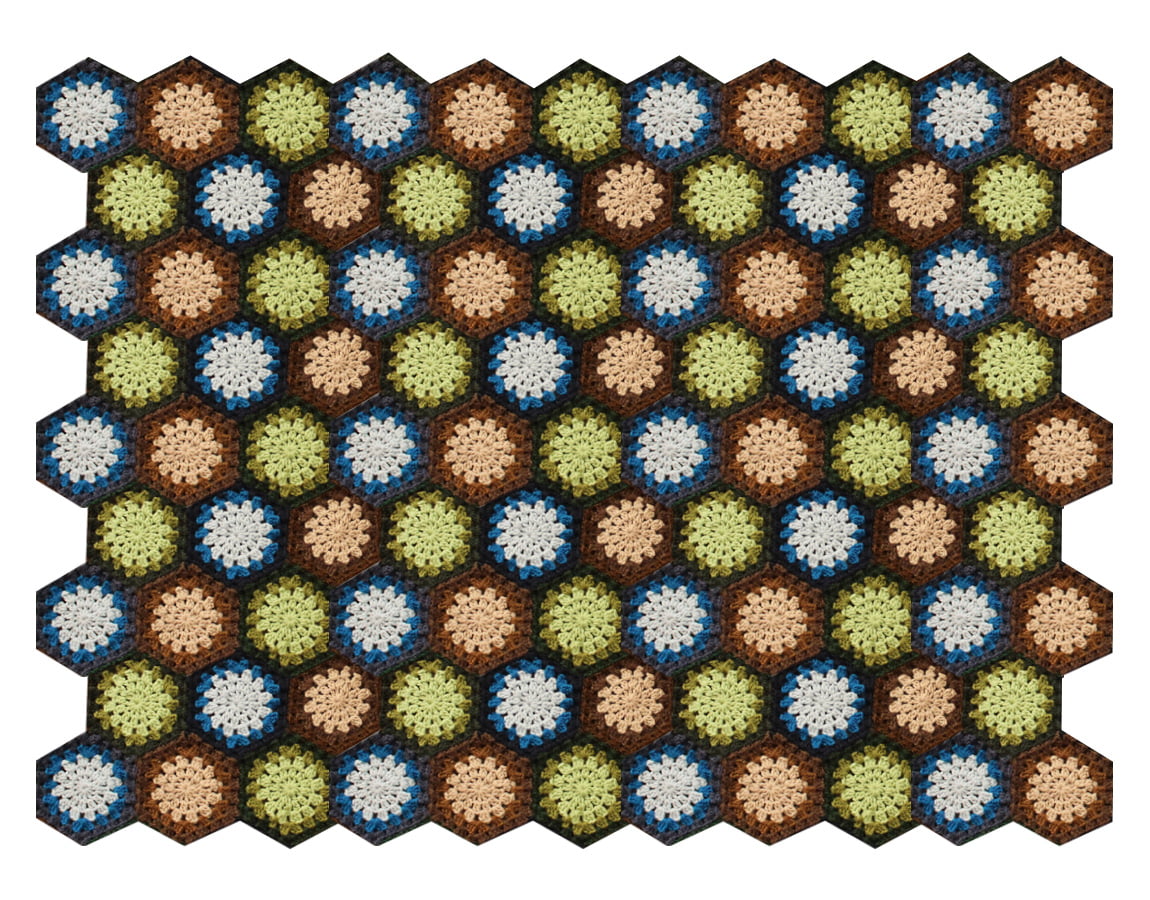
(Cool mockup-huh? I managed to finish the entire blanket, borders and all, in Photoshop in less than an hour – a heck of a lot faster than actually crocheting it, LOL!)
So, what’s left to learn here?
Partial hexagons, borders, and maybe the occasional tip here and there. Please let me know if there’s something you’d like me to cover!
Next time: I’ll talk a little bit about weaving in ends.
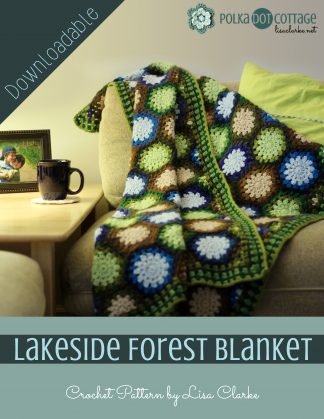
GET THE EBOOK
All of the instructions and step-by-step photos for the entire project are available in this handy PDF. Click the thumbnail below for more details 🙂


This is awesome, Lisa – thanks so much for sharing all this detail! The main reasons I’ve steered clear of crocheted hexies are the math and the joining, and you’ve made it all so much clearer. XO
I am so glad to hear that! I am feeling the urge to play with other shapes, too, now. I’ve always enjoyed geometry…
I’m addicted to this blanket. I spent FAR TOO MUCH time on Saturday making little hexagons. I think I made 7 before I remembered that I was suppose to leave the last row incomplete for joining… 🙁
So now my hexagons have an additional row, with a white border that I’m adding as I go. Maybe my sock weight blanket won’t be so tiny after all.
PS My eyes are not happy that I impulsively chose to use sock weight yarn for this project. There is a reason I had so much unused yarn in that weight!
I’m glad you’re having fun with it 🙂 I hope your eyes hold out until the bitter end! And I think a white border sounds lovely – I am seriously considering that for my next blanket. The next one is for ME!
Finally got a post up about my hexagon progress! Applying for graduate assistantships has been hampering my progress, but just this once I don’t mind the delay!
http://www.buttonwoodcottage.com/2013/01/wip-granny-hexagon-blanket.html
I think I am going to have to try this.. it is a great stashbuster and crochet skill builder eh?
Definitely. Although the stash-busting properties of it are greatly diminished when you let a kid pick the colors. The greens I had in abundance, but the blues and browns were another story…
[…] turn it into a granny-square-style block that I could easily connect together into an afghan with my usual join-as-you-go method. But that was not as easy as it sounded. Keeping the flower well-defined against the white was a […]
Merci beaucoup grâce à votre tutoriel j’ai réussi de jolis hexagones très réguliers.
You are welcome – I am so happy to hear that!
This has been very helpful. I’m working on my very first hexagon blanket and I am glad I read this before I got too far in.
I’m glad I could help! Happy crocheting 🙂