

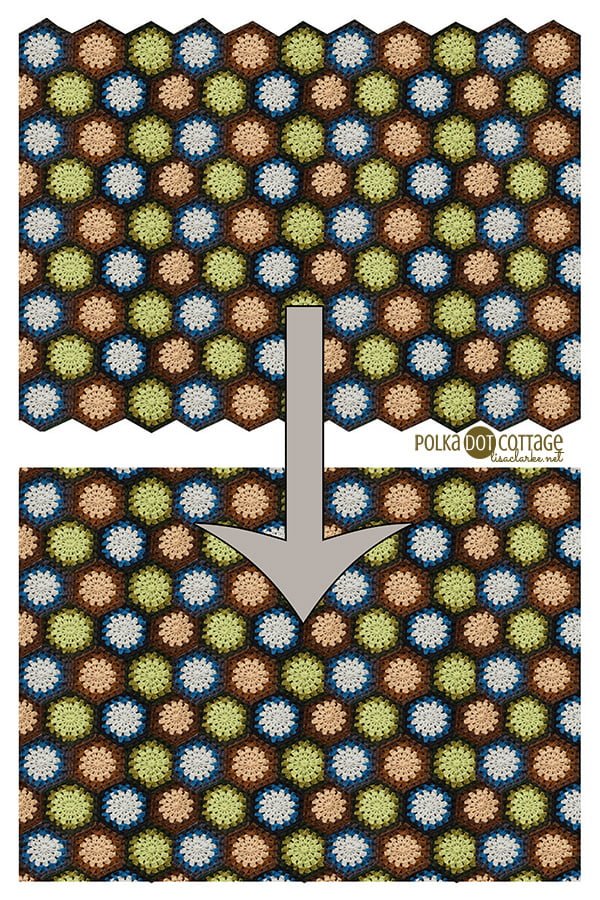
Last week we covered how to deal with the big gaps on the sides of the blanket by filling them in with half hexagons. Today, we’ll talk about the zig-zaggy edges. By the time we’re done with this step, the blanket will be a perfect rectangle.
If you look at the top edge of your blanket, you’ll notice that there are three shapes to fill in: the little right triangle on the right corner, a bunch of downward-facing wide triangles across the top, and a little right triangle on the left corner.
These spaces are tricky to fill, and honestly, most hexagon blanket makers just leave them alone, and let the blanket have two wavy sides. This is a perfectly acceptable solution, but I had taken on the challenge of straightening the edges, and I really wanted to find a way to do it. I experimented quite a bit with triangle shapes, but in the end, a different approach won out:
Rather than make tiny triangle motifs to join into these spaces, we’re going to work directly into the blanket.
Right Corner Triangle

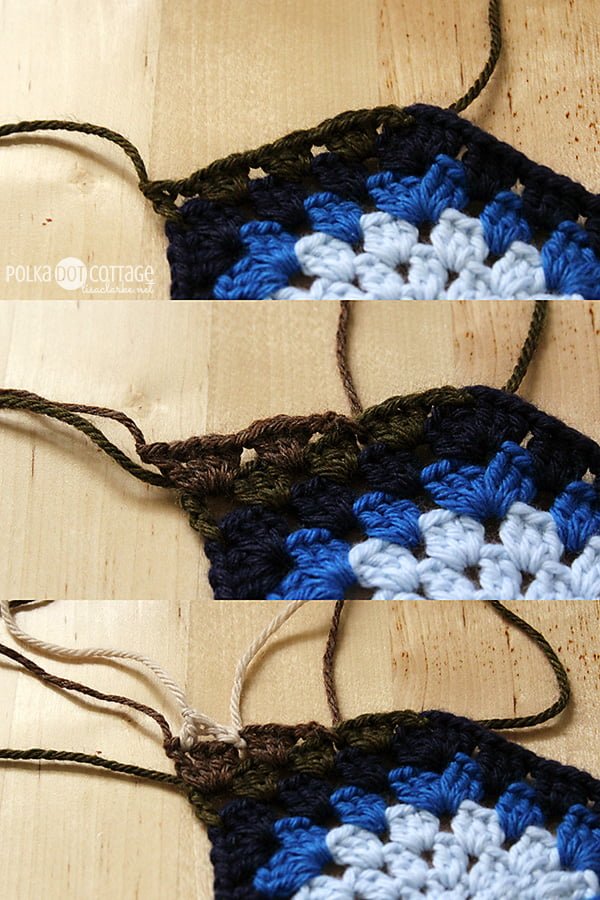
Row 1: With dark blue: insert hook into rightmost corner of the brown hexagon, ch3 (counts as dc here and throughout), ch1, [3dc into next ch1 sp, ch1] 3 times, sl st into top corner of brown hexagon. Fasten off dark blue. (15 sts)
Row 2: With medium blue: insert hook into rightmost ch1 sp of the previous row, ch3, ch1, 3dc into same ch1 sp, ch1, 3dc into next ch1 sp, ch1, sl st into next ch1 sp. Fasten off medium blue. (11 sts)
Row 3: With light blue: insert hook into rightmost ch1 sp of the previous row, ch5, sl st into next ch1 sp. Fasten off light blue. (6 sts)
Top Triangles

Row 1: With dark green, insert hook into top corner of brown hexagon and sl st. ch1, [3dc into next ch1 sp, ch1] 7 times, counting the join between the blue and brown hexagons as a ch1 sp, sl st into top corner of blue hexagon. Fasten off dark green. (31 sts)
Row 2: With medium green, insert hook into second ch1 sp of previous row and sl st. ch1, [3dc into next ch1 sp, ch1] 4 times, sl st into next ch1 sp. Fasten off medium green. (19 sts)
Row 3: With light green, insert hook into second ch1 sp of previous row and sl st. ch1, 3dc into next ch1 sp, ch1, sl st into next ch1 sp. Fasten off light green. (7 sts)
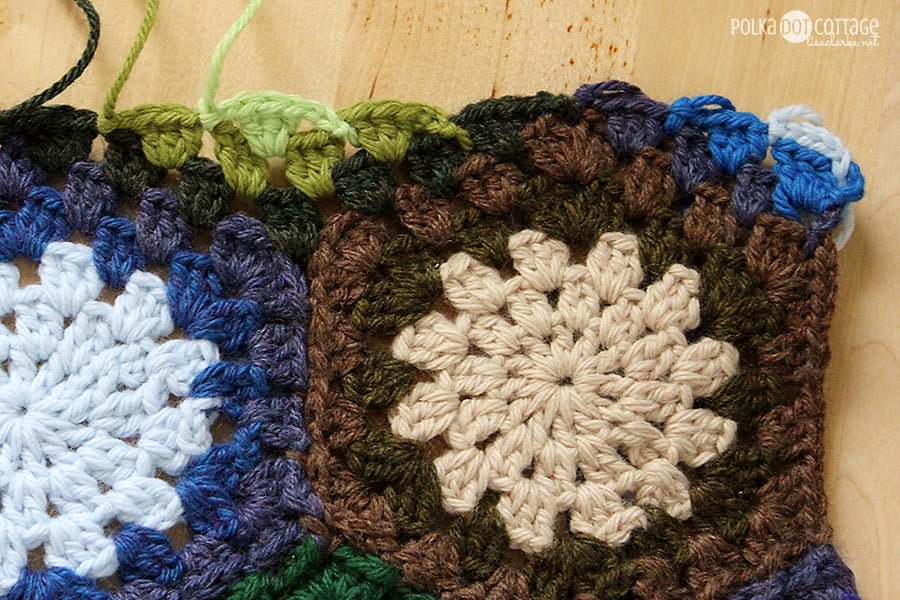
See how the corner and the edge are looking straighter? They may not be perfectly even in some spots, but we don’t need to worry too much about that. Once we start adding the border, any minor waviness won’t be noticed. Plus, you can always block it to exact dimensions, if you like.
Repeat the top triangle pattern in brown, blue, green, etc, until you reach the end of the row.
Left Corner Triangle
Row 1: With dark brown, insert hook into top corner of leftmost blue hexagon and sl st. ch1, [3dc into next ch1 sp, ch1] 3 times, dc into corner of blue hexagon. Fasten off dark brown. (15 sts).
Row 2: With medium brown, insert hook into 2nd ch1 sp of previous row and sl st. ch1, [3dc into next ch1 sp, ch1] 2 times, dc into same ch1 sp. Fasten off medium brown. (11 sts).
Row 3; With light brown, insert hook into 2nd ch1 sp of previous row, ch3, dc into next ch1 sp. Fasten off light brown. (4sts)

When you’re finished, your blanket should look like this (assuming you, like I, did not weave in the ends as you went along on these rows).
This is a very useful place to be, because now that the blanket is an actual rectangle, you are free to add your favorite border from any rectangular blanket pattern. I do have a particular border in mind for this blanket, which I will show you next week, but feel free to explore your options before then.
That’s it for this lesson. We’re almost finished! Are you getting excited? It’s always so much fun to finally reach the final stages of a project that has been months in the making, I think.
Please let me know if you have any questions!
GET THE EBOOK
All of the instructions and step-by-step photos for the entire project are available in this handy PDF. Click the thumbnail below for more details 🙂


thank you so much for this—–just started crocheting again and —-worked up a bunch of hexagons and was trying to figure a way to straighten the triangle gaps—-not too wild about fastening triangles into the space—-this is great—-
I’m so glad I could help! Good luck finishing your blanket 🙂
What a treasure you are! I am so delighted to have found your blog and I am definitely going to blog about you soon (after I have finished my hexie blanket) to share this wonderful idea! 🙂 Have a great 2014!
Aw, thank you! I hope you have a great 2014, too 🙂
My 2014 New year’s resolution was to learn to crochet I have knitted since I was 6 or 7 but feared the unknown. I started by crocheting granny squares but got bored. Then did a few beannies for the kids a great success 🙂 then my wonderful wool shop owner , emily, at ewe knit 20 suggested that I made a throw out of my granny squares brilliant idea and now today I am 99 hexigons later just finishing of all the edges. I have loved this and have colours and ideas racing around my head. Thank you for your blog. Amazing to think that the USA and the world can connect via my little kindle and create such beautiful things.
That’s terrific! Isn’t crochet so much fun? I’m a recent newcomer to it as well (about 2.5 years), and it quite literally hooked me 🙂
Thanks for dropping by and sharing your story!
Please let me know if you have a way of using single crochet to do this in stripes changes every row. I’m working on it altering the pattern here (amazing tutorial and highly appreciated) hope u have a tip or two
Hi, Michelle. As long as you have regularly-spaced
ch1stitches along the outside round of each hexagon, it shouldn’t be any different than this post says. So, say each side of the final round of each hexagon has 16scs. If you work each side as4 sc, ch1, 4sc, ch1, 4sc, ch1, 4sc, ch2, you can follow the exact same instructions, inserting the hook to join with a slip stitch in everych1space.I’m in a bit of a rush, so I’m not sure if I explained that well. If you need me to rephrase it, let me know and I’ll take another stab at it later 🙂
Good luck!
Oh, geez. Please disregard my previous message. I was answering a question you didn’t ask!
I will have to give this one a little bit of thought, because I remember it was tricky figuring this piece out at first. I’ll make myself a note to revisit it later today and get back to you 🙂
I have crocheted many hexagons, not granny squares but very fine hexagons. Now I want to put a beautiful border on but I need to know how to fill in all those valleys. Can you please tell me how to fill in the valleys?
Hi, Kris. This post that you commented on explains exactly that. Follow the steps shown, and it should fill in the valleys. Good luck!
Thank you so much for your reply. I actually saw your instructions, but my hexagons are very fine single crochet hexagons. They are not granny squares at all. I’m trying to figure out how to fill in the valleys with just single crochet. I’ll have to figure it out myself, just wondered if you had ever done anything like that.
Oh! I’m sorry, I misunderstood. Unfortunately, I really don’t know how to help with that. It would take some time to experiment and figure it out, but I suspect it’s very similar to the granny-style. Good luck!
Those pesky little corners! This is such a helpful tutorial. I was in the process of trying out all sorts of things but none were the right shape. Your step by step photos are the best! I really wanted four straight edges & this with some small modifications for my 2dc clusters will work up lovely. Thank you!
I’m so glad to help! Happy crocheting 🧶🙂