

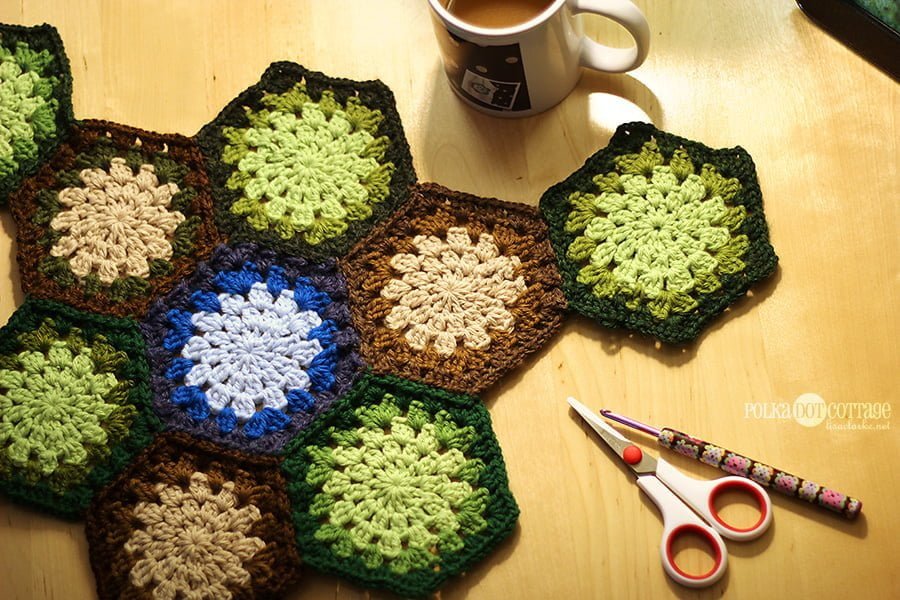
So, you made your first hex for the Lakeside Forest Blanket. Congratulations! That’s one down, ninety-eight more to go…
Before I show you how to connect two hexes together, let’s talk a little bit about blanket design and the placement of these hexagons. My blanket will be 11 x 9, and the motifs will be arranged in such a way that no two motifs from the same color family will ever touch. Like so:

This is a diagram of my blanket plan. Some of the details (the border especially) are subject to change, once I get going on it, but for the most part, it looks good to me. There will be 33 full-size hexagons of each color family, plus a bunch of partial hexes, and a 4-row border in white plus 3 shades of green. Probably.
If having a sketch of your own blanket would help you plan it out, you can download a PDF of hexagonal graph paper. That is what I did, and then I played with it in Photoshop. If you don’t want to go high-tech, you can print it out and use colored pencils. Use the default options to get a 9 x11 grid as I have. If you are thinking your blanket is going to be bigger or smaller, you can play around with the graph paper settings before generating your PDF.
So, let’s say you have a lovely brown hexagon, and you would like to connect a green one to it.

Work the hexagon pattern through Round 4.
Work Round 5 until you have one fully-unworked side left, stopping after you’ve completed the first half of the corner (3dc ch1).
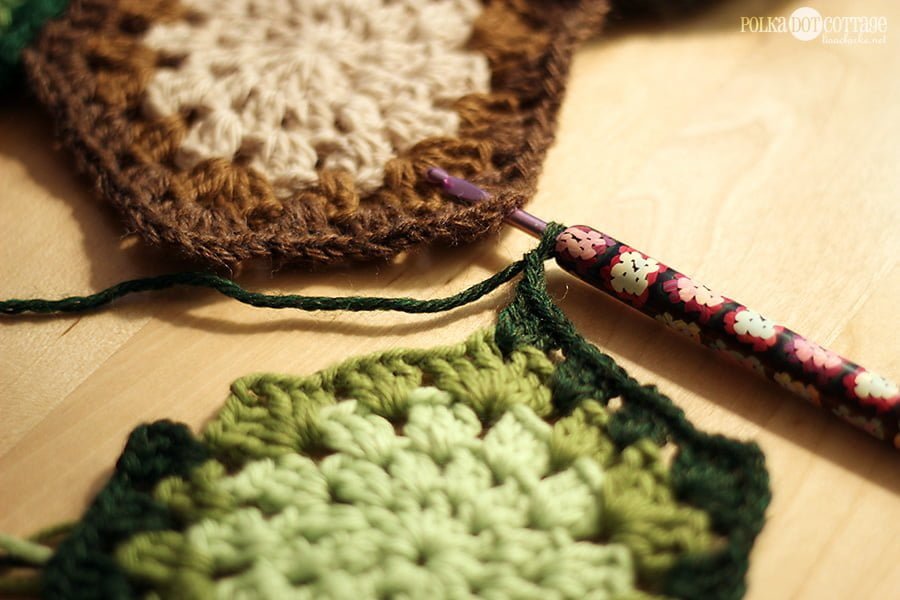
Insert the hook into the corner space of the brown hexagon.
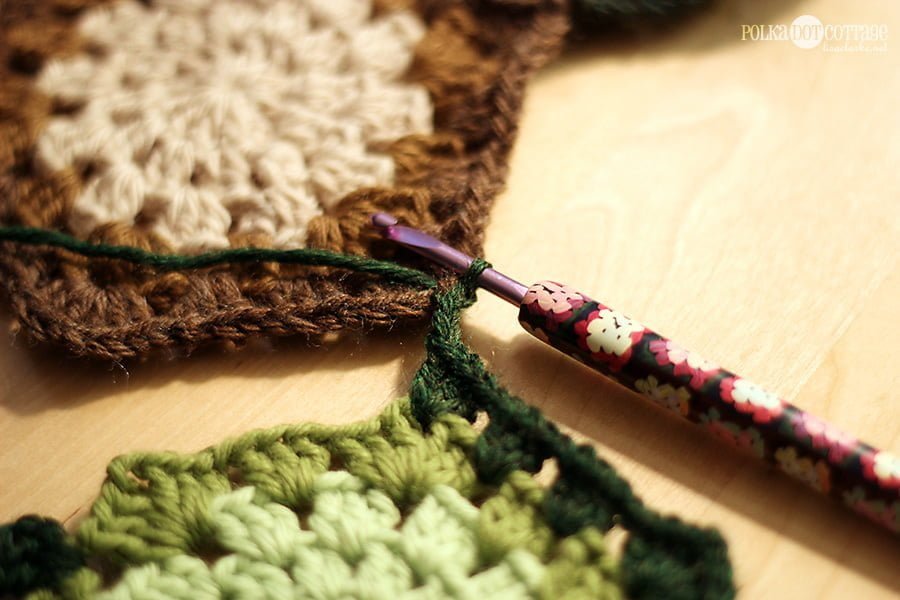
sl st in that corner.
This connects the two motifs at that one point.
Work the last 3dc of the corner as usual, but instead of the final ch1, sl st into the corresponding space of the brown hexagon.

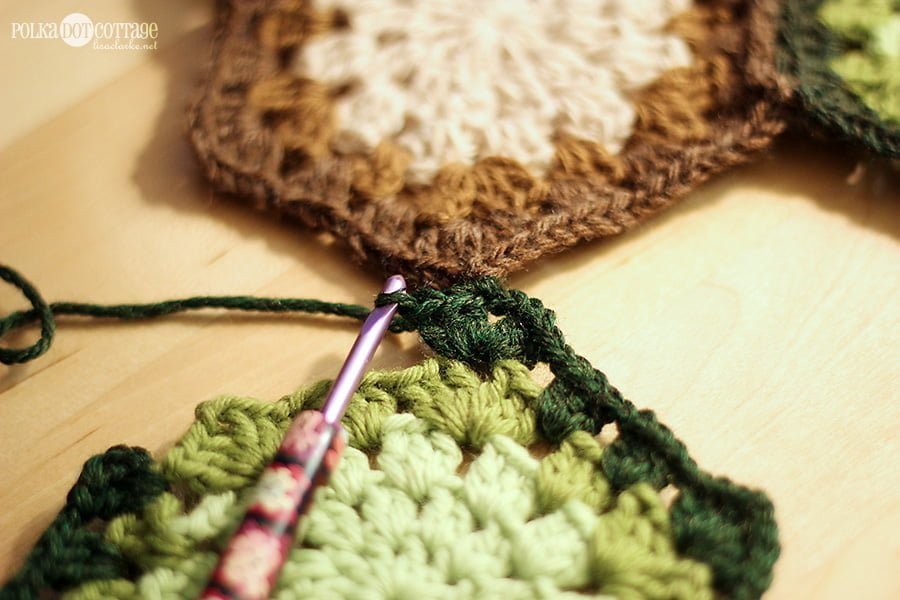
Continue in this manner, following the hexagon pattern, but replacing each ch1 st with a sl st into the corresponding space on the brown hexagon.
Do this until you reach the last corner. Work half of the corner (3dc, sl st into corner of brown hexagon).
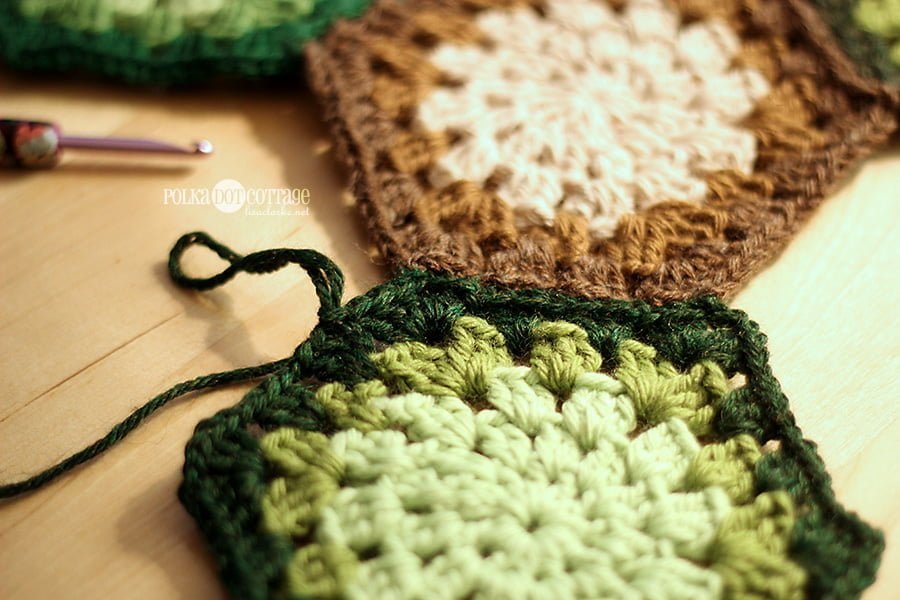
Work the rest of the corner the normal (non-joining) way: ch1 3dc.
Continue as usual until you reach the end of the round, join with a sl st at the top of the starting chain, and fasten off.
And now you should be able to complete the first row of your blanket!
If you are following the same placement pattern as I am, you will be making a brown hex, followed by a green, then a blue, then brown, green, blue, etc., until you have a row of 11 hexagons.
Next time: I’ll show you how to join a hexagon to two or more other hexes, so we can move on to the second row.
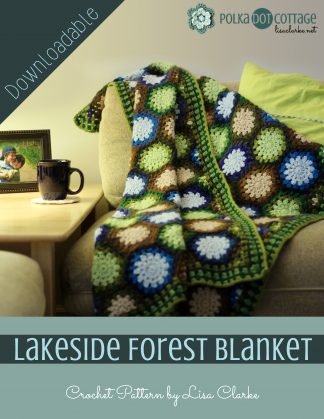
GET THE EBOOK
All of the instructions and step-by-step photos for the entire projects are available in this handy PDF. Click the thumbnail below for more details 🙂


No pics there 🙁
Argh! This is the second time that has happened with a post I scheduled to go live while I was away. It’s all fixed now. Thanks for bringing it to my attention!
U’re welcome.. Its coming along beautifully..
When slip stitching into the previous hexagon, are you inserting your hook into the back of hexagon 1 or the front? Thanks!
I find it easier to slip it back-to-front, but I am not sure that it technically matters, as long as you are consistent.
Neat joining idea, I hate joining granny squares, but this looks so nifty I think I might have to make one!
I know I would hate it, if I left it all to the end, but I do enjoy doing it this way!
I have no business starting this project…but I did. I’m using sock yarn (so tiny…I know) but I think I’m going to end up with a crib sized blanket. I’m certain that will eventually come in handy. I’m seven hexes in and anxiously awaiting your next set of instructions!
Assuming I get my act together and do some writing this afternoon, the next installment will post on Monday 🙂
You’re much more patient than I am, using sock yarn! I can’t wait to see what it looks like as it progresses!
[…] week I showed you how to connect one hexagon to another by hooking the last row of the new motif into one side of a previous motif. It’s a versatile […]
Ive just started my second row of this blanket although im doing all purples to match my bedroom thank you for the easy to follow pattern i can slowly see my blanket growing 🙂
You’re welcome! Purples sound pretty ☺