Or, How to Make an Ugly Vest in Four Easy Steps.
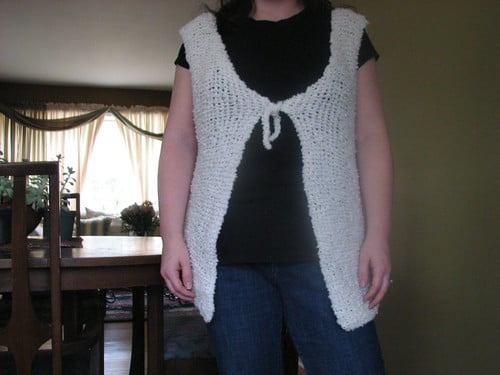
This is my first knitted garment, and I knew within the first few rows of knitting that I wasn’t really going to like it much. But I pressed on, because I wanted to learn the mechanics of vest-making, do a little experimenting, and use the project as a learning experience – a stepping stone to something more appealing.
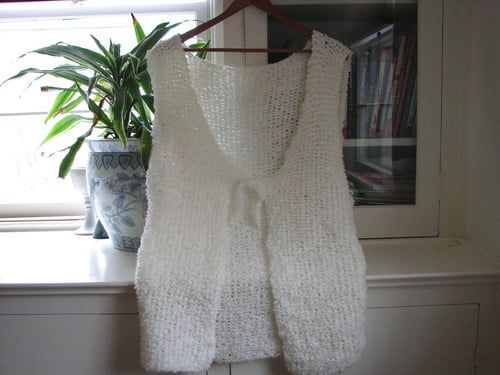
I fell in love with this design when I found it on Ravelry, but I didn’t want to buy the pattern because I didn’t know enough about the basics of vest-making to successfully translate it to the loom. And besides, it wasn’t really the stitch pattern that appealed to me as much as the shape of the garment itself. I decided that the best course of action was to find a vest pattern meant for the knitting loom, and see if I could modify it to be the correct shape. Turns out, I can.
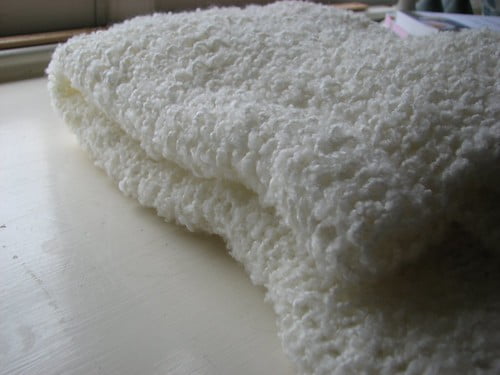
I used the Jiree Sweater/Vest on this site, and decided I would have the most success if I used the yarn called for in the pattern. That was probably my first mistake – besides being annoying to work with, this boucle is something like 97% acrylic and 3% polyester, and I have decidedly found myself drawn more to natural fibers these days.
I followed the pattern exactly for the back of the vest, but for the front, I attempted to add shaping that would make it more like my inspiration piece, and less wrap-ish.
Notes for next time? Because there will be a next time:
- No more boucle. I’m using cotton or wool
- No more garter stitch. I think I’d like it better in a ribbed pattern.
- Adjust the shaping so that it ties higher up.
- Replace the ties with a small button.
My goal is to make a light & airy vest that I can wear in the spring with a t-shirt and a-line skirt. Off I go to try a ribbing pattern in green wool!


good for you for continuing on just for the learning experience! At least this way you’re not disappointed that you can’t wear this one. It was just practice. I’ll look forward to the “real” project.
See what Sarah Jackson has been blogging about: yellow week – day four
Exactly. The disappointment factor is pretty low when your expectations are equally low 🙂
You are SOOOOOO drawing me into loom-knitting. I made a crocheted shrug last year, which was horribly ugly upon completion. But then, crocheting garments is challenging, since the resulting fabric can be so stiff. I love the possibilities of looming.
See what Sister Diane has been blogging about: Review: Stencil Me In
Ooh, I’ve come across a lot of patterns for loom-knit shrugs… Come on over to the dark side 🙂
you go girl! Take each project as a lesson to learn and soon you will be knitting for days…..with needles! I will teach you if we ever meet up 🙂
See what Kathi has been blogging about: TOTD 19/28
I suspect I am unteachable, LOL!
well…if you are going to the IPCG retreat in July…I promise to sit down and teach you. I taught Karen how to crochet and she was all fumble fingers with it.
See what Kathi has been blogging about: TOTD 19/28
Wish I was going! Didn’t fit into the schedule (or the budget, for that matter).
Aw, see, I was really hoping to see a knitted poodle costume! I just thought you were getting an early jump on Halloween. Remember, I recently crocheted a powdered wig. I’m thinking of starting a freeform crochet cape in greens now, so I can be Mother Nature for Halloween…. so, the knitted poodle costume sounded like a real possibility to me!
See what Penny has been blogging about: Yes, you can have earthquakes too.
I am more of the “throw something together on October 30th” variety of Halloween moms 🙂
I *love* the Mother Nature idea! You are just so darn creative. I need a little bit of that.
Yep.. ya gotta break out and try different yarn.. I think the darker yarn I used when writing the pattern helped a bit with the over all look.. The white yarn is an interesting choice!
Glad you learned something though!
I’m making the second on using Patons Classic Wool in Leaf Green, and I’m trying out a ribbing pattern. I’m really liking it so far. I’m only 30 rows into it, though.
Thanks for your pattern – it was very helpful in getting the basics of vest construction down! And the “poodle vest” may yet be salvageable. I’m going to play with it a bit and see.
And thanks! That Vogue vest is nice..
Yeah, I think you can blame the yarn for this one. I like garter stitch for the edges of my stuff and that’s about it. On an related note, I think I made a similar poor yarn choice and am in the process of making a very furry poncho. Hmmm. 🙂
See what Tanya has been blogging about: Etsy soft launch
Some of the garter designs I’ve seen on Ravelry look so nice, but they’re all in a much tighter gauge. I am really not fond of the Knifty Knitter gauge garter stitch.
Funny about the poncho – accidentally furry must be contageous 😀
You should get a Decor Accents loom. They are amazing and available in much smaller gauges.
See what Tanya has been blogging about: Cozy commissions
I have two of them, actually. I’ve only used them each for one project so far, but I suspect they’ll get more use next season. Right now I’m looking ahead to more “airy” spring knits 🙂
I am sorry but I am 63 and I wore that sort of best in the 60’s and 70’s. Thought it was in style. I know you can do better. At least it isn’t a toilet paper cover.
But congrats on finishing it. Most of my projects aren’t done ane many will never be.
Lisa, I think your vest turned out pretty darned good for (A) a first time effort and (B) and altered pattern. Who the heck does THAT the first time out on a project (oh yeah, all of us do, huh? :P). Anyway, it may not be wearable but it’s not horrible at all; I think you did a great job. BTW, I saw your hats about 3 weeks ago for the first time and ran right out to buy a loom set LOL. Now I just need to sit down and do it.