 This blog post is part of the Fancypants Sew-Along. You can catch up on all of the sew-along posts here. You can learn more about Fancypants or get your copy of the tutorial here.
To be notified when there are new posts in this series, sign up for the Fancypants Sew-Along mailing list:
[wysija_form id=”6″]
Yesterday, we talked about choosing your fabric. Today, we’re taking the measurements that will be translated into your custom pattern.
For this step you will need a tape measure, and a printed copy of the worksheet that is provided on page 3 of the Fancypants PDF. If you don’t have the worksheet, or don’t plan to do the calculations on your own, you should have the Fancypants calculator page open in your browser. Or just use good old scrap paper for now.
These pants were designed to have a feminine fit: comfortably snug in the hips and bottom, luxuriously wide in the leg. The key to a good fit is good measurements. If possible, find a buddy to help you measure yourself. Sometimes it’s an awkward thing to do alone.
Note: the tutorial goes into ways of changing the fit (looser up top, less wide in the legs, etc.) but for the purposes of this sew-along, I am going to assume we’re all making the default variety.
Fancypants requires four measurements: hips, thigh, crotch, and inseam. Let’s take them one at a time.
Hips
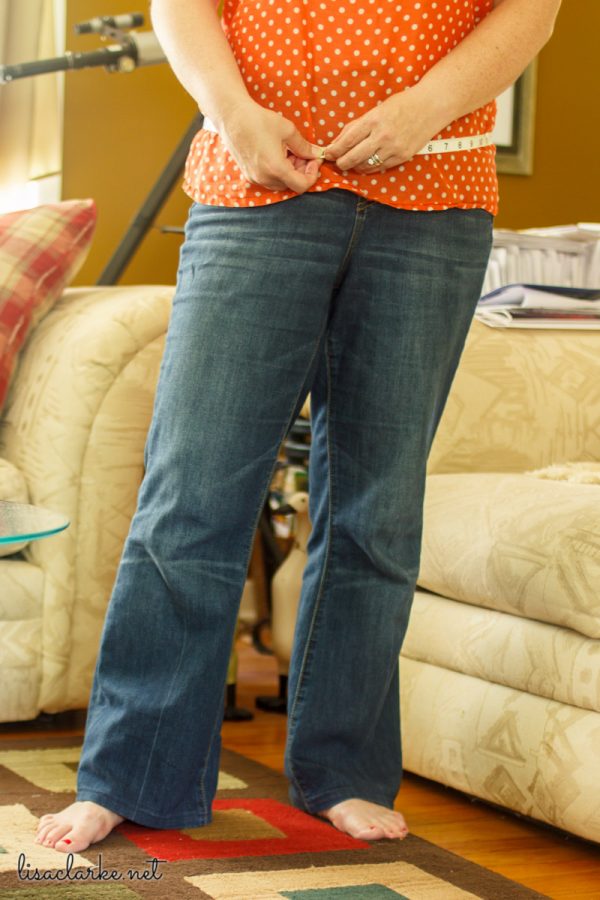
When I say “hips,” what I really mean is the widest area between your waist and your bottom. You need to be able to pull your pants on all the way, so they must be at least as wide as you are.
When measuring yourself, you want to keep the tape measure comfortably snug against your body. Too much slack, and you will end up with pants that are too loose. Cinched too much, and you will end up with pants that are uncomfortably tight.
It’s most effective to take measurements in your underwear, but I was not about to do that for the whole internet to see 😜
When you have gotten your hip measurement (in inches!) record it in the appropriate spot on the worksheet or in the calculator.
Reality check: I measured myself (I’m 5’3″) and my string bean of a son (he’s an inch taller and about 60lb lighter). I’m going to share our measurements so you can see if yours is within a reasonable ballpark of those. Of course I know that we are all differently-shaped. (In fact, that is the whole premise behind this tutorial!) My goal in sharing our numbers is to alert you if your own numbers are drastically off. It doesn’t hurt to re-measure and make sure. With that said, our two hip measurements are 43″ and 31″ (remember, he’s a string bean).
Thigh
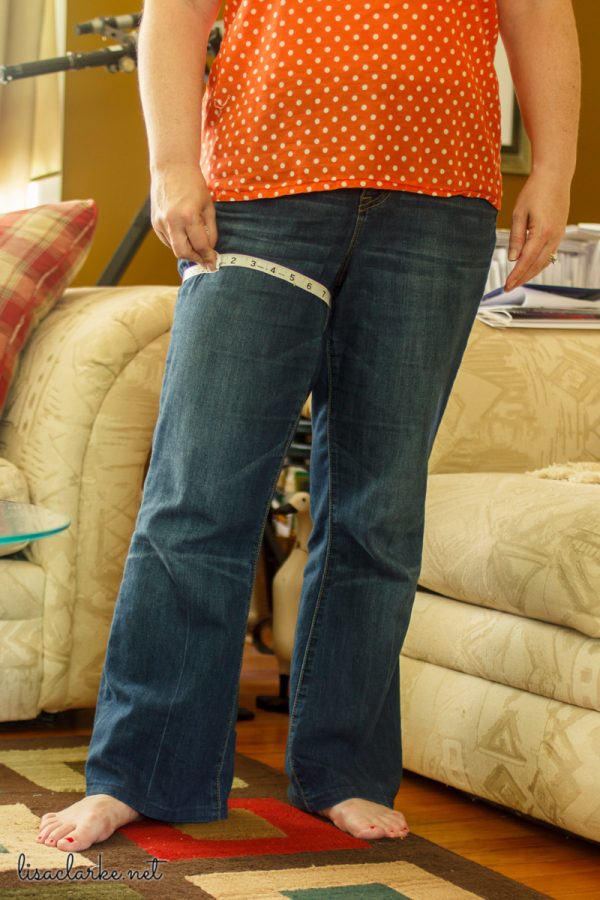
The thigh measurement is used to determine just how wide the legs of the wide-leg lounge pants are going to be.
Find the widest part of your upper leg, and measure the distance around.
Record that number on your worksheet or in the calculator.
Reality check: 22″ for me and 16.5″ for string bean.
Crotch


Not only does this tell us how high (or low) the pants will come up on us, but it also allows for our own particular level of tummy flatness or roundness to be considered.
Make a note of this measurement on the worksheet or calculator.
Reality check: 26.5″ for me and 23.25″ for him
Inseam
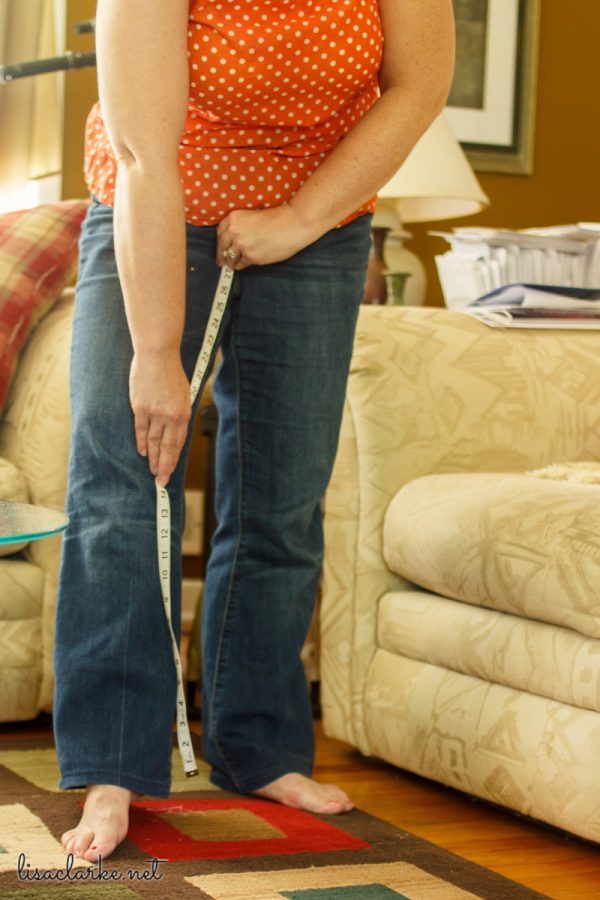
You can see here what I meant about it being easier with a buddy.
I referred to “inseam” as one measurement, but in reality it can be any number of them. This pattern that we are drafting can be used to make pants in as many lengths as we want. My advice is to measure for the longest pants you will ever want, and make the pattern to reflect that length. Later, if you want shorts or cropped pants, you can draw those lines in on the pattern, rather than making a whole new one.
Measure from your crotch to just below your ankle, or however long you want the pants to be. Make a note of that measurement.
Reality check: 26″ for me and 27.5″ for him
If you also want to measure now for shorts or cropped pants, that is done in the same manner: start at the crotch and measure to the spot where you’d like the pants to end. Make note of these measurements, but not in the “inseam” section. Scribble them down in the margins for later. The Fancypants tutorial will show you how to take them into account when you are drawing your pattern.
At this point, you are either going to plug these measurements into the Fancypants calculator, or you’re going to use the worksheet that came with the PDF. Either way, when you’re finished, you will have a series of numbers that are labeled with letters that correspond to lines on the pattern (AF, AB, BF, BB, CF, CB, D, E, and F).
Reality check
My pattern measurements for the front leg:
AF:11.25
BF:12.75
CF:1.5
D:14
E:28
F:42
My son’s:
AF:8.5
BF:10.25
CF:1.75
D:12.25
E:29.5
F:41.75
Next time we’ll talk about using this information to draw your pattern, but I’m going to wait a few days before launching into that. I want to give you some time to get your fabric and to calculate the pattern measurements. And if you have any questions at all, you can feel free to ask them here.
The Fancypants tutorial is fairly detailed in terms of drafting the pattern, so if you have your fabric in-hand and feel confident enough to skip ahead, please do!
If you’d like to share images of your progress in social media, use the #fancypantssewalong hashtag!







I cracked up when I read the part about “you need to be able to pull your pants all the way up.” In 21 years of teaching high school, I never saw a boy’s pants pulled all the way and the girls had pants so tight I thought they were wearing blue foundation. Turns out when you can’t breathe, you turn blue.
Thanks for making me laugh.
LOL! Glad I could provide some entertainment 😀
[…] week, we worked on getting accurate measurements of our bodies. Now that we have those, we can use them to calculate the measurements of our patterns. Through a […]