I hope by now you are running your fingers through a big bowl of buttons you made yourself! I also hope you have enjoyed learning a little bit about polymer clay.
Some of you have asked questions about the process I use to make the buttons I sell. While it is beyond the scope of a beginner class to go too deeply into my method, I can tell you a few things about them:
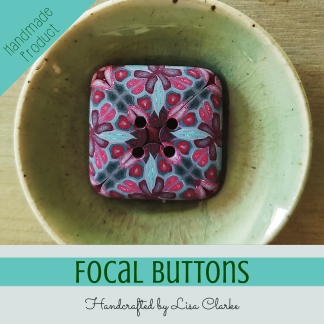
Most of my buttons are made similarly to the Polka Dot Focal Buttons, in that they begin with a slab, a pattern is placed on top of the slab, and I use a 1.25-inch circle cutter to cut them from the slab. There are some key differences, though:
- I use a pasta machine to roll out smooth slabs of a consistent thickness.
- The pattern is not made up of dots, but is rather a very thin veneer of a millefiori cane slice.
- I usually don’t use the plastic wrap.
- I use a button hole positioning tool I created so that the holes are always in the right place. And when I poke the holes, I don’t worry that they are poked all the way through.
- I bake the buttons once, add a very thin layer of solid-colored clay around the edges to act as a frame, and then I re-bake the buttons.
- I use a handheld drill bit to enlarge and refine the holes.
- I sand each button through several grits of sandpaper, and then buff them on a soft cloth.
If you like the matte look of the buttons we made in class, then you are probably quite pleased with your collection. You can feel free to continue using and refining the Beginner Button Class techniques as long as you like.
But if you feel that the buttons you made still need a little “something,” you will want to employ some more advanced construction and finishing techniques. I can help you there, but it requires a little sales pitch that I hope you will forgive.
In my Polka Dot Cottage Hearts tutorial, I include a description of two possible methods for giving your pieces a nice shine. These methods work as well for buttons as they do for heart pendants. The tutorial is written at the same level as the button class, so if you felt comfortable with the button-making instructions, you should also have no problem with the hearts. You can buy a downloadable pdf copy here.
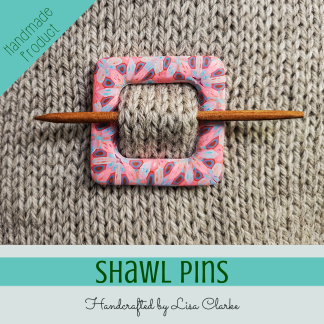
My Plaid Shawl Pin tutorial is an intermediate-level lesson that builds on some of the techniques we’ve learned in button-making, but assumes a familiarity with building millefiori canes, and expects that you have access to a craft-dedicated pasta machine and other common polymer tools. Some of the basic techniques used to construct a shawl pin are the same as those that I use to make my focal buttons. If you want to better understand my process, you can buy a downloadable pdf copy here.
Or, just take a look through all of my polymer clay eBook tutorials.
I hope you’ve enjoyed this class, and that it has helped you get your feet wet in polymer clay. If you feel the urge to expand your knowledge, you can visit Polka Dot Creations, where you can find a nice little collection of free polymer clay tutorials, as well as hundreds of books, project books, magazines, and dvds on the subject.
Additionally, I’ve written a few blog posts that you might find helpful:
- Come rifle through my toolbox – a description of the handmade tools I use regularly in my claywork
- So you want to try polymer clay – a list of supplies, tools, and recommended reading/viewing for those just getting started in polymer
Thanks for playing, and Happy Claying! 🙂
GET THE FULL CLASS EBOOK
All five previous lessons, plus other useful tips included in one PDF.







Thanks so much Lisa! I thoroughly enjoyed your class and learned a lot from it.
Thanks, Kathleen, I’m glad to hear it! Thanks for spreading the word and for participating 🙂
I learned of your blog thru the Polymer Clay blog. Your buttons are beautiful! I am new to Polymer Clay but cant wait to try your tutorial! Thanks for sharing it and the inspiration!
Thank you! So glad you dropped by. I hope you make the buttons and share images with us here!
Loving the tutorial and always enjoy your site! Thank you for the fun and ideas.
My pleasure! I’m glad you enjoyed the tutorials – hope you make some great buttons!
Oh, dear, oh, dear, if there was a 12-step program for polymer clay, I’d probably need it! I’ve purposely avoided learning how to make buttons – until now!!! You’ve given me great hopes that I can apply to my polymer clay jewelry! I thank you for your tutorials! The buttons are beautiful and I can’t wait to make some.
Haha, I’ve definitely felt that way about clay at one time or another! I’m not such an addict these days, but I still feel the pull very strongly now and then. Enjoy the tutorials, and feel free to share images of what you make!
These are charming! I can’t wait to follow the tutorial and try some. I can soooo see them in my artwork. Thank you, thank you! I work with small pieces of fabric. Please stop by and see what I’m doing with these scraps. I think you’ll agree that there is room for polymer buttons along with the fabric and stitches. http://kbartdesigns.com
Oh, yes, I can definitely see how there would be room for buttons in your artwork! Good luck with the tutorials – I hope they are helpful 🙂
These buttons are so cute! Thank you for the tutorials…I can’t wait to get my clay out!
Glad you like them! Enjoy 🙂
Hi Lisa – I love your online lesson. Are you interested in hosting a workshop at my studio in NY? Look forward to hearing from you!
Thanks for the complement! I am in the middle of a somewhat busy time right now, but maybe after the new year we can talk via email? lisa@lisaclarke.net
Amazing! Super cute!!!
Thank you!
How do you sand your buttons without scratching them? I don’t know what I’m doing wrong, perhaps my sand paper isn’t fine enough? I made my first batch and totally ruined a few of them in the sanding process.
Hi, Krissy. The key is to sand them with several different grits. I start with 400 and go up to 1200, usually. Each successive grit of sandpaper cleans up the marks made by the previous grit, and eventually your buttons will feel smoooooooth and nice. They may still look kind of dull, but if you buff them on a soft cloth (or on your jeans) they’ll perk up considerably. I hope this helps a little!
You inspired me to make some buttons 🙂 I posted about them today if you wanted to take a peek.
Somehow I missed this a few days ago, but I checked it out now – very cool! 🙂
[…] I have been having so much making crochet jewelry from wire (you can see all the jewelry here), I thought it would be fun to see how it would work as a loom flower. I think I am going to attach […]
What a wonderful range of buttons! They are so beautiful! I have always struggled with polymer clay and precise items like these have been beyond me. You have inspired me to break out the fimo and have another go tho! Thank you for writing such a lovely tutorial. xx
I’m so glad I could help! I hope you have better luck this time 🙂