


I discovered last year that I really liked cotton lawn fabric for summer – it’s so lightweight and breathable. The only problem is that it’s hard to find inexpensively. Enter Dharma Trading Company and their nice selection of unprinted fabrics. Plain white cotton lawn can be had for a fraction of the cost of the printed varieties, plus you have the extra fun of embellishing it with your own designs.
One look I enjoy is the “ombré” look, which essentially involves a gradation of color from top to bottom. Often you see it with a dark color at the hem, fading upwards to white.
I recently sewed and dyed a Summer top for myself, and while it didn’t come out exactly as planned, I’ve decided that’s more a result of the color I chose, than of the process itself. Would you like to make a Breezy Ombré Tank for yourself? Read on…
Tools and Materials
- 2 yards of Cotton Lawn Fabric
- Cotton Thread
- Sewing Machine
- Bucket
- Water
- Soda Ash Fixer
- Calsolene Oil
- Non-Iodized Salt
- Procion Fiber Reactive Dye (I used Cayman Isle Green #108)
- Big Stick for stirring
- Disposable Plastic Cup and Spoon (keep them in your dye kit, and they can be re-used)
- Rubber Gloves
- Washing Machine
- Professional Textile Detergent
Directions
Sewing the Shirt
You can either use a pattern you already own, trace a favorite tank top to make your own pattern (as I did) or follow an online tutorial (this is a nice, easy one from Belle Epoch).
If you are not up to sewing your own clothes, you can skip this part and buy a shirt pre-made. Dharma has a lot of clothing blanks to choose from, or you can dye up a white shirt you already own – it’s a great way to give new life to something that may have gotten a bit dingy over time.
Preparing the Dye Bath
Add 1 ½ gallons of warm water to the bucket. Stir in 1 ½ cups Salt, 1/6 cup Soda Ash Fixer, and 1 teaspoon Calsolene Oil, and continue stirring until everything is dissolved.

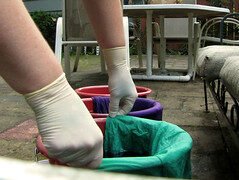
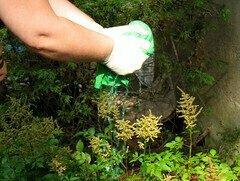
Put on the rubber gloves. Any dye you splash onto your skin or your clothes will stain. Just ask my poor bespeckled feet.
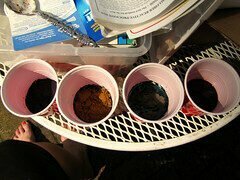
Place about a tablespoon of dye in the plastic cup. Add warm water gradually, stirring with the plastic spoon until all dye is dissolved. Pour dye mixture into the bucket and mix well.
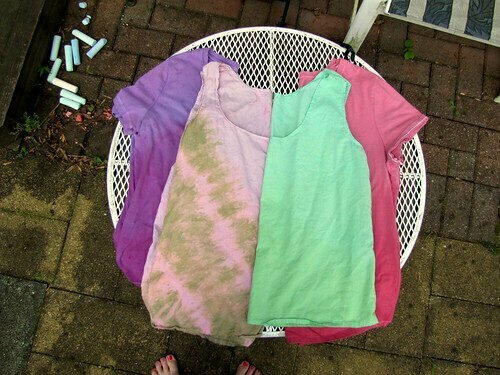
I had several cups and buckets prepared, because I like to have a lot of little projects going at once. This time around, in addition to the tank for this project, I did a prototype tank which I only wear to bed because the fit isn’t perfect, two white t-shirts that had started to look a bit yellowed, and just for kicks – a handful of the husband’s tighty whities that had seen better days.
Dying the Shirt
You may want the top of your shirt to be pure white. I would have liked that, too, except I’d worn my new cotton lawn shirt – in it’s undyed state – out a few times and had managed to leave a couple of small stains on the front of it. I needed to dye over them. If you need to dye the top of your shirt, too, submerge the entire shirt in the dye bath for five minutes, stirring occasionally. Pick it up, and wring the excess dye out of it. If you want the top of your shirt to be pure white, don’t put it in the dye bath, but do get it wet and wring it out well.

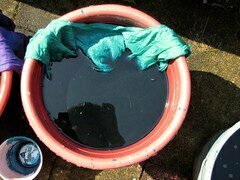
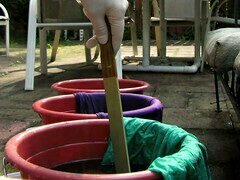
Hold the wet shirt over the bucket of dye, and lower it evenly down until all but 4 or 5 inches is submerged. Lean the rest of the shirt on the edge of the bucket. Take the time to spread out the shirt, minimizing folds. Gently stir the part that is under water to make sure it is being evenly coated.
Repeat the process every five minutes or so, each time leaving less of the shirt submerged, until you run out of material to dye.
Washing and Wearing


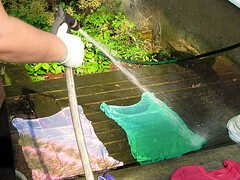
Remove the shirt from the bucket, spread it out on the ground and rinse thoroughly with a garden hose. If you are doing this project indoors, just run the shirt under the faucet until the water begins to run clear. Wring the shirt out completely, and toss in the washing machine.
Wash with Professional Textile Detergent according to the bottle directions. Dry. Wear and enjoy!
Notes
I am very imprecise about dyeing. I often eyeball my measurements, and am sloppy about making sure the dye is entirely dissolved. I go into the process with a direction and an open mind, and usually I am pleased with the results, even if they are not entirely what I planned.

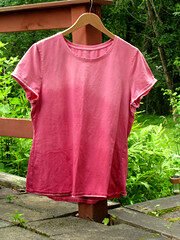
In this case, my ombré tank was not as dramatic as I’d hoped. I can see now that this technique needs a much darker shade to really shine. The t-shirts that I did in purple and red, for instance, really showed off the effect.
The other thing I noticed about the color I chose is that it appears bluer near the top and yellower near the bottom, as if the yellow component of the dye doesn’t really “stick” until the material has been submerged for some time.

Also, there is something to be said for precision with this technique. If I’d had the inclination to rustle up the supplies, I’d have rigged up a system I thought up, involving string, masking tape, and a big stick that would have allowed for a more controlled distribution of the dye (and likely eliminated that “dipping” effect that is so pronounced on the red tee). I’m ok with loosey-goosey this time around, but if I decide to give this other idea a try, I’ll be sure to post an update.
I should mention, some of the other items I did had little splotches on them where the fabric had come into contact with undissolved dye particles. I need to be more careful about that, because in general, I’m not crazy about little splotches.
So, while not exactly what I imagined, I still like the way my new tank looks, and it’s definitely the perfect weight for the 90-degree days we’ve been having here lately. Bring on Summer!


i love the little undies just hanging out along with the shirts— it’s like under-roos sets. oh yeah.
cute shirts too! great idea on getting that gradation.