


Saturday I sat down with my little bowl of buttons, and began to organize them by color and pattern. There is something strangely appealing about this activity for me. Seriously, I could probably re-arrange and re-organize them all day long and not get bored.
But then, I’m weird that way.
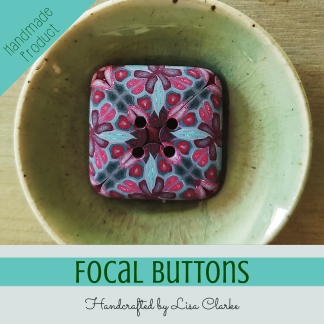
I had them out so that I could take inventory, update the quantities in the shop, and add some new styles. I mention this here, because I suspect that many of you like my big focal buttons, but either lack the funds, or lack a project for a 1.25-inch button. With that in mind, I’ve posted a selection of smaller, more economical button sets that you might like.
And now I am going to unplug for the night. I’ve been very productive in the Real World today, which is great, but I’ve also spent every other spare moment online and it’s starting to bug me.
I think I’ll go run my fingers through a big pile of buttons 😀


I think you should make a checker, chess or backgammon set, I will proudly volunteer myself as a backgammon set tester.
You make such beautiful things.
I actually had plans to make a checker set a while back, even bought many of the supplies I was going to use, but I never did it. Maybe I should revisit that project…
Adore all your buttons! 🙂 The colors are so great!
I did the exact same thing with my buttons just two nights ago! Hahaha I found it so funny that I’m not the only one so strange! :]
See what Becca has been blogging about: (Untitled)
Hi,
I like your buttons. question, how do you finish the sides and backs? how thick do you make them? thanks
Merrie
Hi, Merrie. Most of the time, they are just under 1/4-inch thick. They involve a patterned veneer on a solid-color base. Most also have a solid color band around the outside. My earlier buttons were finished with a very thin layer of liquid clay on the top and sides (nothing on the backs), but in the last few years I’ve skipped that step and instead sanded and buffed them on all sides. I’m currently running a free beginner button-making class here, if you want to learn more specifics.
Thank you for your input. Unfortunately I cannot attend the demos as I work so I have been reading what you post. I am interested in how/what you put the band around the outside. I did not notice that in any of your pictures. by the way thank you for posting your knowledge as a gift to us. Best
Merrie
There aren’t any live demos, just the written word, so you haven’t missed anything. I haven’t explained how I put the band around the outside, actually. That is a more advanced topic than what I plan to cover in the beginner button class. I am considering writing up a more advanced button-making tutorial for the future, but I haven’t done so yet. Sorry!