


In honor of Mother’s Day, I thought I would show you how I made my Mother’s Day Skirt last year. This is potentially a no-sew project – that’s how I did it, since I didn’t have a sewing machine a year ago, nor would I have known what to do with it if I had! It’s a fun project because the result is a collaboration between parent and child, and because your kids will find it cool that Mom is wearing their drawings around town!
Here’s what you need:
- white cotton peasant skirt (I used one of these)
- fabric dye (I used these)
- decorative ribbon
- images to transfer (I used a book of “I love you because…” drawings that my son gave me for Mother’s Day)
- t-shirt transfer paper
- decorative buttons
- iron-on adhesive tape or sewing machine & coordinating thread
Dye the skirt
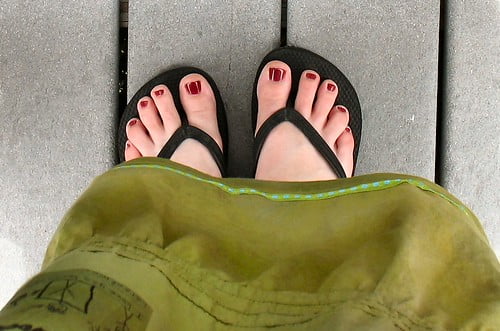
Follow the directions on the dye package to get the look you want. I like a “mottled” look when I dye, so I usually just dump the fabric in a bucket of dye, swirl it around for a while, and then try it in a bucket of a different color or two before I decide I’m done. The results are unpredictable, which is part of the fun, I think. For this skirt I used a few shades of green and some brown.
Hem the skirt
This skirt started out practically floor-length, which was too much for me, so I trimmed off six inches, and then hemmed it. The ideal way to hem the skirt would be to use a sewing machine and do it in the traditional way. If that’s beyond your skill level (as it was mine), you can use adhesive tape that is designed to be ironed on. There should be instructions on the package. It’s a simple, although possibly more time-consuming and less permanent, process.
Once the skirt is hemmed, use your method of choice (iron or sewing machine) to attach the decorative ribbon about an inch from the bottom of the skirt.
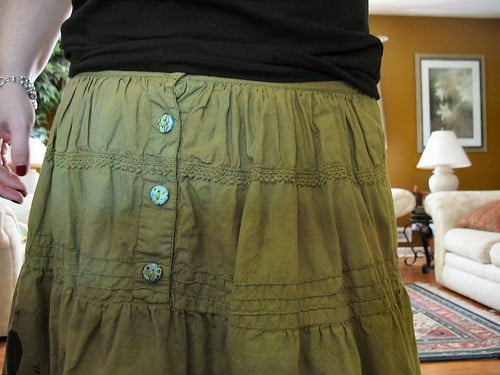
Replace the buttons
Remove the plain buttons and add some pretty ones to match the new color of your skirt. I used buttons I made from polymer clay, but you can also use store-bought buttons.

Transfer the images
Print your images onto t-shirt transfer paper, remembering that the design will be a mirror-image. Be sure to reverse your image before printing, if there are words on it, or if direction is important to you. I actually forgot to do this for one of the images on this skirt, but you can’t tell until you get close and try to read the words!

Things to think about:
- As I said, I made this skirt a year ago, before I knew how to sew. If I made it again now, I would definitely sew it instead of using the iron-on tape. The adhesive has held fairly well, but I can see places where it is starting to come apart.
- In general I like the mottled color look, but I think a project like this might benefit from a lighter hand as far as dye goes. Either a paler color, or less variation in color might compete less with the images.
- I would suggest trimming around the image on the transfer paper before applying it to your fabric. I didn’t do this, and the lines where the transfer was applied are quite clear, and maybe a bit too harsh.
- If you’re not into wearing child art on your person, this same technique could work nicely with your own line drawings or even simple photographs. I could imagine a “garden” of flowers decorating the lower tier of a skirt like this, for instance.


Lisa – how fantastic! I love that you made something so fantastic with your boy’s art. They must love it when you wear it. 🙂 You are so creative – how do you have the time? I think i need to get really organized so i can be creative again…
I think Aidan does enjoy seeing me wear it. And I’m living proof that you don’t need to be really organized to be creative. Just push the junk out of the way on the table and go for it, LOL!
that is an amazing skirt Lisa, what a wonderful keepsake!
Thanks! I can’t help thinking about the ways I’d do it differently now, but I still like it, and it’s fun to wear.
What a lovely idea! I love the skirt and just think, you could do shirts, jackets, oo, a quilt! wow.. endless possibilities. You’re so crafty and clever! *totally jealous!*
Starr
Ooh, a quilt! That does sound cool. Although it’s a bit too ambitious for me at this point. I’m still scared of quilt making, LOL!
Happy Mother’s Day! LOVE your skirt!
Thank you! And Happy Mother’s Day to you, too! I’m eying one of your sheets for my next skirt, by the way. The really big, bold orange floral is calling my name…
Now that’s just about the best tutorial I’ve seen in a while. I mean, this is one I’ll actually use. I already love those skirts and can’t wait to put my 5 year old’s art on one. Thanks so much for sharing the process.
Glad to hear it! I hope you’ll come back and post a link to your results when it’s done 🙂
[…] I mentioned how much I love tub dying? I think I might have, here. Or maybe here. At any rate, if you haven’t heard it before, “I love tub dying.” I love that I […]